JacobCoffinWrites

joined 1 year ago
[–] JacobCoffinWrites@slrpnk.net 3 points 1 week ago* (last edited 1 week ago)

Hugely in favor of helping solarpunk concepts reach people across language barriers! And very interested to see solarpunk stuff from DACH. Having a community here might help ease them into the rest of the instance too

Best of luck!

[–] JacobCoffinWrites@slrpnk.net 7 points 2 weeks ago (1 children)

I appreciate that a significant portion of the 40k universe's problems aren't actually humanity's fault.

[–] JacobCoffinWrites@slrpnk.net 2 points 3 weeks ago

This is really cool! I really appreciate the history and the way they changed things around them, along with changes in the way they're perceived. I also think the distinction between the sort of black box device and the focal thing, directly used and serviced by people, is worth considering.

I'm optimistic that solarpunk as a genre might be able to help with the aesthetic appreciation of modern windmills at least. They show up frequently in solarpunk art (though almost more often in the form of altaeros temporary windmill blimps):

I even included one in a scene of a ship at sea:

Its cool to think that the aesthetics of an optimistic genre/movement could help sway the culture in a way that helps support windmills. I also really like the author's suggestions for education possibilities, helping people engage with them, feel a sense of ownership or pride in them, if they are so hard to ignore.

[–] JacobCoffinWrites@slrpnk.net 19 points 3 weeks ago

So this is a question that's been in the back of my mind for awhile while seeing celebrations of dams being removed, no worries if you don't want to be the one to answer it.

I think I understand the extent of the damage caused by the implementation of dams, but I guess my impression had been that that damage was done, and there wasn't much of a timeline on fixing it. Like, after eighty years or so, are there fish still trying to get past it?

At the same time, we're struggling (failing?) globally to get away from fossil fuels quickly enough to avoid the worst of climate collapse. It seems like hydro is one of the more reliable green power sources, and is compatible with old grid infrastructure that counts on fairly consistent power so there's less than has to be overhauled in order to just keep using hydro for awhile longer.

So at first glance, it seems like new solar and wind etc production would be better prioritized in replacing oil, coal, natural gas. Prioritizing replacing hydro feels like letting the perfect be the enemy of the good.

I haven't seen that discussion anywhere, so I genuinely expect I'm wrong about that, but I'm wondering why.

[–] JacobCoffinWrites@slrpnk.net 3 points 3 weeks ago

Nice! I'll check that out!

[–] JacobCoffinWrites@slrpnk.net 4 points 3 weeks ago

Thanks, that makes sense on both topics, they're definitely going on the list!

[–] JacobCoffinWrites@slrpnk.net 4 points 3 weeks ago (4 children)

That's a good list, thank you! I have a couple questions you might be able to answer:

Could you elaborate on the relays? I don't know anything about them yet (in their intended use or alternatives). Though I am reading up on them.

I know there's a some benefit in running 12v appliances (intended for campers) with solar panel setups because you don't have to convert from DC to AC then back to DC at the appliance. Would that work for just using a car's AC unit to cool a room, or are they built too specific to a car or not efficient enough to justify the work?

Thank you!!

[–] JacobCoffinWrites@slrpnk.net 2 points 4 weeks ago

That reminds me - inside the rubber squeegee part is a long thin strip of good quality spring steel. Lockpicking folks like it for making tools, diy gun folks sometimes use them to make the extractor. I honestly don't know what to use the rest of the wiper for.

[–] JacobCoffinWrites@slrpnk.net 5 points 4 weeks ago (1 children)

This is a great list with a bunch of stuff I wouldn't have thought of - the transmission reuse is a cool idea!

I think some LED headlights are goood for growing plants. I remember some local news panic piece from years ago about how criminals were stealing headlights for their grow ops. A quick search online confirmed they work fine (probably not worth stealing though) and this post I think suggested a couple other car parts alternative uses I'll have to go back and get later: https://www.rollitup.org/t/is-it-possible-to-convert-a-headlamp-into-a-grow-light.496815/

Thanks again!

[–] JacobCoffinWrites@slrpnk.net 3 points 4 weeks ago (1 children)

That's a great example, thank you!


Hi, I've had some good discussions here in the past, so I thought I'd reach out with an idea for a resource I'd like to try to put together for solarpunk writers and artists.

I was talking with A.E. Marling about a story he's working on, and one of the things he was looking for was uses for old cars.

I think the obvious answer you'll get from solarpunks (aside for limited use where it makes sense) is to melt them down for your society's steel manufacturing needs - electric arc furnace smelters running off a green grid, recycling, are about as close to zero emission steel as you're likely to get, and the metal is already refined so I think you could get pretty tight control over the quality on the output.

But I think reuse offers some much more interesting opportunities. I'm only just starting to learn about fixing cars, but I've already been struck by the fact that at least some parts in cars can go into other things. For example, it looks like certain old alternators can be used to generate a wide range of amperage and voltage, suitable for different needs, including welding: https://diysolarforum.com/threads/diy-low-cost-generator-from-vehicle-alternator-alternating-generator.1843/ so perhaps one could be hooked by belts (adjusting speed) to a waterwheel or something?

I feel like a solarpunk society with a really strong library economy might start cataloguing parts of more complicated machines (even salvaged from machines like cars).

And looking for parts commonalities and alternative uses strikes me as a really cool step towards building an open-source manufacturing sphere. Perhaps starting with a database of hardware/parts so they could be identified and repurposed, and alternatives identified.

So the actual proposal:

I'd like to try and put together a list of common car parts which can be reasonably used in other (more solarpunk) contexts. This doesn't have to be specific down to the model number or include a how-to guide, (though I recognize that some reuses might only be possible with a specific model) just something solarpunk writers could casually drop into a description of a room or workshop, or an artist could put in the background of a scene. Something that shows that this isn't a scratch-built future, but that they're repurposing stuff where they can. Think of all the weird ways postapoclyptic movies dress the sets with misused items from the present - we could offer something like that to solarpunk, but grounded in at least some practicality. If you have any suggestions, I'd love to hear them.

Thanks!

edit: I've built out a list and it's located over here: https://slrpnk.net/post/13032570

[–] JacobCoffinWrites@slrpnk.net 2 points 1 month ago

Oh, one more to consider: Reckoning Press is more climate fiction than explicitly solarpunk, but it was one of the things that got me to give solarpunk a chance.

[–] JacobCoffinWrites@slrpnk.net 8 points 1 month ago (1 children)

Ecotopia is a fun one because it hits all the notes but predates the genre.

Murder in the Tool Library is a favorite of mine because the setting is awesome and aspirational while feeling real and human, and because the murder mystery plot is a change from the usual ecofiction.

The solarpunk TTRPG Fully Automated! is free (libre and gratis) and has several sections devoted to its setting and worldbuilding that helped me understand a bunch of solarpunk concepts by seeing them in practice and to start thinking much bigger with my own fiction. It also has some good advice on creating engaging plots in an aspirational solarpunk setting where a lot of the usual problems have been solved.


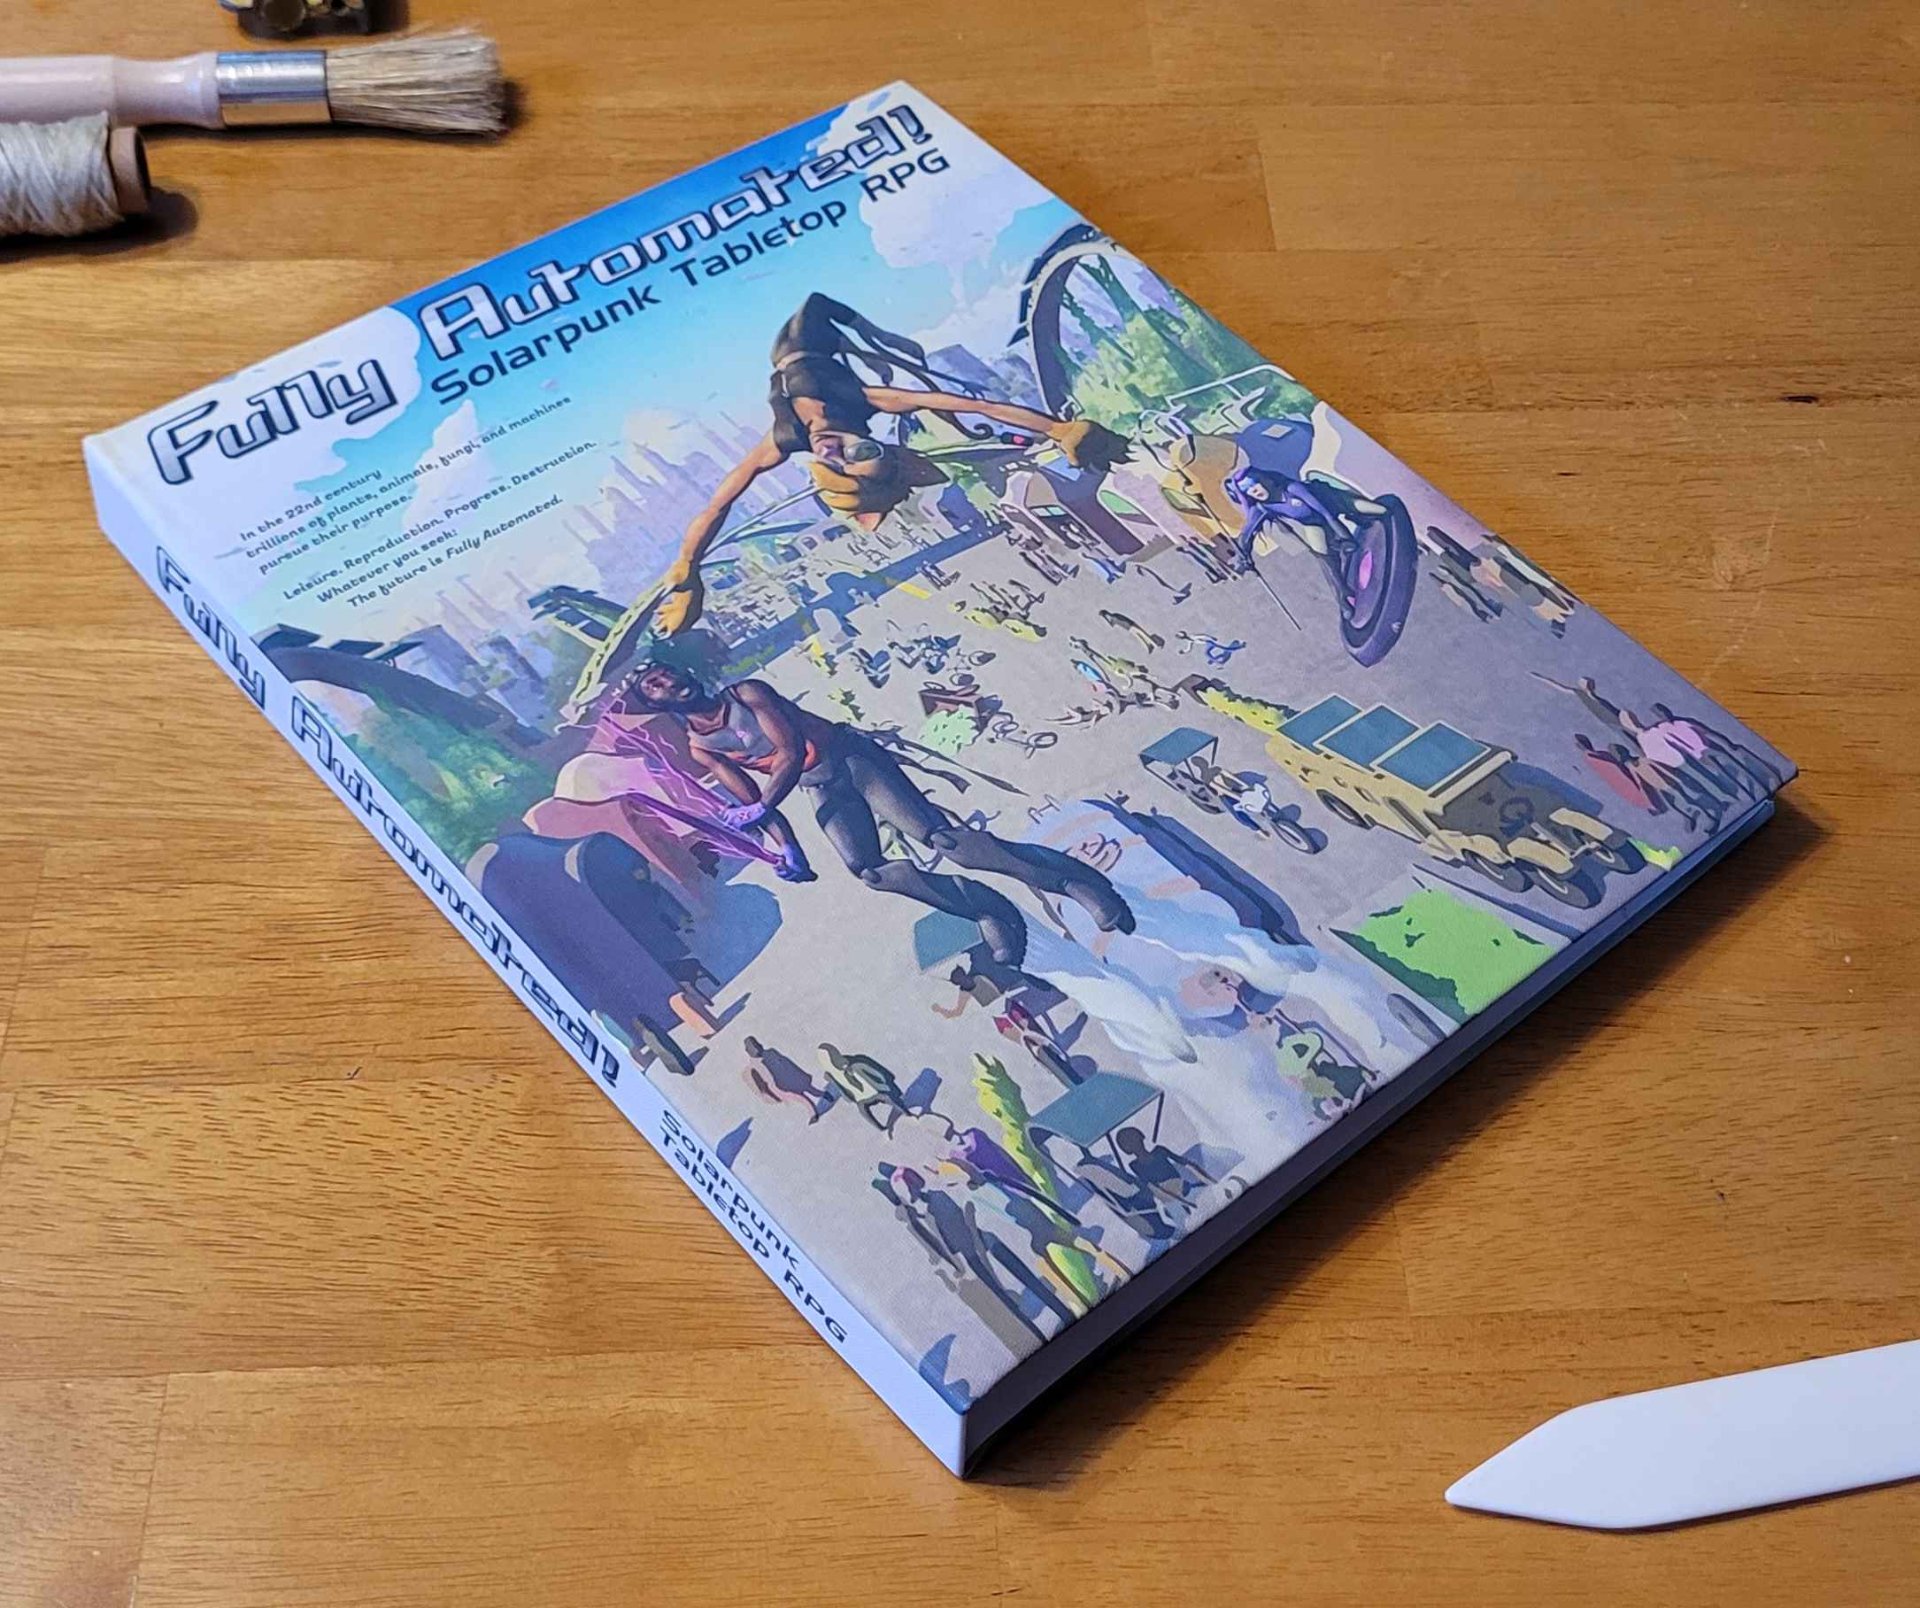
This is basically my most traditional bookbinding project. I used regular fabric cloth for the cover, and followed the traditional steps. The interesting (to me) change is the use of a CO2 laser cutter to mark the fabric. Here's the steps to making it:

I think it's fair to say that this book is extremely rare. The author has told me that the one physical copy I've made is the only one in the world, aside from an 'ugly stapled proof [he has] in a drawer somewhere.' The book was released on patreon as serialized fiction, with each of the six sections being made available as early drafts to a certain tier. The plan was that he'd put them up briefly, take them down again, then compile the drafts and eventually release a full published version. For life-happened reasons, the last step never got done (though the author was kind enough to repost the six sections on a discord channel when I asked).

Just the same, it was one of my all-time favorite stories, so if it wasn't likely to end up somewhere I could buy it, I was at least going to make a copy of my own.

So I took the six pdfs and started editing them using whichever online tools seemed like they'd do the best job. I started by cropping the files so they'd fit the correct aspect ratio for 8.5x11" letter paper folded in half, but started getting fancier as I went. I removed pages of bonus content from the back of each one so it'd flow better as a book. I merged them all together into one file (to reduce the number of mid-book blank pages from turning it into folio signatures). I even added a second set of page numbers to the bottom because the ones in the top right restarted in every section. I manually added some blank pages front and back.

By the time I was done, I had something to feed into https://momijizukamori.github.io/bookbinder-js/

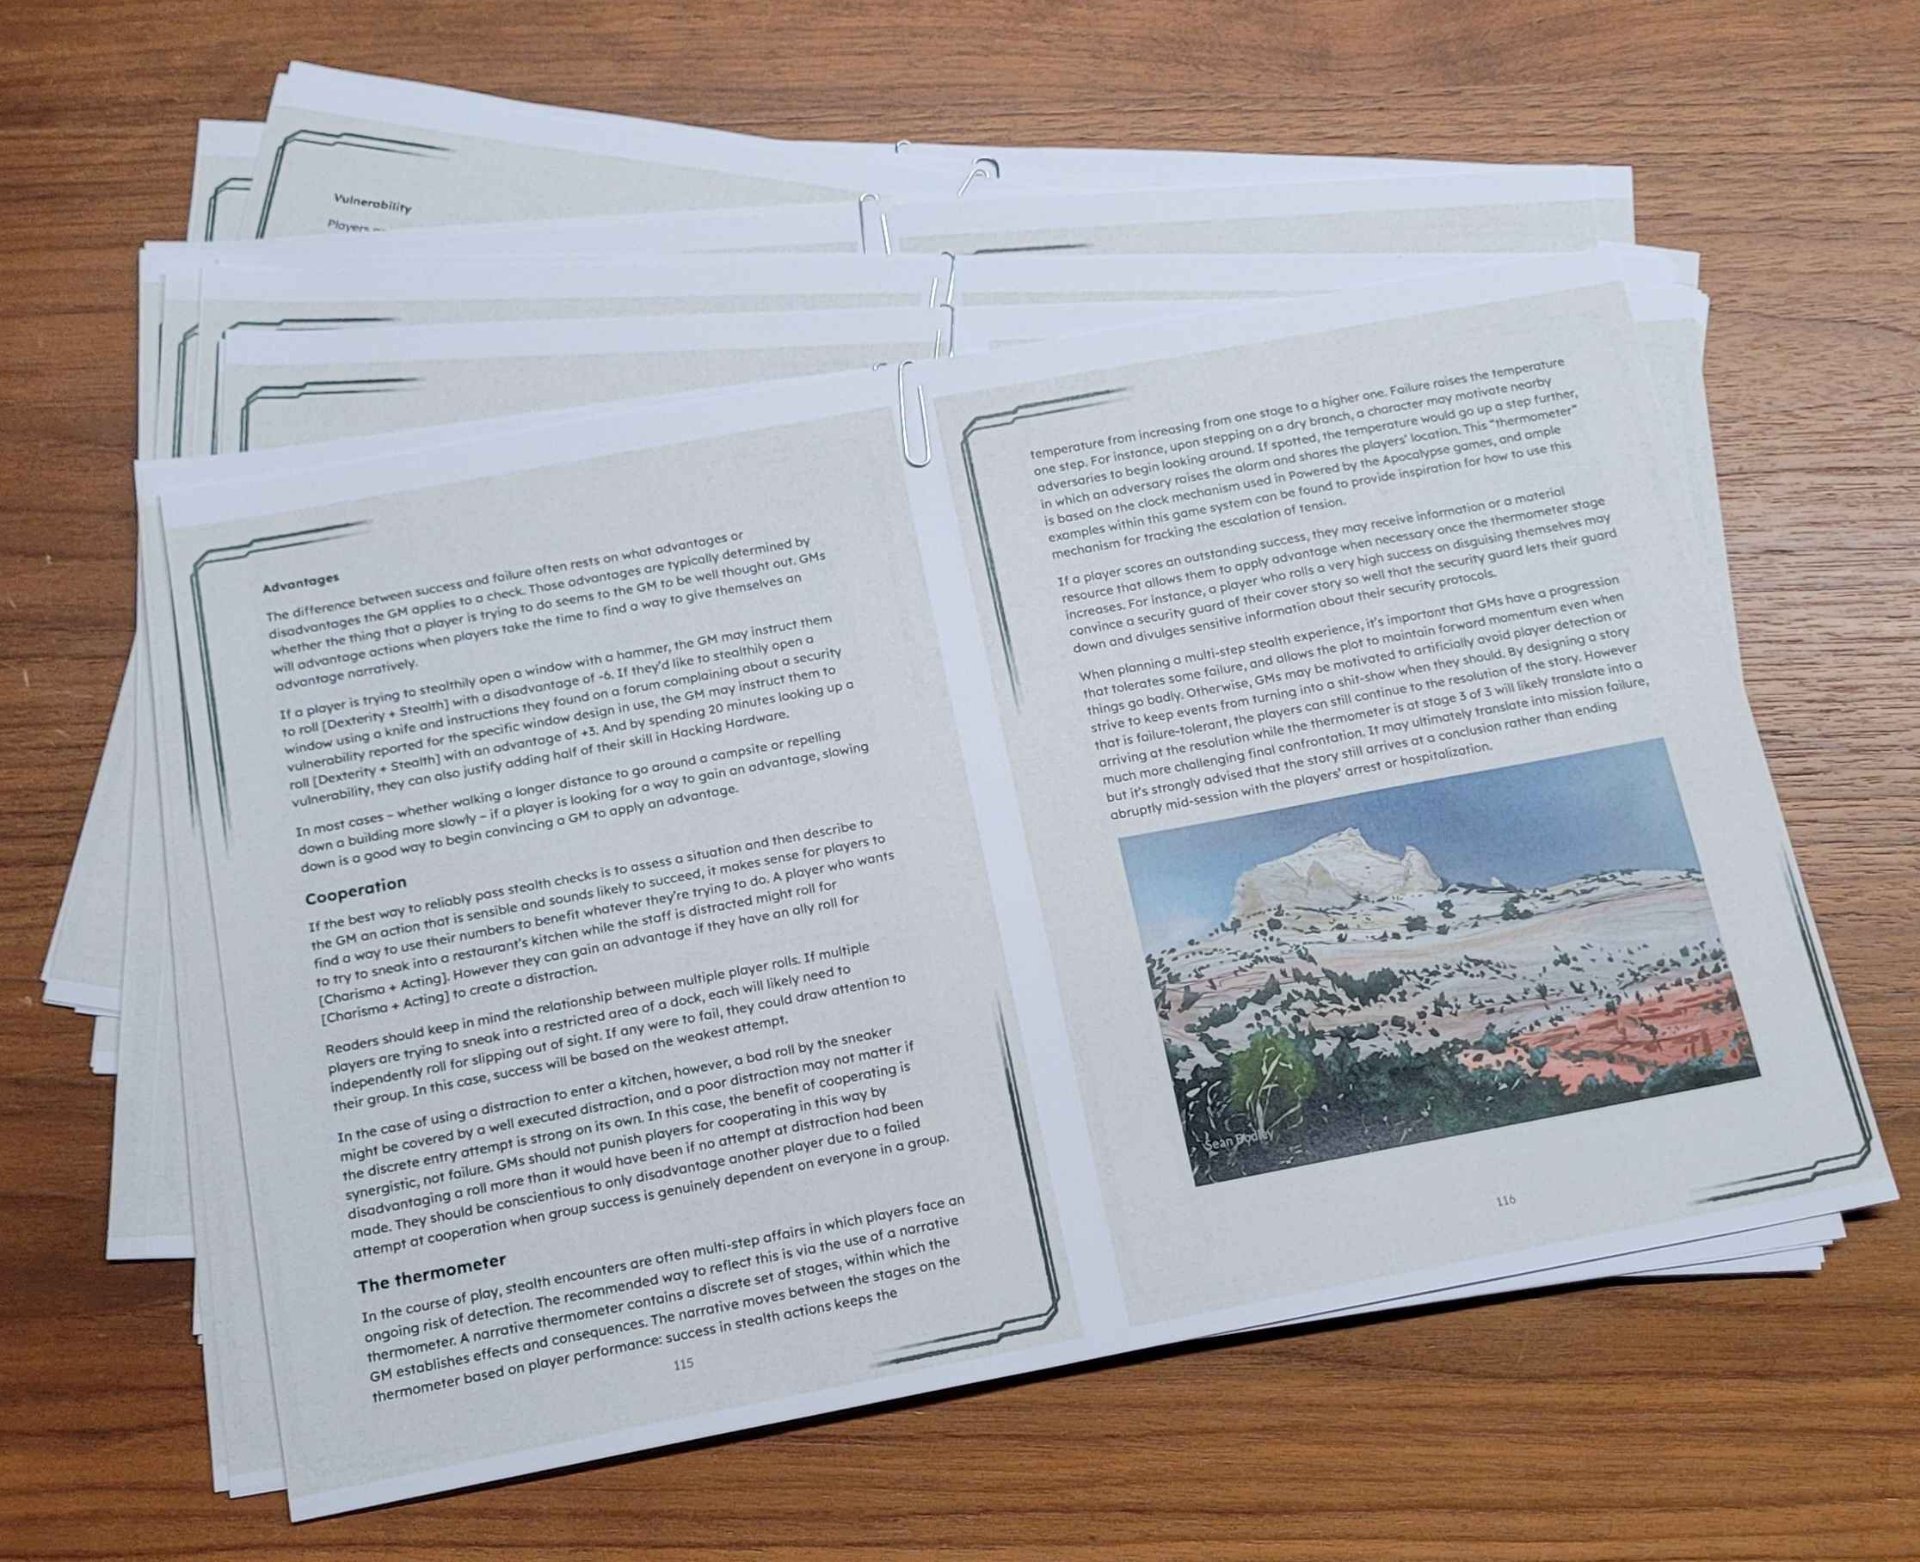
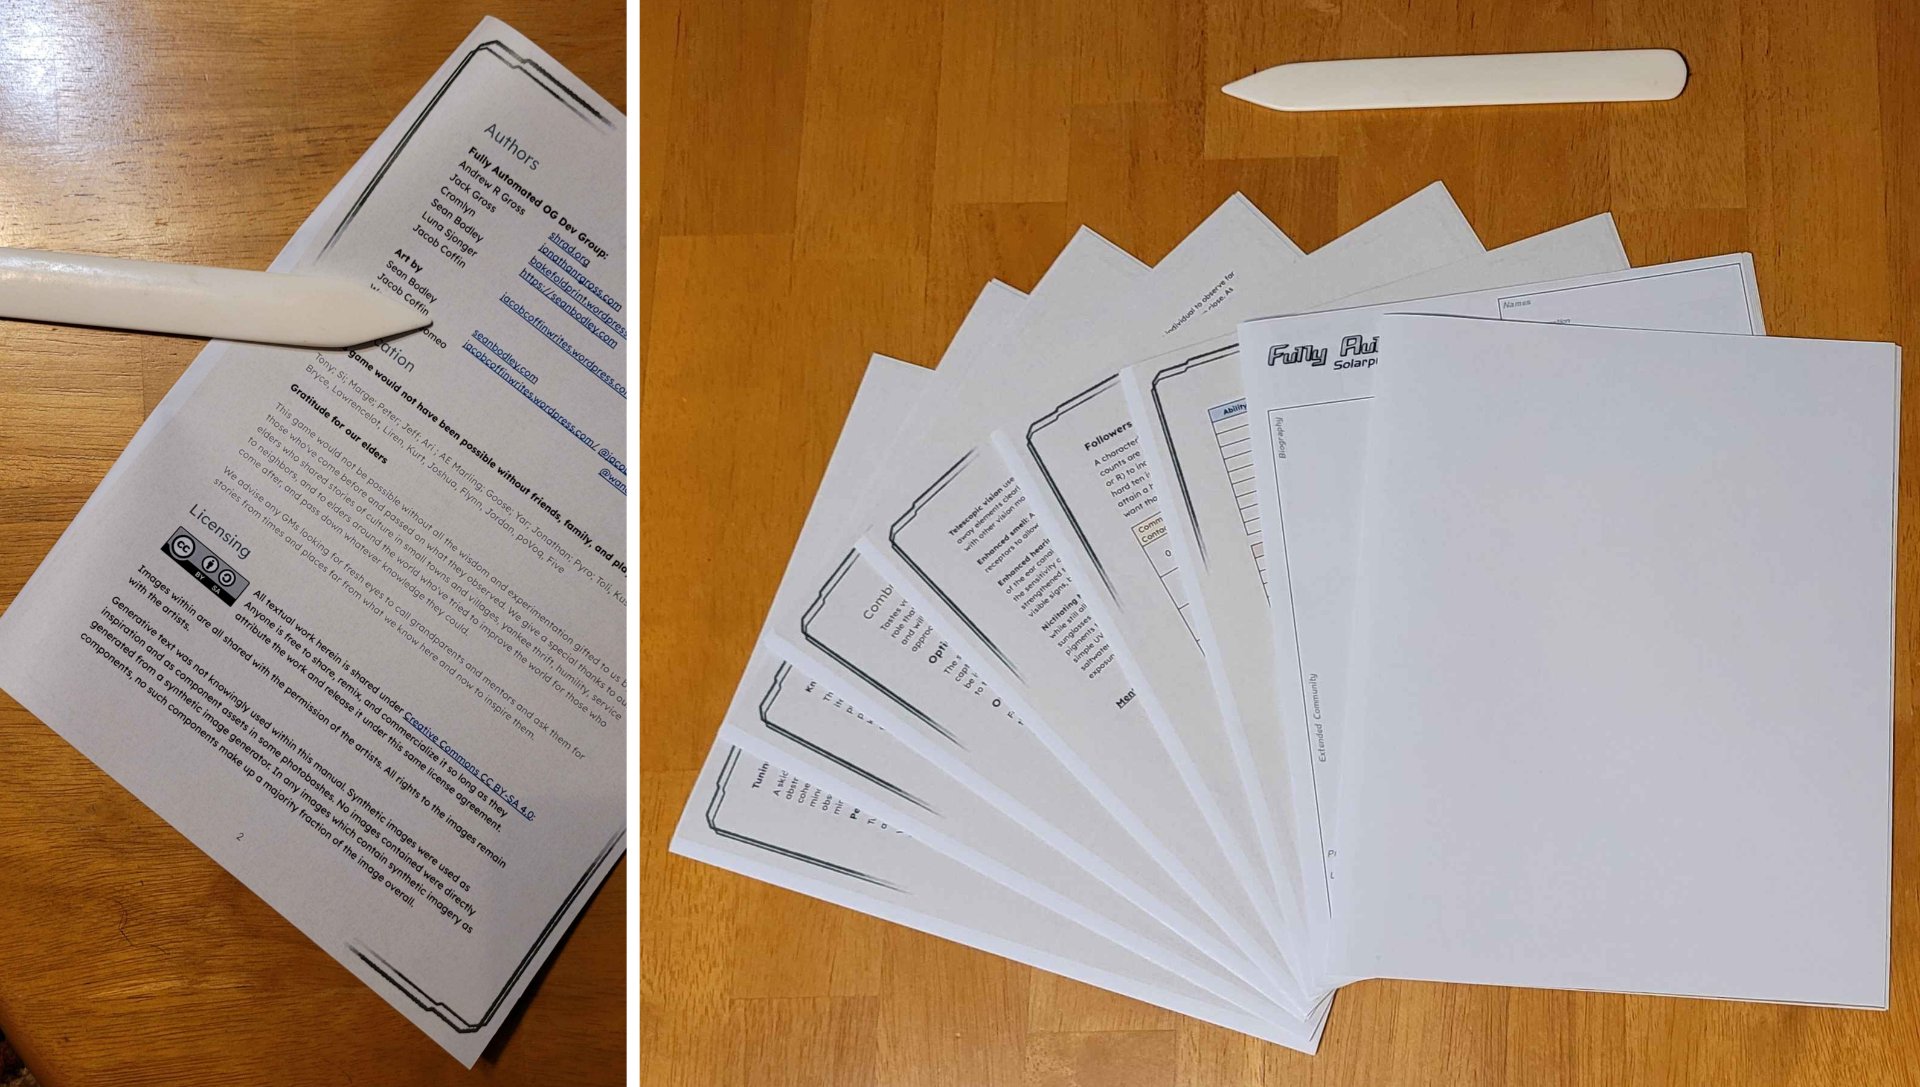
I used that to create letter page folio signatures (with sets of 4 and 3 pages per signature). Now I had something I could actually print. We did so on a regular office photocoppier, and I can't recommend printing each signature separately and organizing them with paperclips enough. I would have lost my mind trying to sort them otherwise).

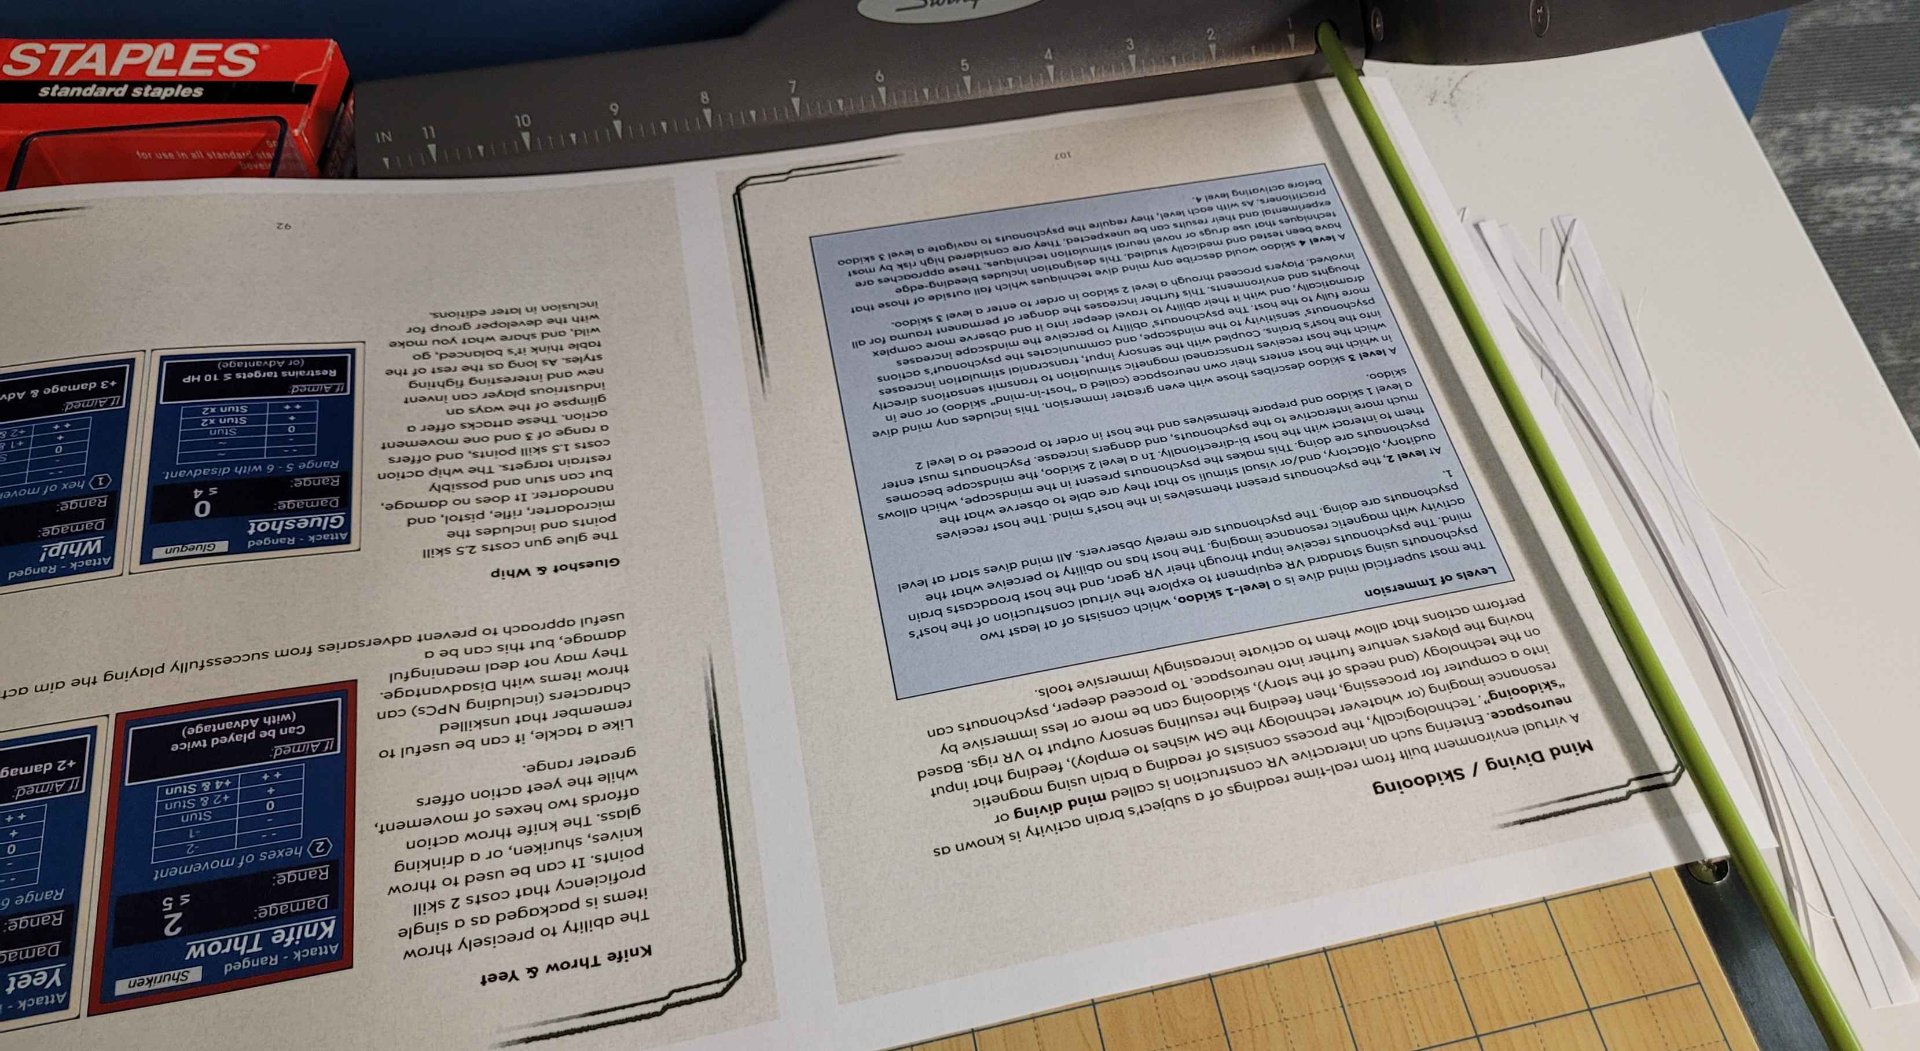
We start off the actual bookbinding in a pretty familiar way, taking each signature, folding each page of it in half with the bone folder, nesting them, and adding that signature to the stack.

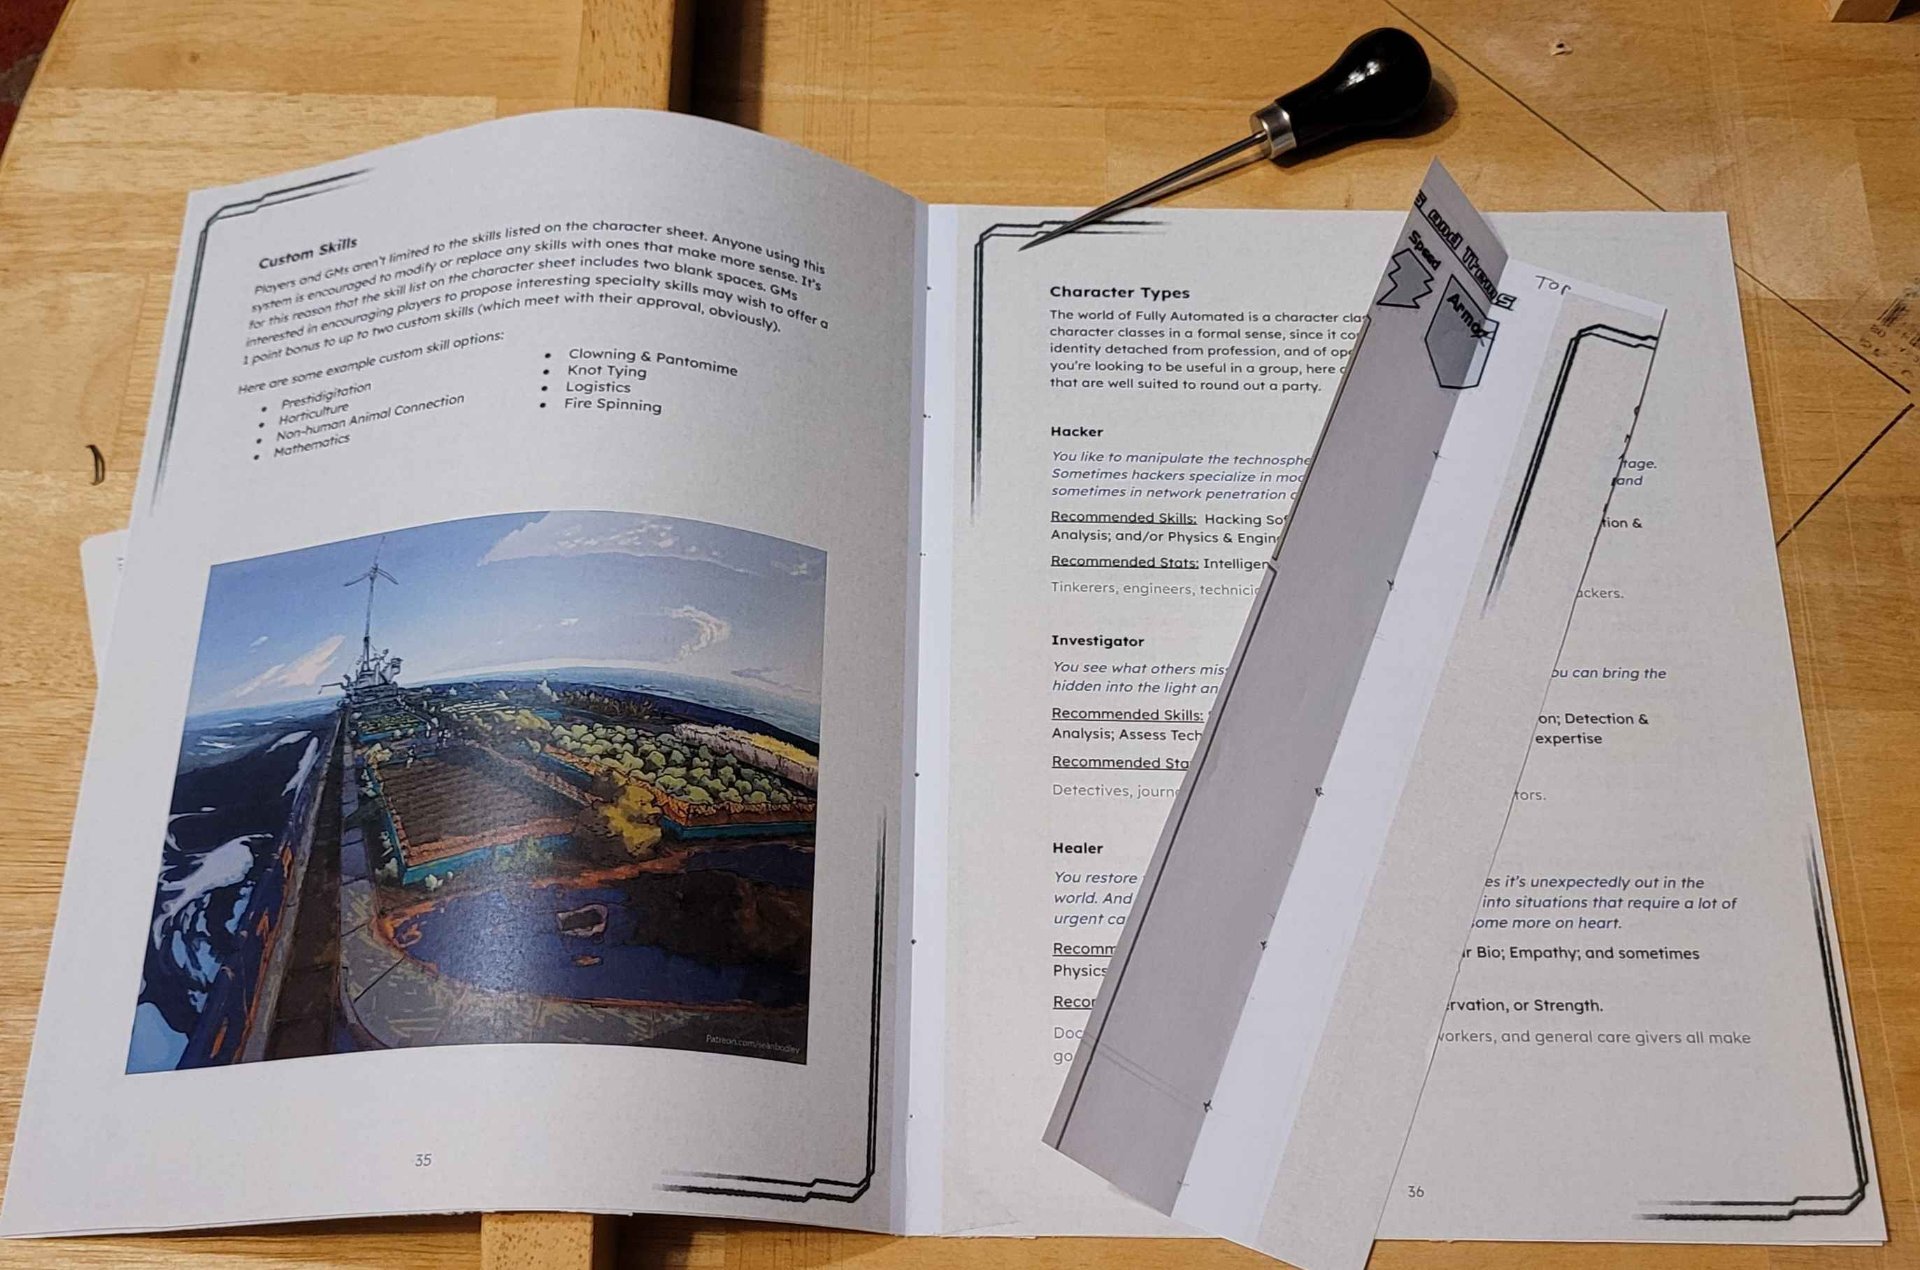
Then I used my template from the previous bookbinding project to punch holes through each signature. One really nice thing about not having to trim whitespace from my pages is that the overall page size (and thus most dimensions of the cover except the spine) will remain the same no matter what is printed on the page or which printer I use. So I can reuse things like this template.

Here's my template with its measurements in case you want to reference it:

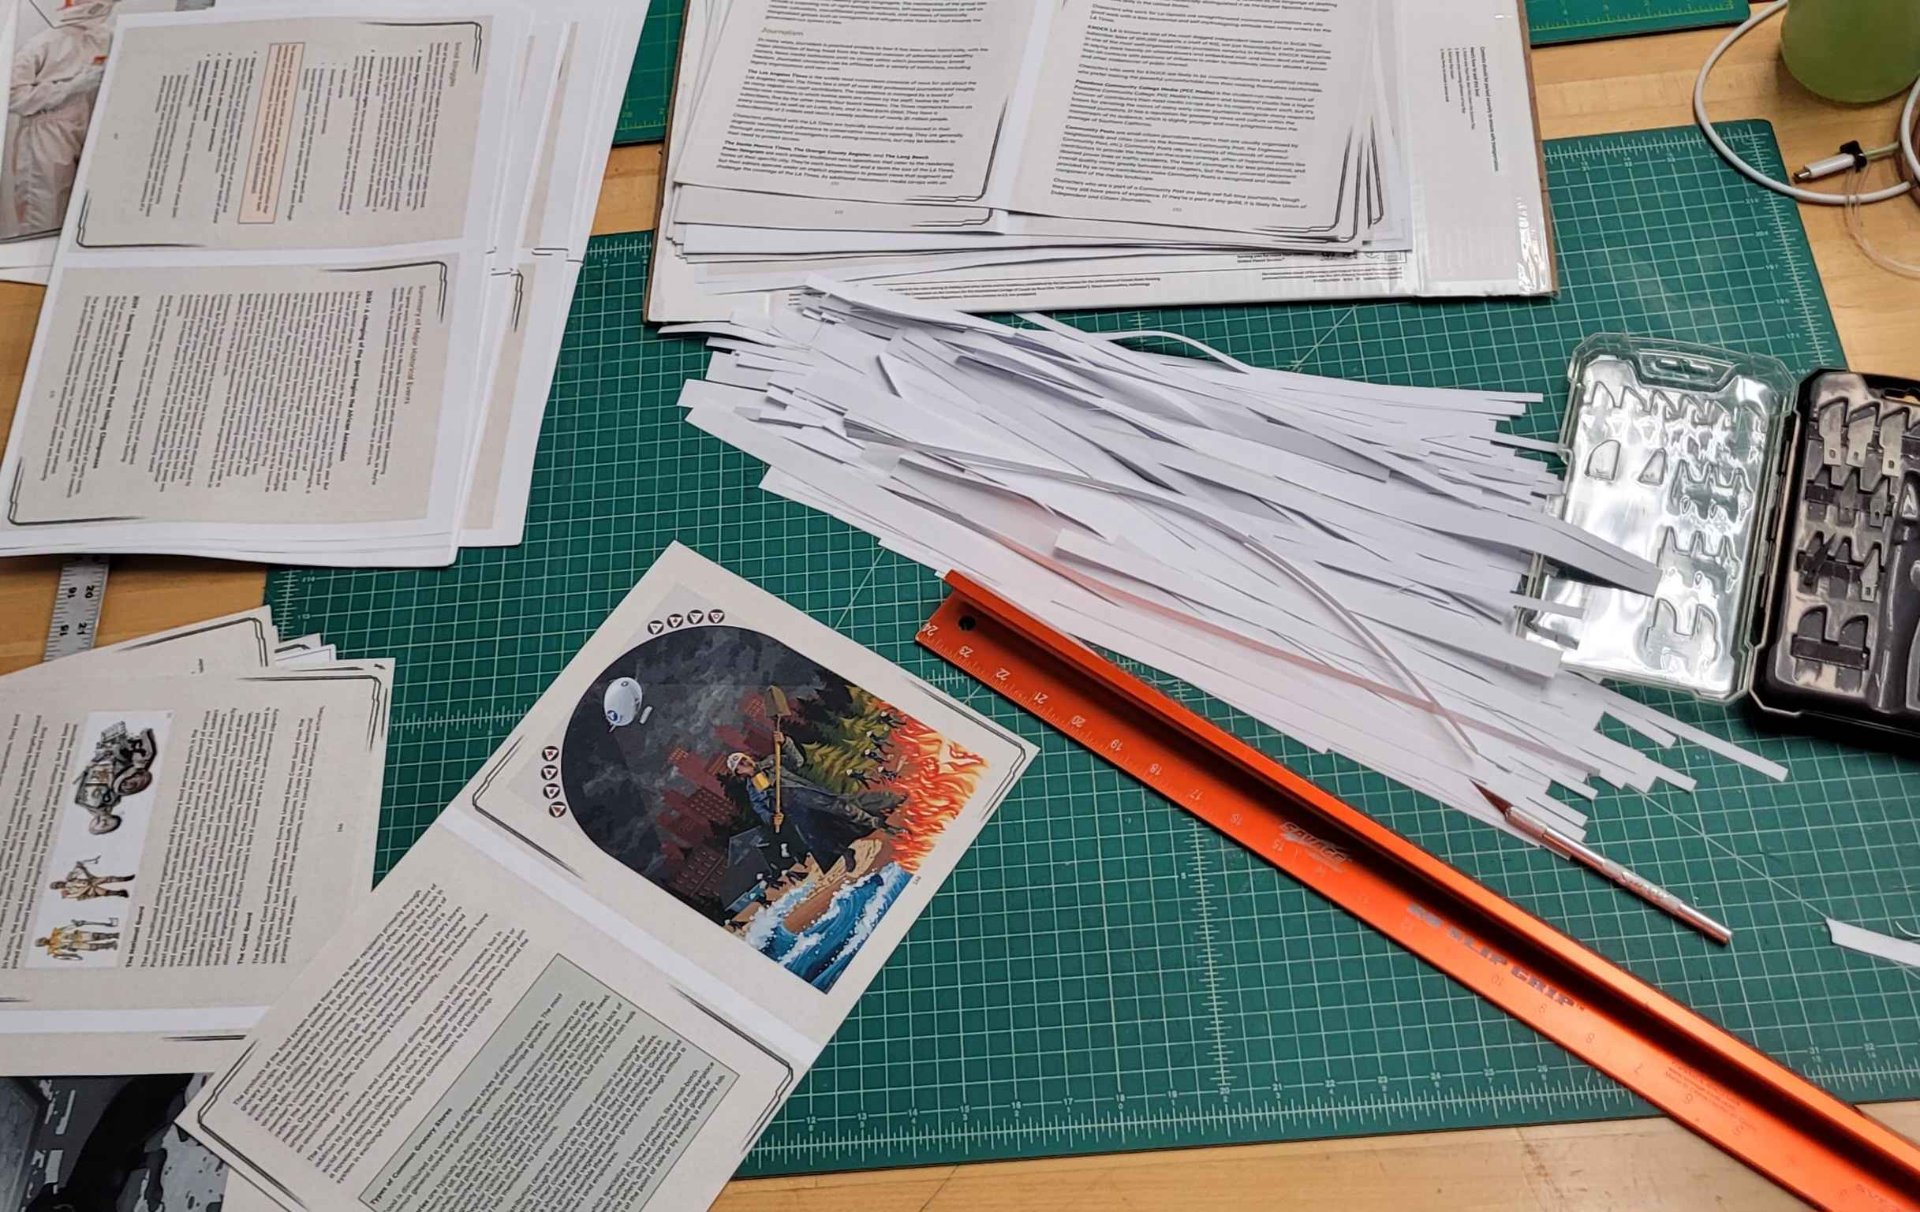
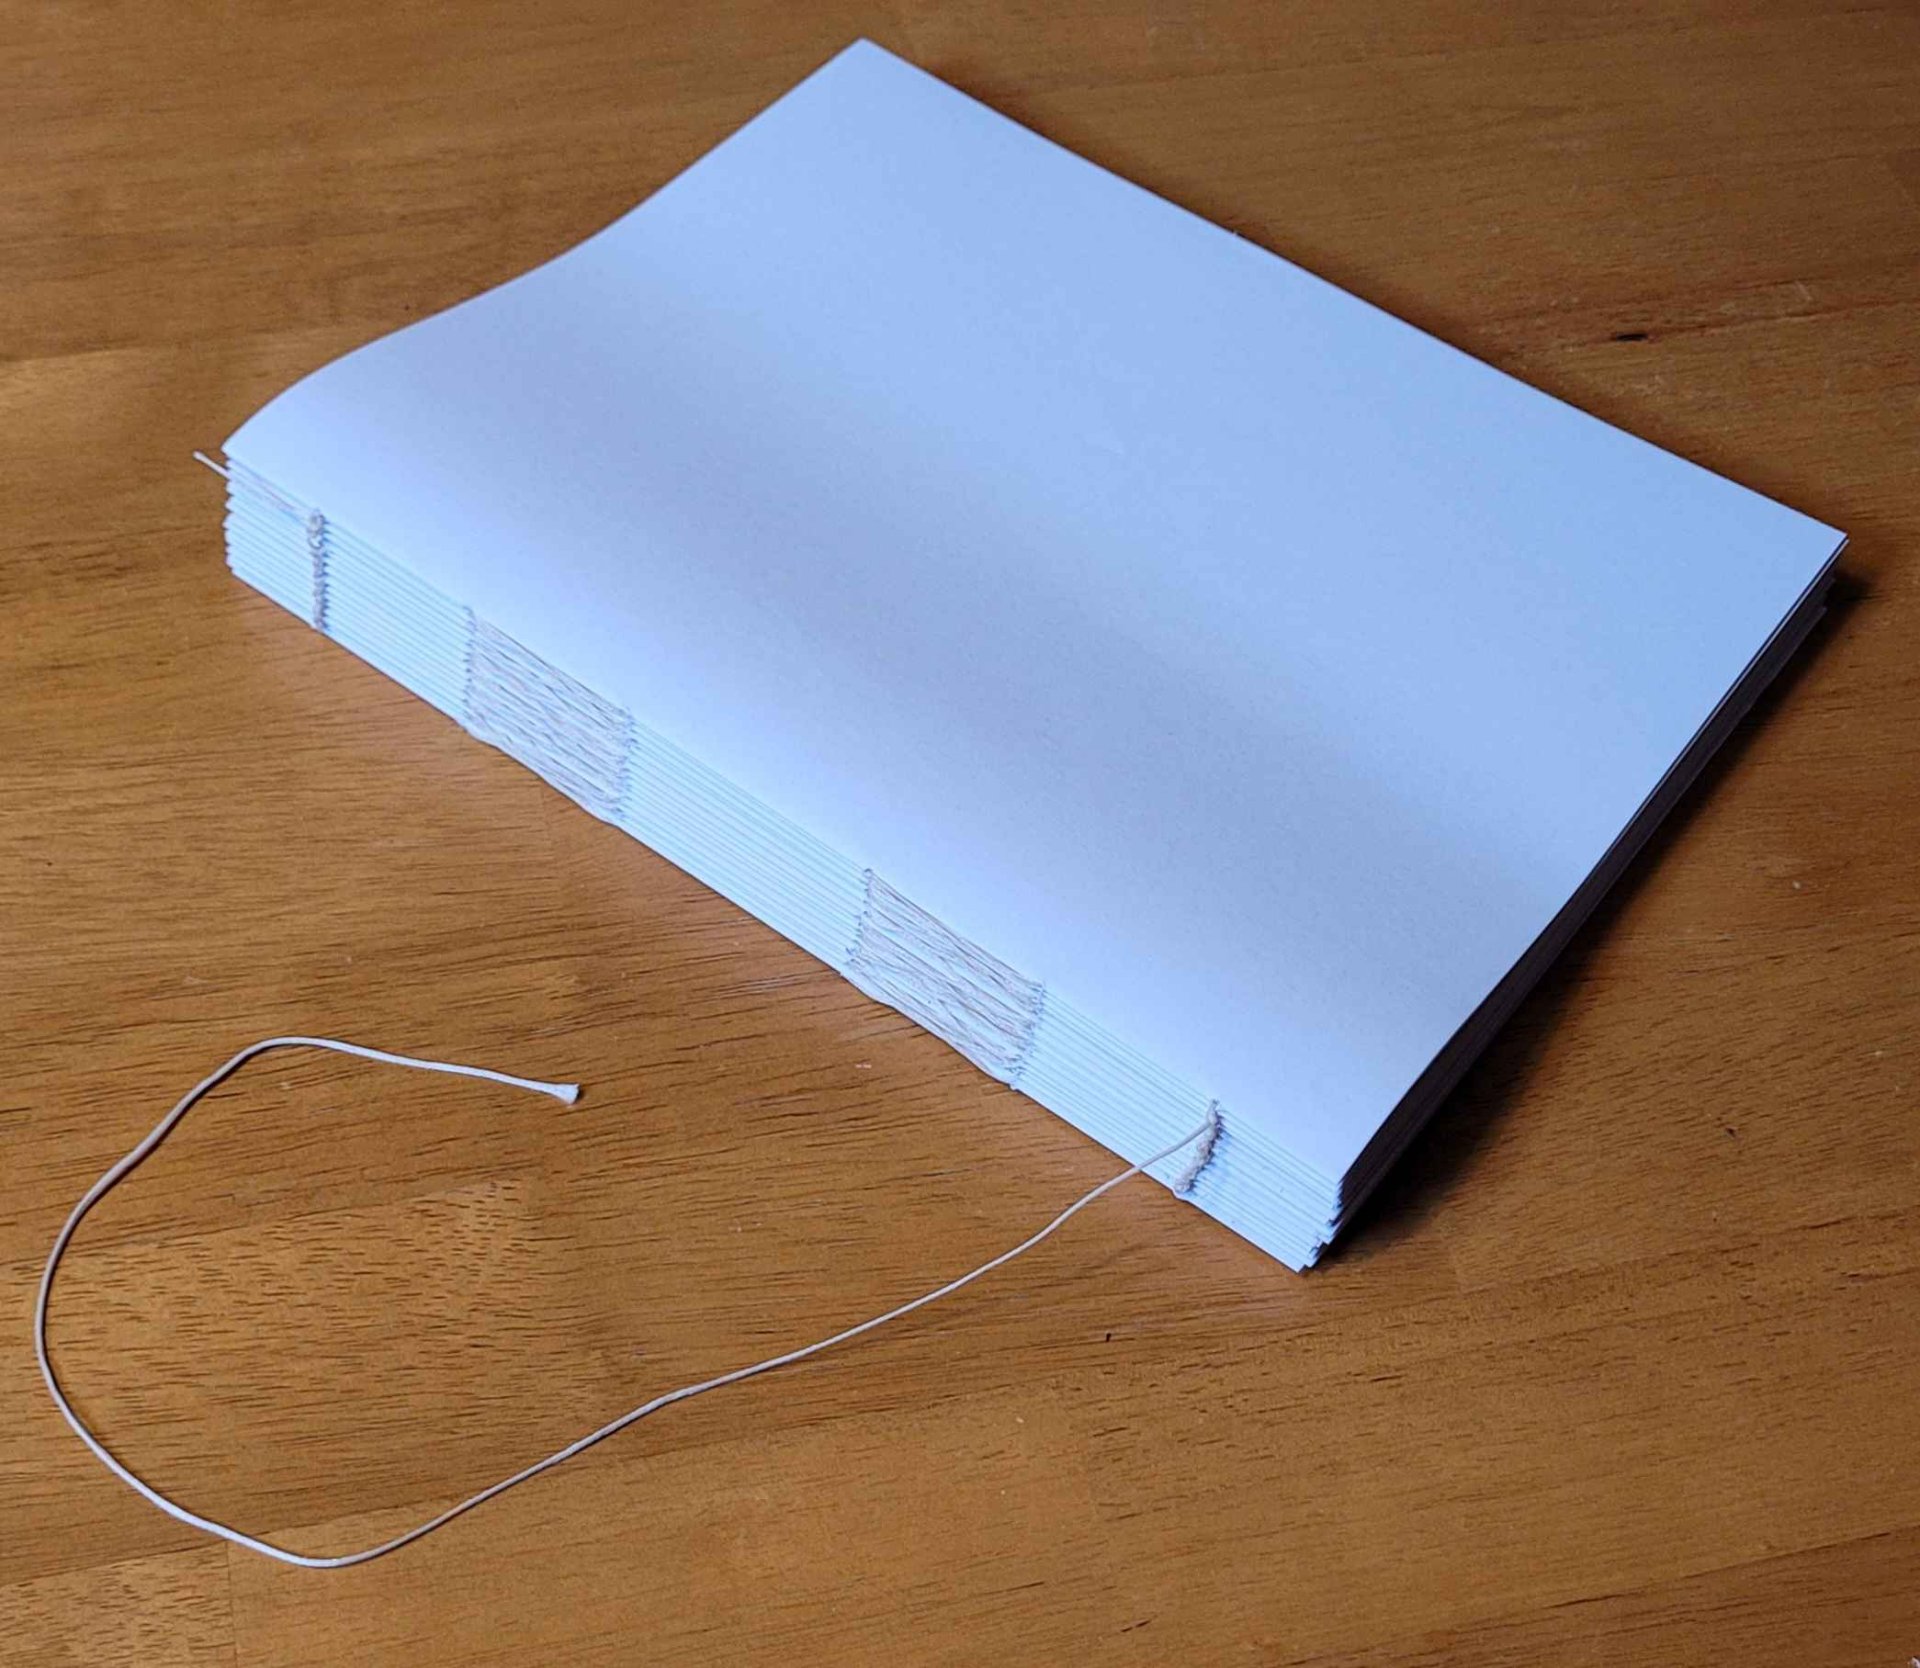
Eventually this left a nice stack of signatures ready to sew together:

As before, I sewed it together using waxed thread, following the Penrose Press Pretty Perfect Paperback Guide. I know there are a bunch of ways to do this, but I quite like this technique.

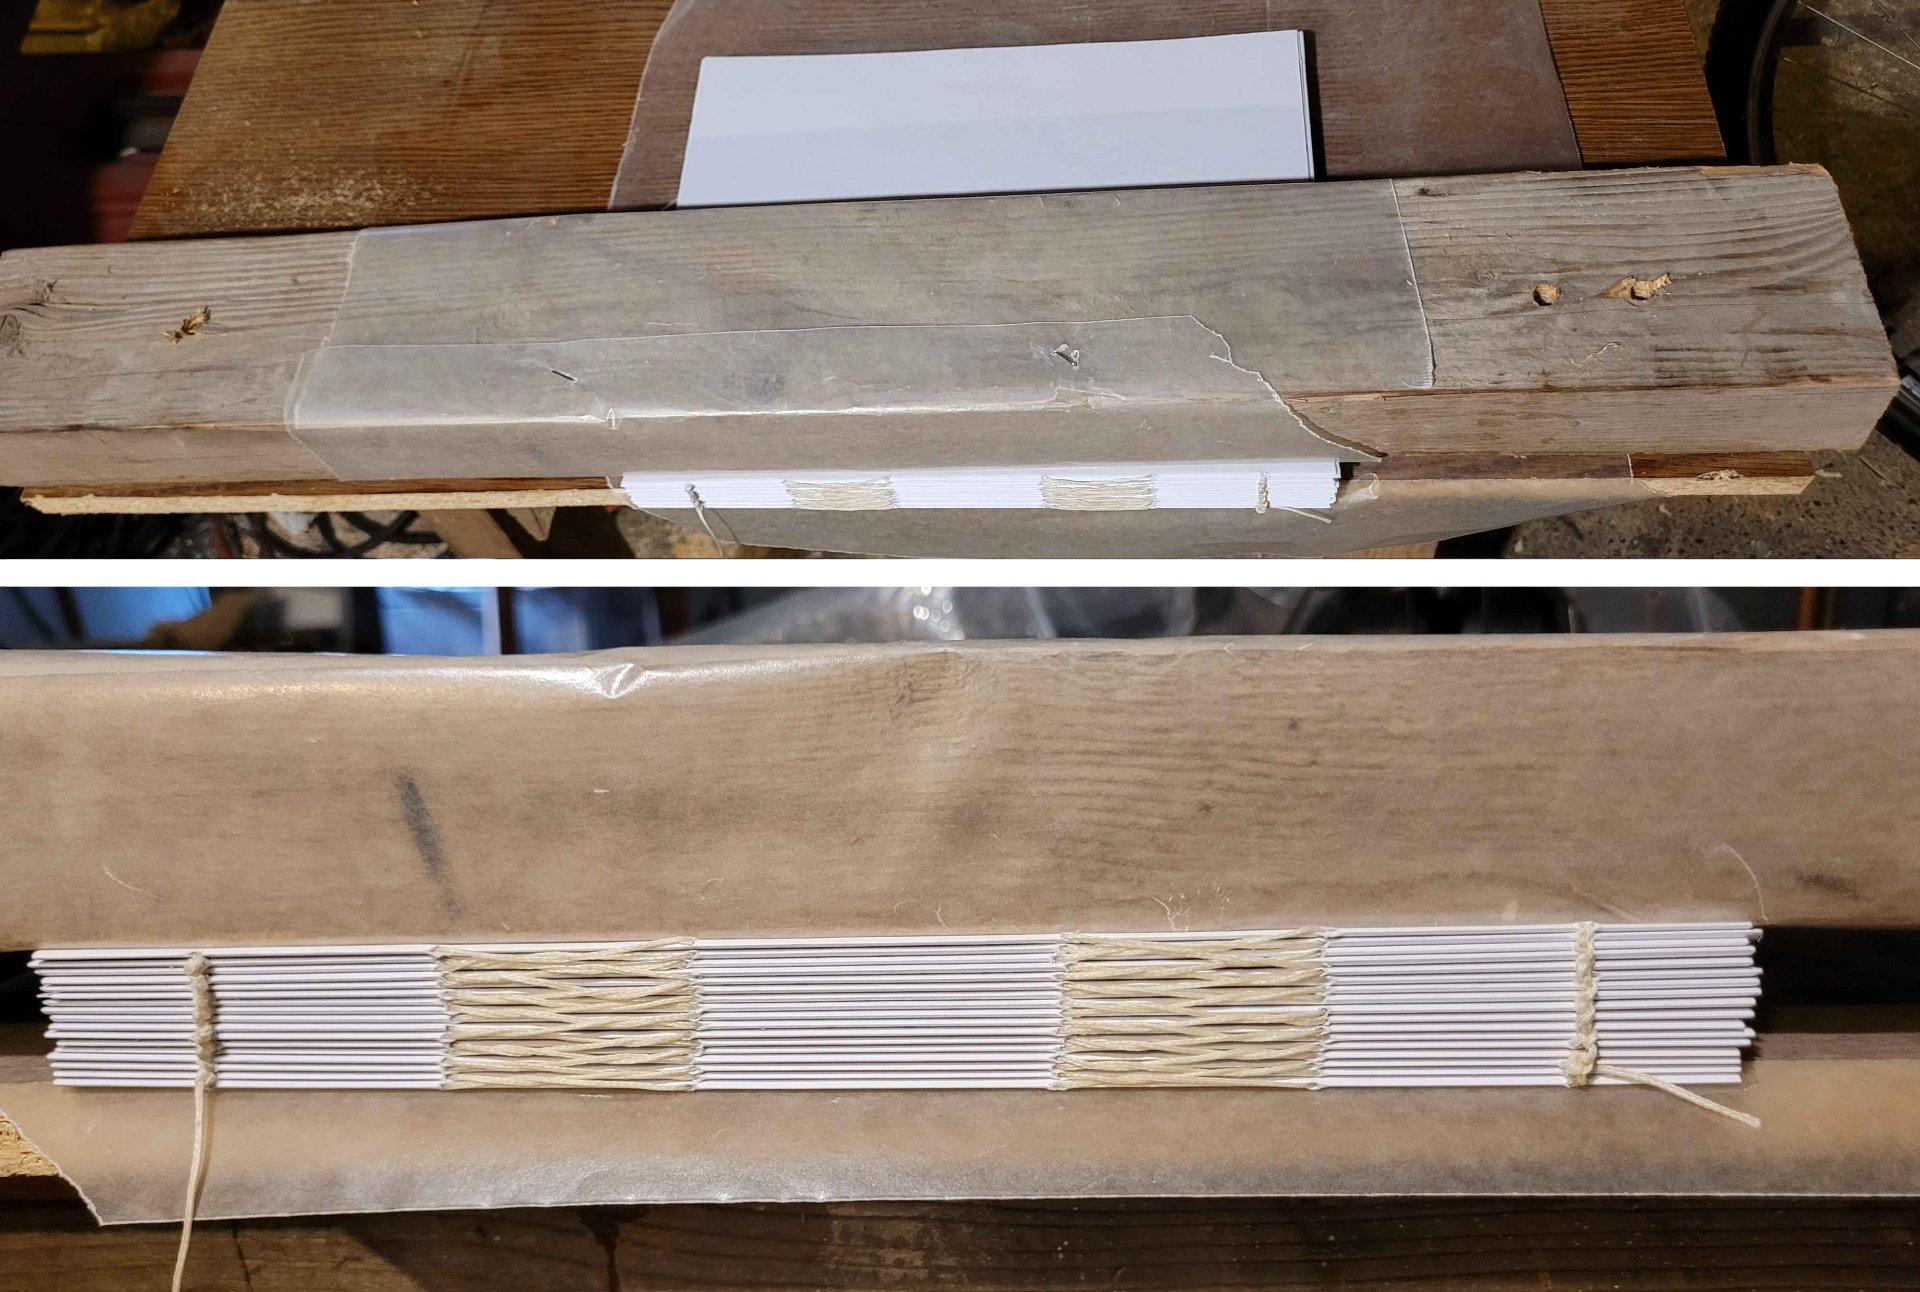
The next step is to clamp and glue the bookblock together. My clamp is pretty crude, it's just a 2x4' screwed to a piece of particleboard, with a couple ragged sheets of wax paper keeping the book from gluing to the clamp.

The goal is to get it as tightly pressed as possible while keeping the book block nice and square.

I didn't take a picture of this step for this project, so here's one from the last book. Note how the signatures are jumbled along the edge. I've gotten much better about lining them up recently.

I usually use my finger to work the glue into the gaps these days, it's faster and makes less mess than the brush. I think it gets into the gaps better too. I do three coats of glue on the spine. For hardcovers like this one, I then glue on a strip of mull or cheesecloth which is a couple inches wider than the spine on either side (front to back), and like an inch or so shorter than the top of the spine (heightwise).

Then I glue on a strip of watercolor paper (it's supposed to be manila paper but I don't have that).

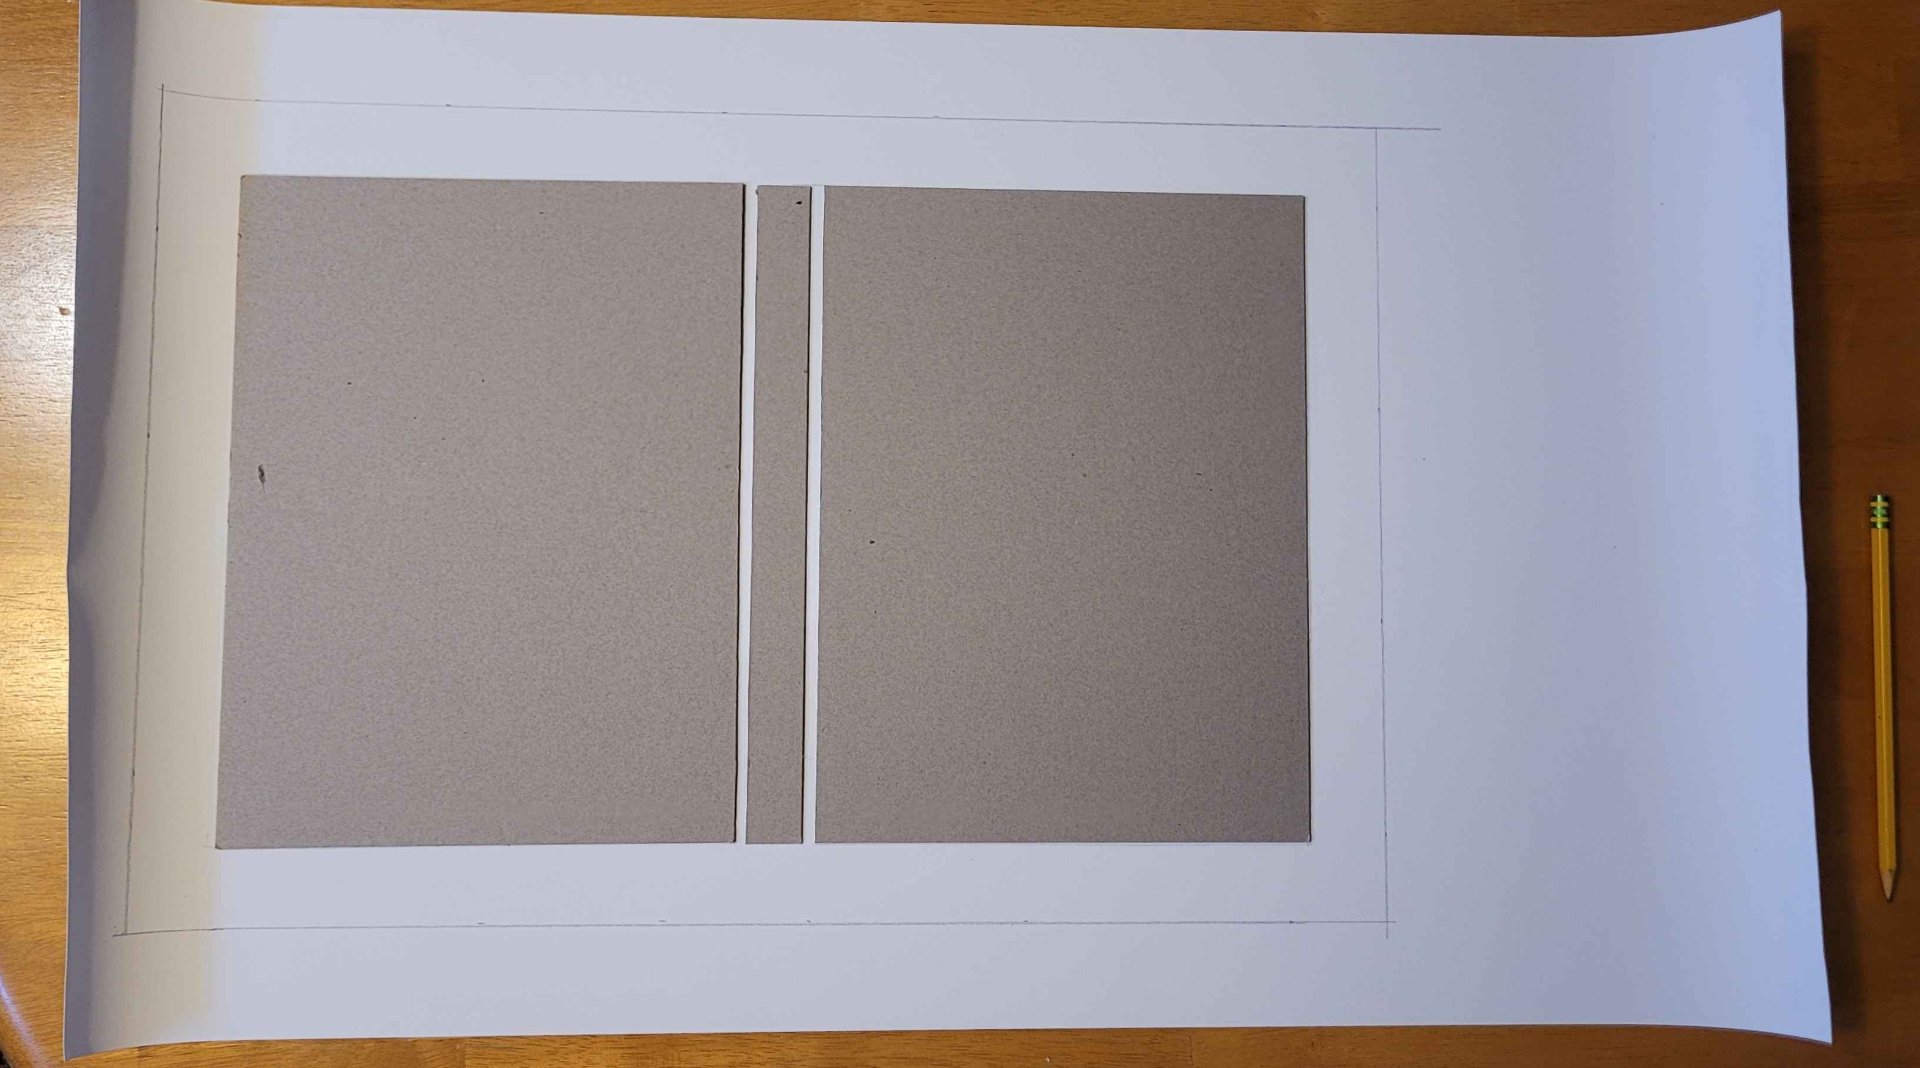
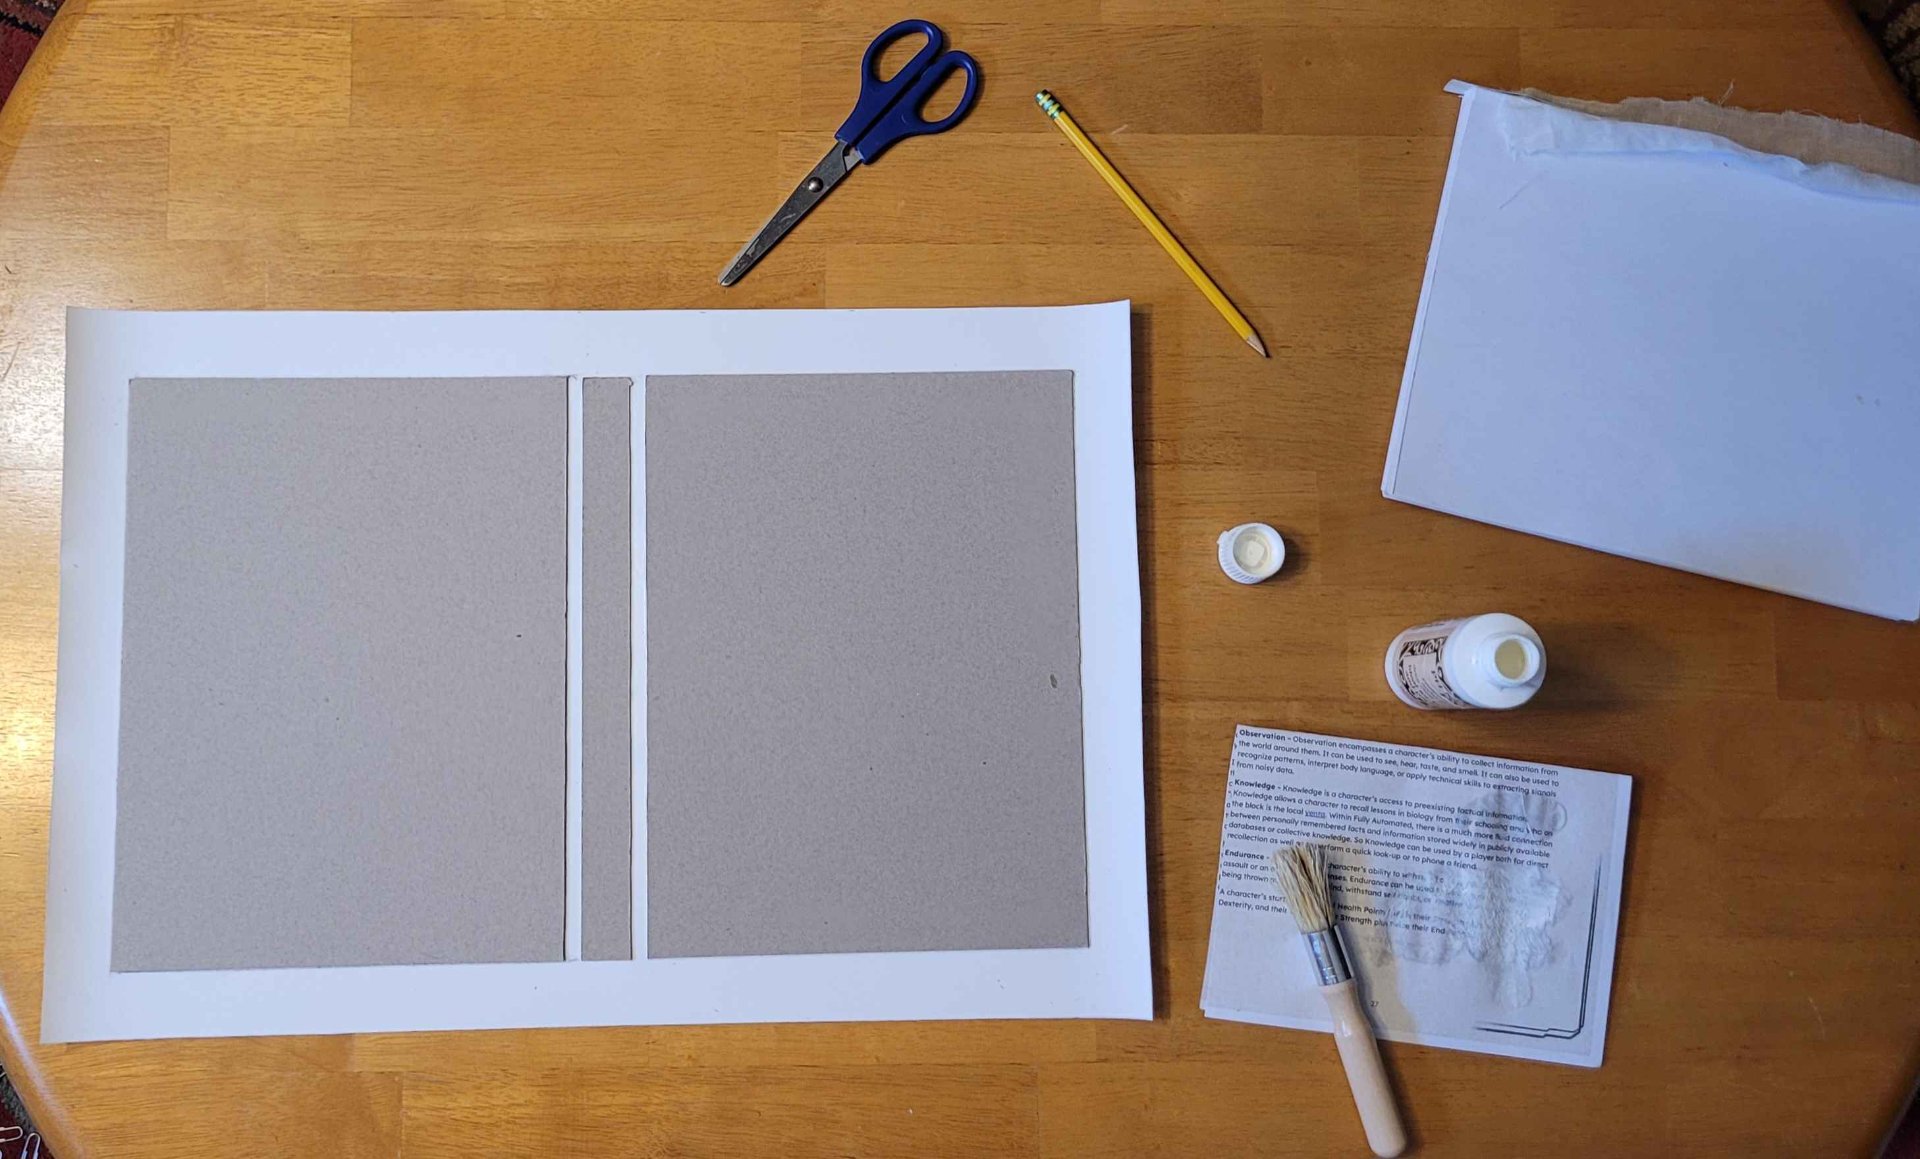
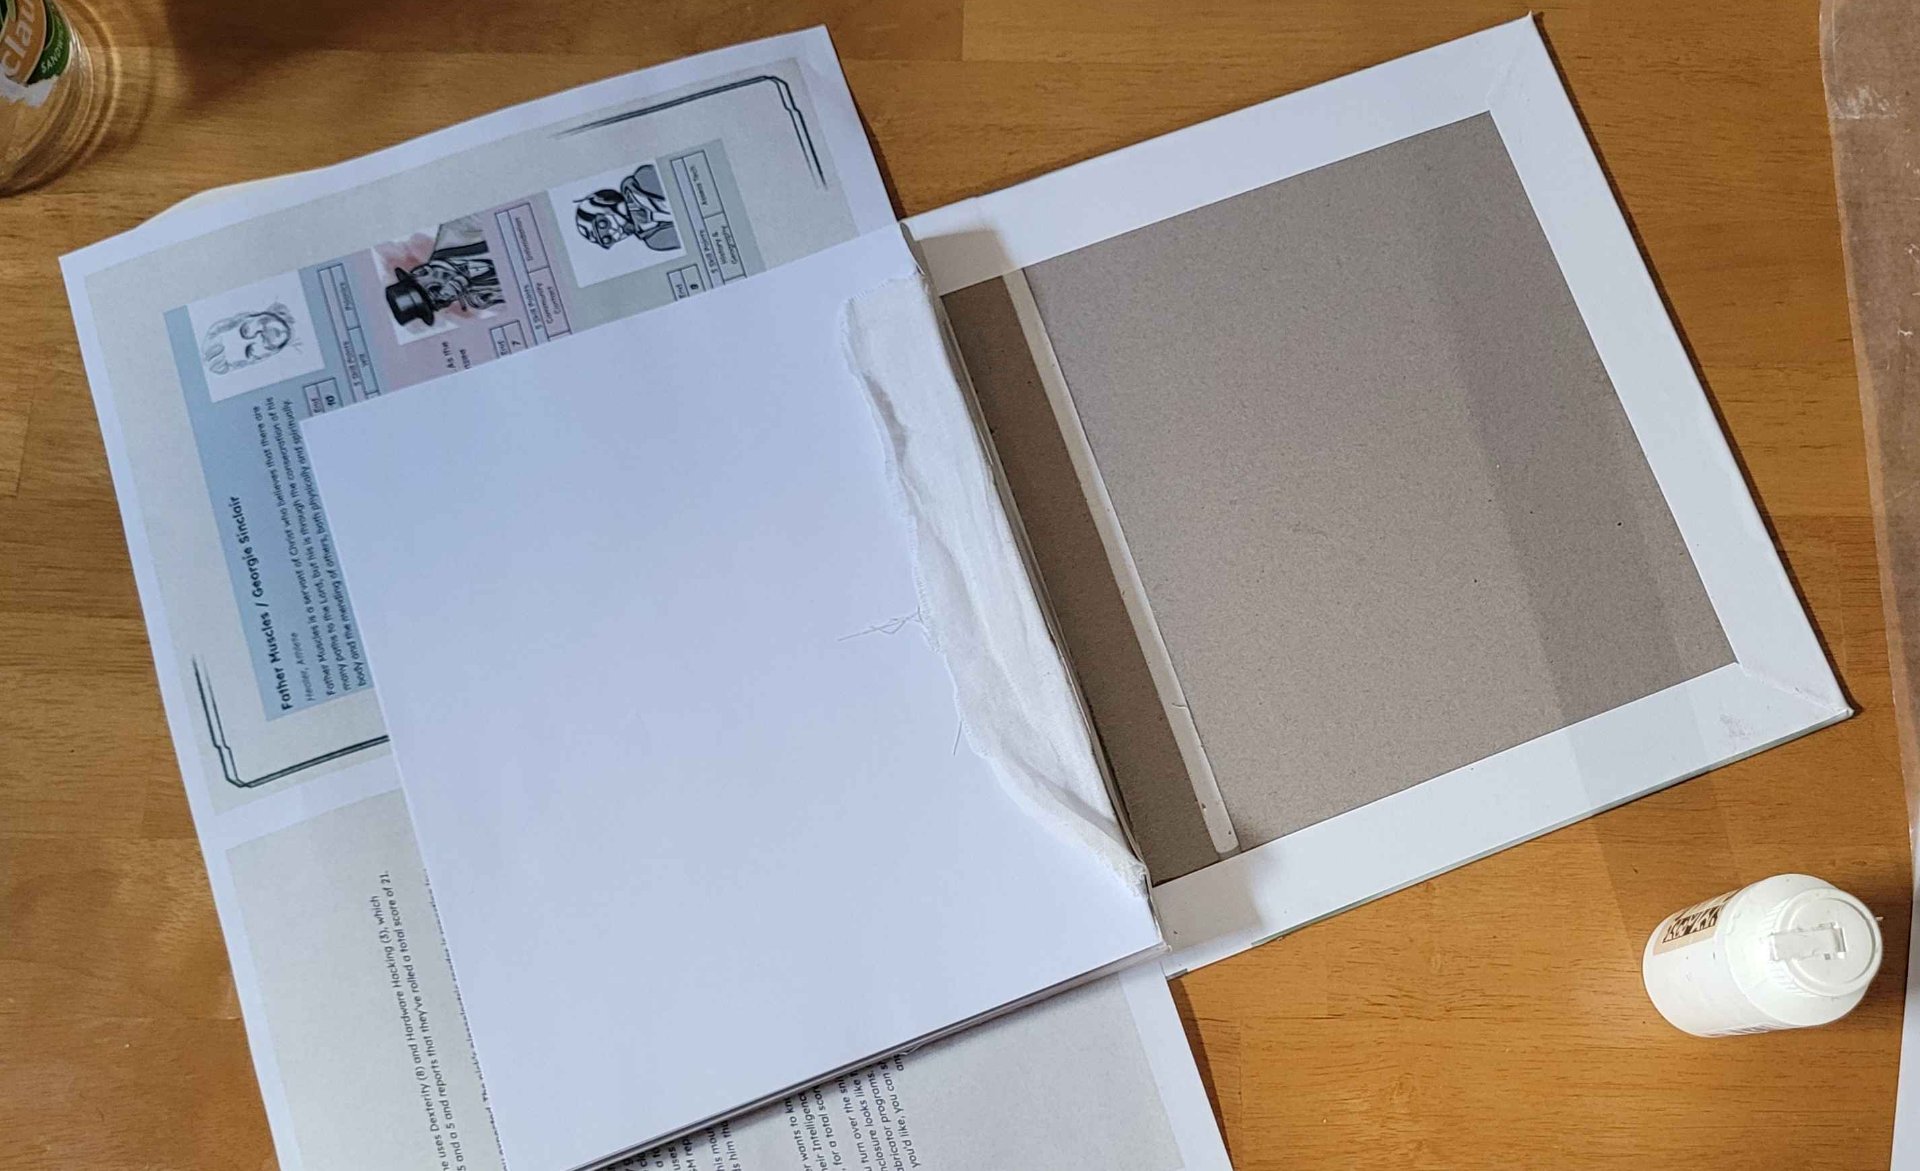
Now it's time to start on the actual cover. I size the bookboard so it'll overlap the book block by 3mm on the top, bottom, and open edge. You're supposed to make it 3mm wider for that overhang, but then remove 6mm for the hinge by the spine (so that's actually -3mm) but I haven't had good luck with that, the open edge always seemed too close to the book block, so I just leave it the same width as the book block and slide it out 6mm. Somehow that works.

To get the spine width, you're supposed to measure the spine of the book plus one thickness of bookboard, but my spines often come out a bit thicker than the rest of the book so I'm sure about that guidance either.

That's the basic layout but I wanted the color to be darker. I was reusing fabric I bought for a halloween costume, but I was picturing more of a maroon color. I didn't want to buy new cloth when I had a bunch on hand I wasn't using, so I decided to dye this piece.

I started off trying to use some very old, expired, dark roast, decaf coffee, but the cloth just wouldn't take the stain, likely due to not being natural fibers. So instead I switched to using some old rit dye I had. I took lots of pictures for the coffee and almost none for the rit dye, so just pretend it's slightly blacker and in a different pot. And that I'm using a stick instead of a wooden spoon.

The nice thing is the rit dye isn't really going to go bad, so I just poured it from the old pot I used (we stopped cooking with it because the nonstick lining had started to flake) into an old jug. I've actually reused it since and it worked fine!

After a lot of hassle, the rit dye finally made the difference.

I ironed the cloth to smooth it out:

And glued the bookboard down onto it. Make sure the gaps between the spine and the front and back is 6mm and that they're square/in line with one another.

The next step is to trim 45s off the corners (leave one bookboard's thickness between the corner of the bookboard and the cut edge) and to clean up the edges.

Then I applied glue to the bookcloth and bookboard and wrapped each edge over:

My attempts at this look kinda crude, but you don't really see this once the endpapers are glued on, so it doesn't bother me yet. Someday I'll probably look back on it and wonder why I thought this was good enough, but for now, it works just fine.

(You might notice that I glued the cut-off triangles to a scrap of bookboard, that'll come into play later)

When you apply glue to the endpapers they'll kind of liquify a little and stretch, so trim a couple mm off the leading/open edge. It'll look better.

Okay, final assembly. This is where it all comes together or goes horribly wrong.

To do this you place the bookblock inside the cover and get it positioned how you want it. Open up the cover again, slide a piece of wax paper and a piece of scrap paper in between the topmost endpaper and whatever's underneath it. Make sure the scrap paper is on top.

Get your brush soaked with glue and then dab it on some scrap until its not really soaking where it hits. Use little vertical jabbing motions (Psycho style) to stipple the top paper so its completely glued. Apply glue under the mull/cheesecloth, then put the cloth in place, then apply glue on top of that.

When there's a good layer of glue everywhere take a deep breath and close the cover onto the page. Open it just a crack, look for wrinkles and smooth them out as best you can. If you open it too far the paper will pull away from the cover.

When you think you've got it as good as it's going to get, remove the scrap paper but leave the wax paper. Close the book, put something heavy on it, and hope for the best.

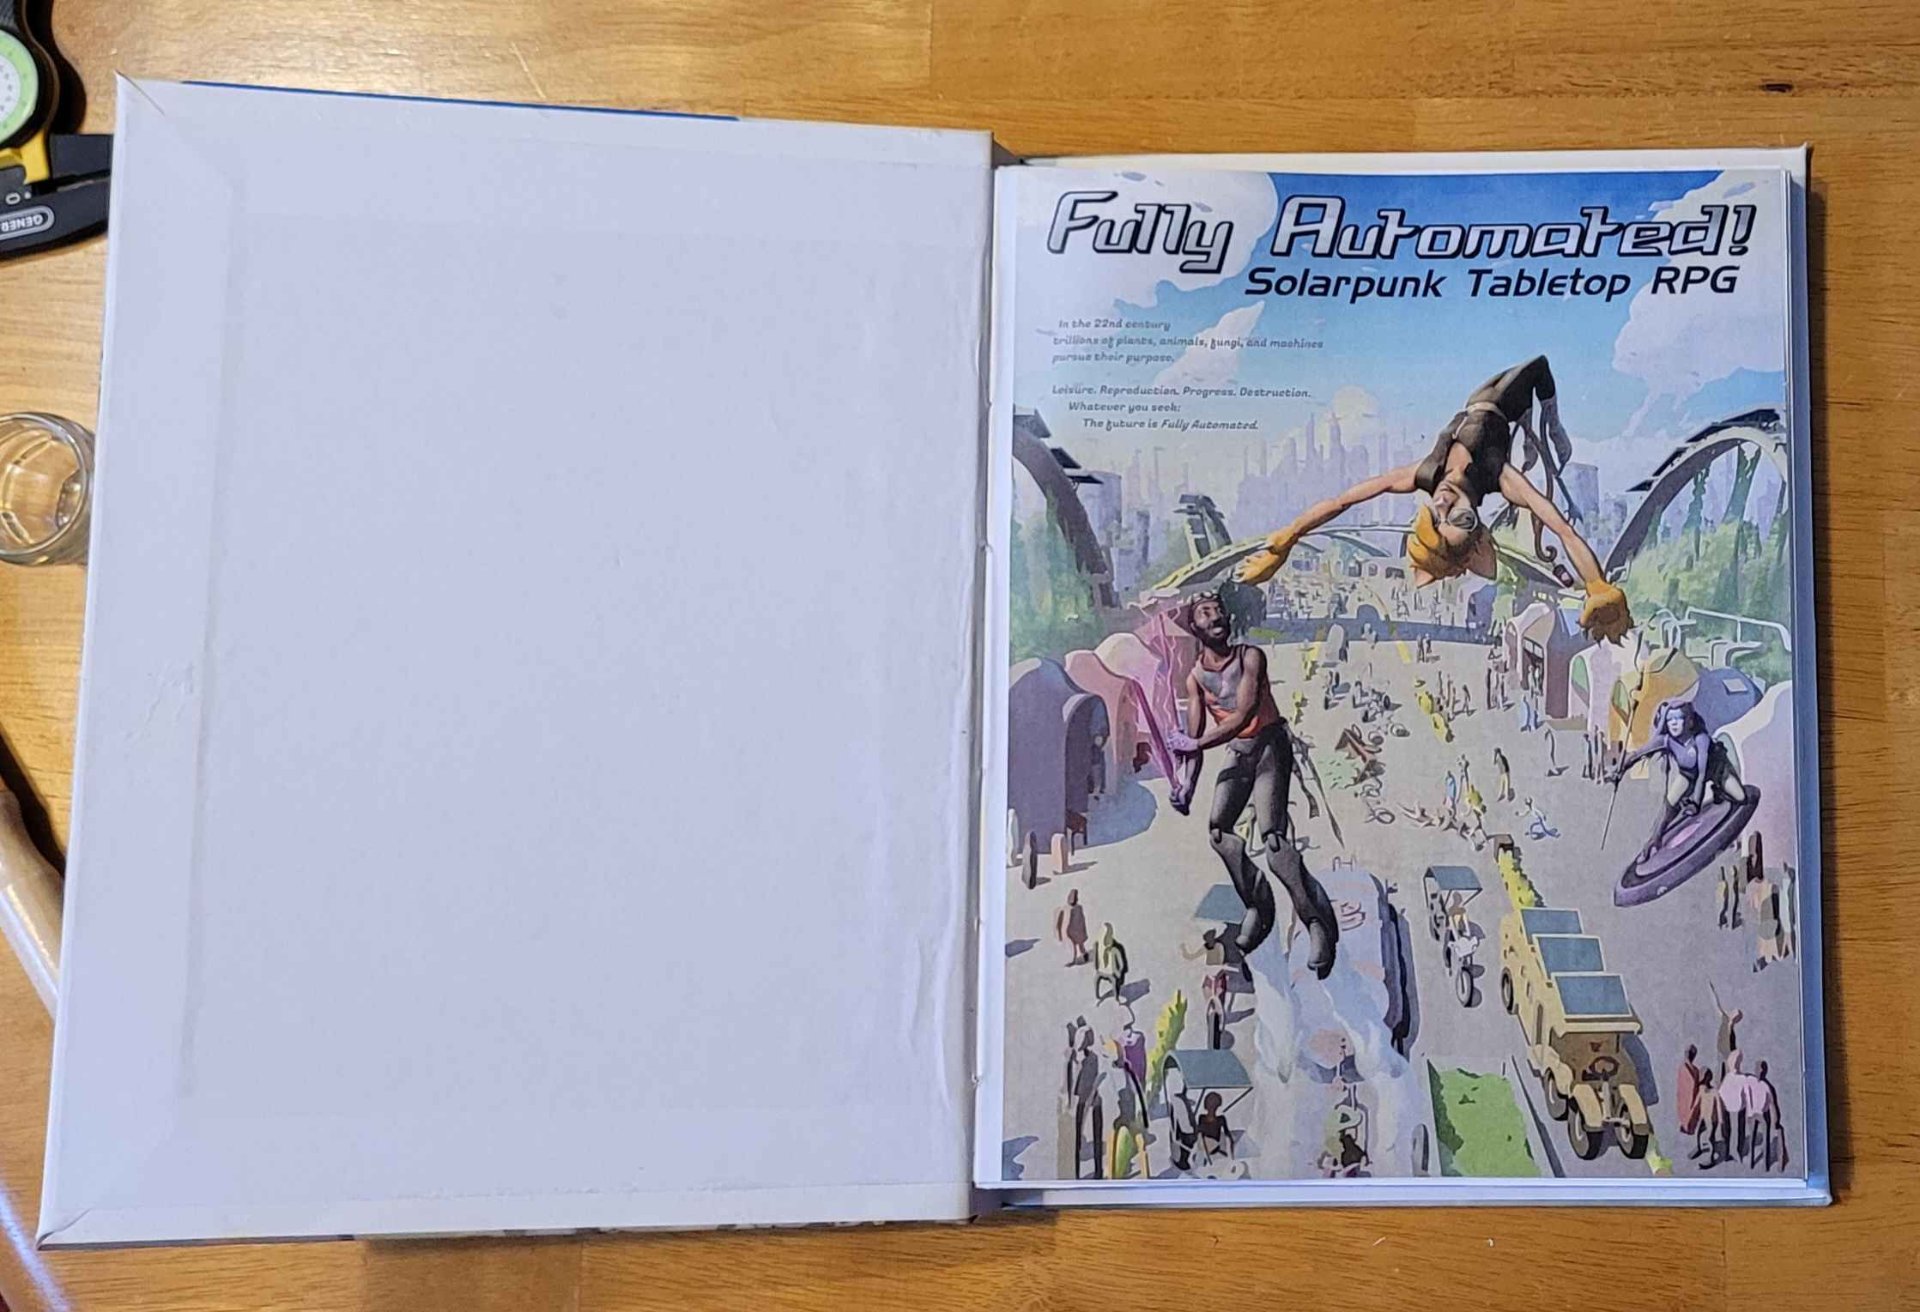
When its dry, flip it over and repeat the whole process.

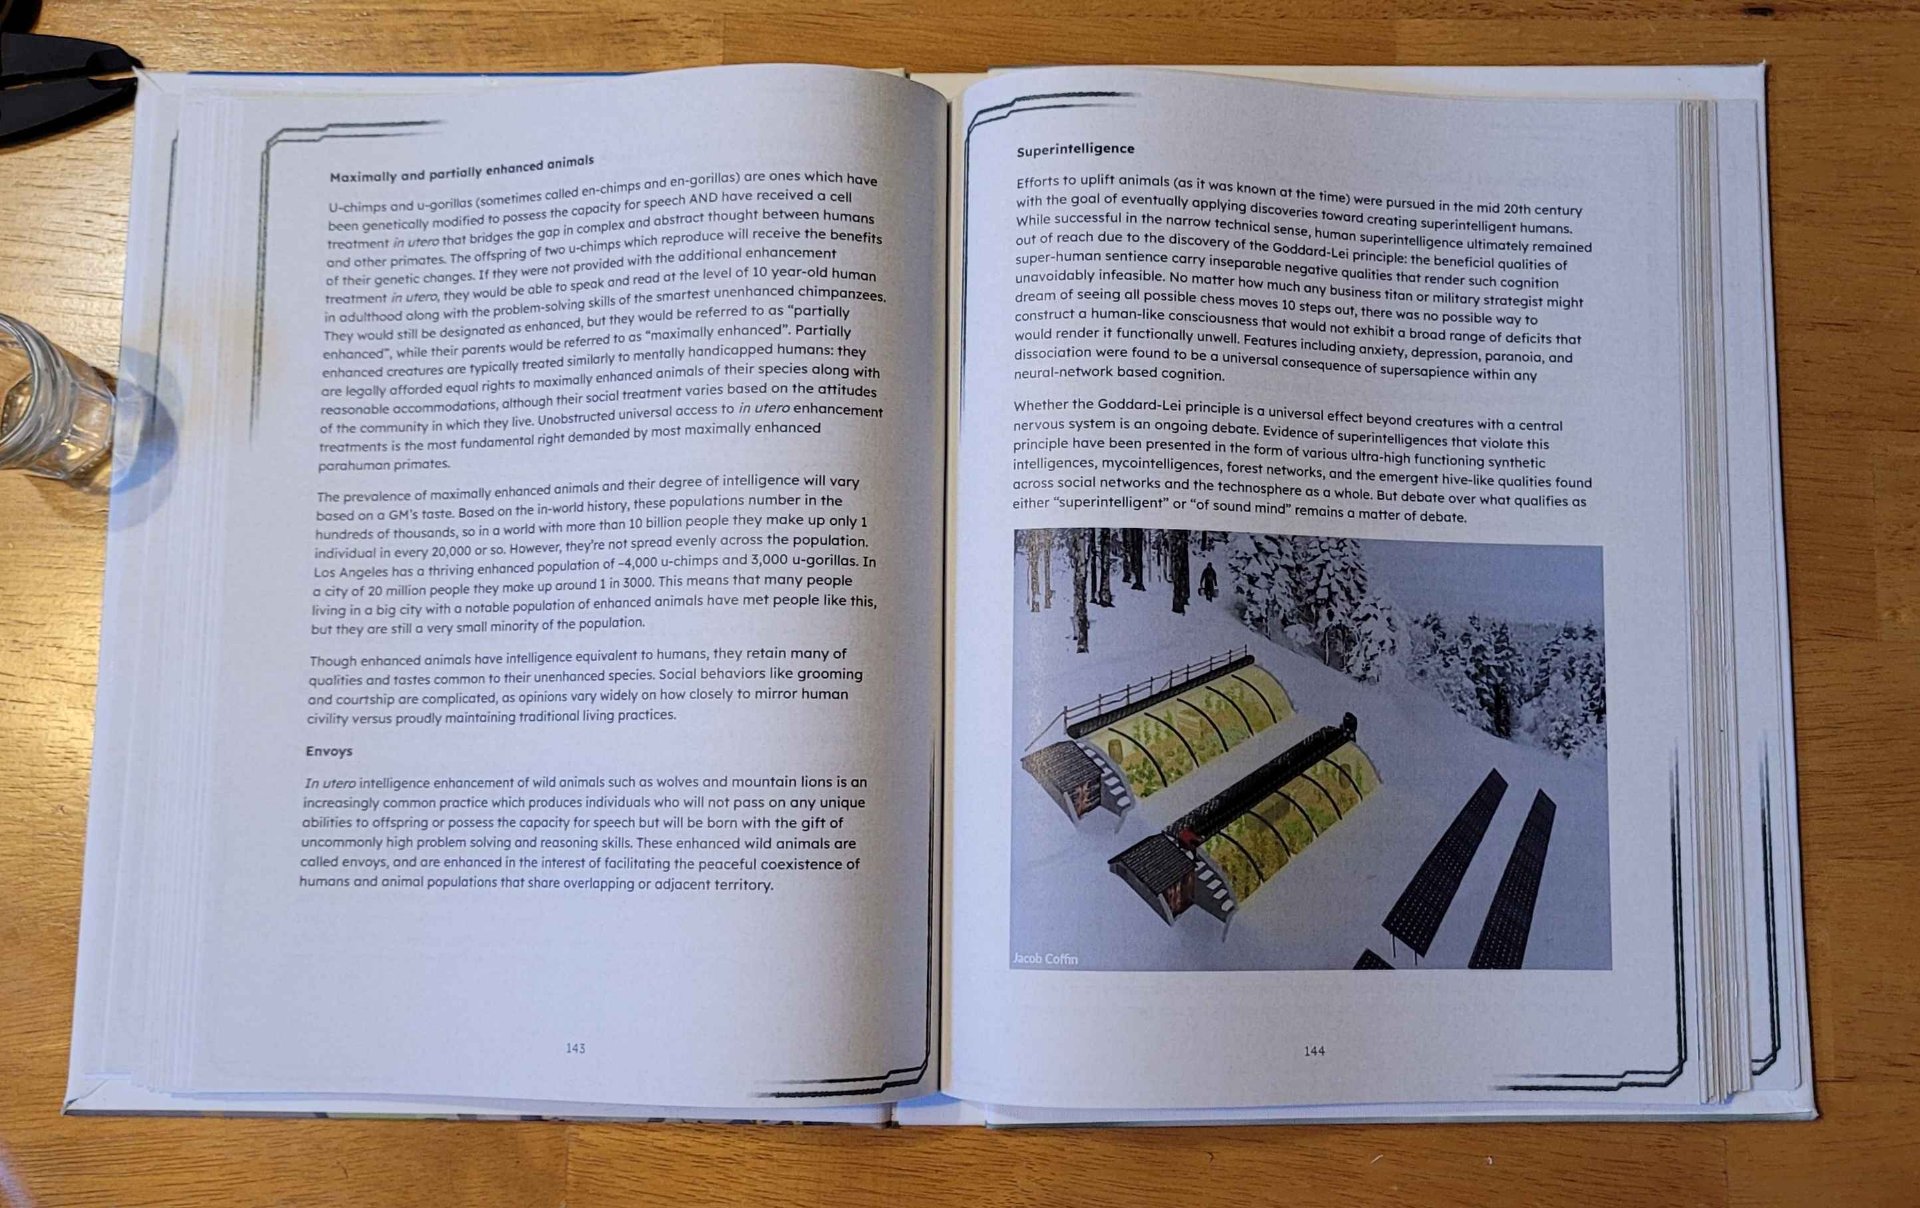
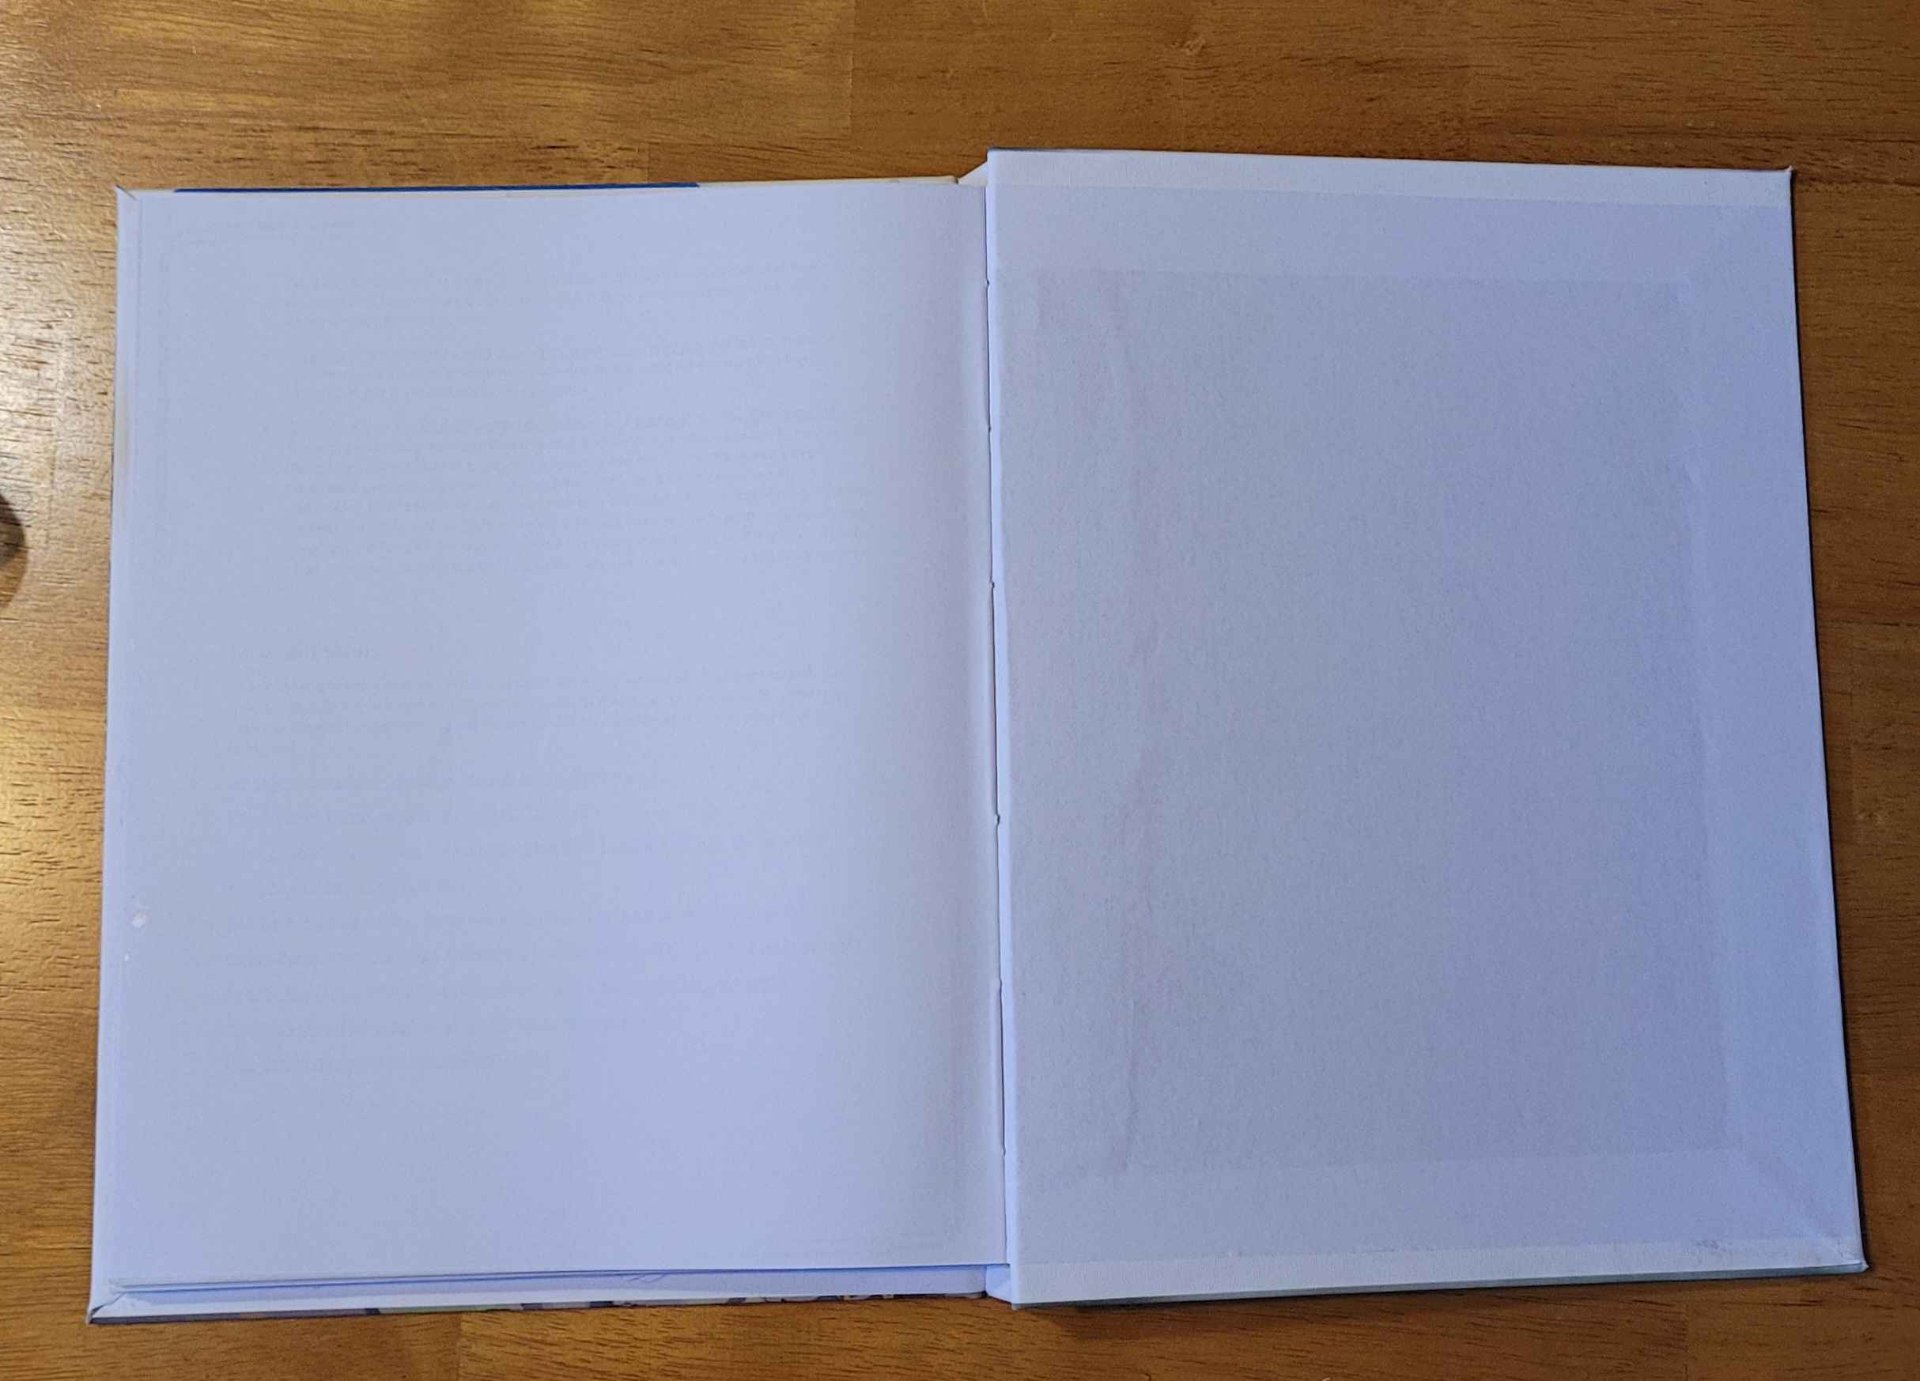
We've now hit all the usual steps (except the end ribbon thing but I don't see the point of that). I was honestly very pleased with the results.

But lets get fancy with it. I had some time on the CO2 laser cutter at my local makerspace, and I'd seen online that people had managed to etch bookcloth, so I wanted to try finishing things that way.

We started with some tests, on very low power and working our way up. We weren't sure how well the poly-blend fabric would handle the laser, or what kind of damage it would cause.

We started with the settings for printer paper (95 speed, 10% power) and worked up by 5% increments, finding that the quality improved each time.

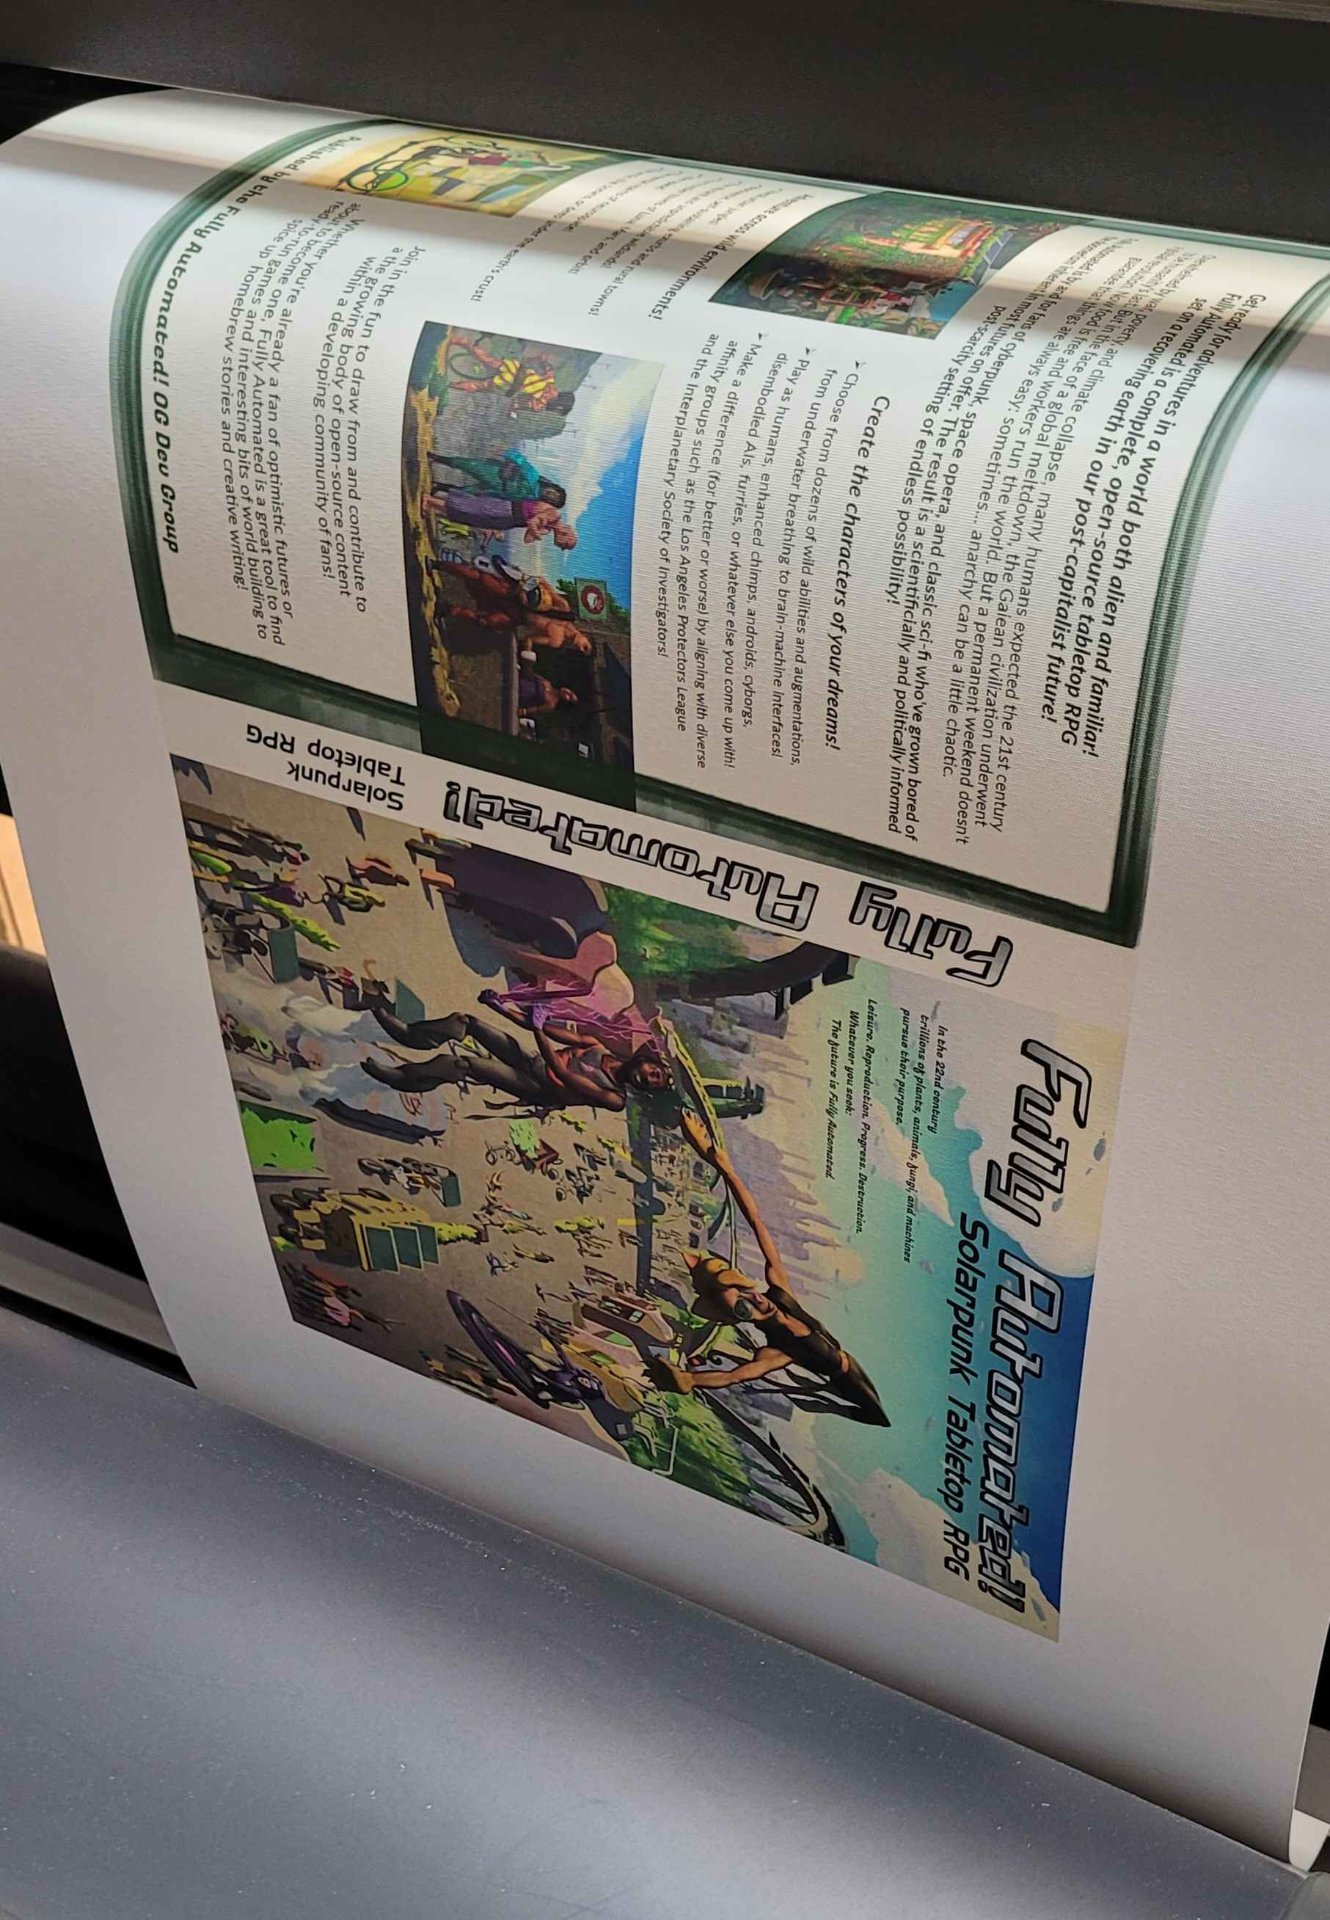
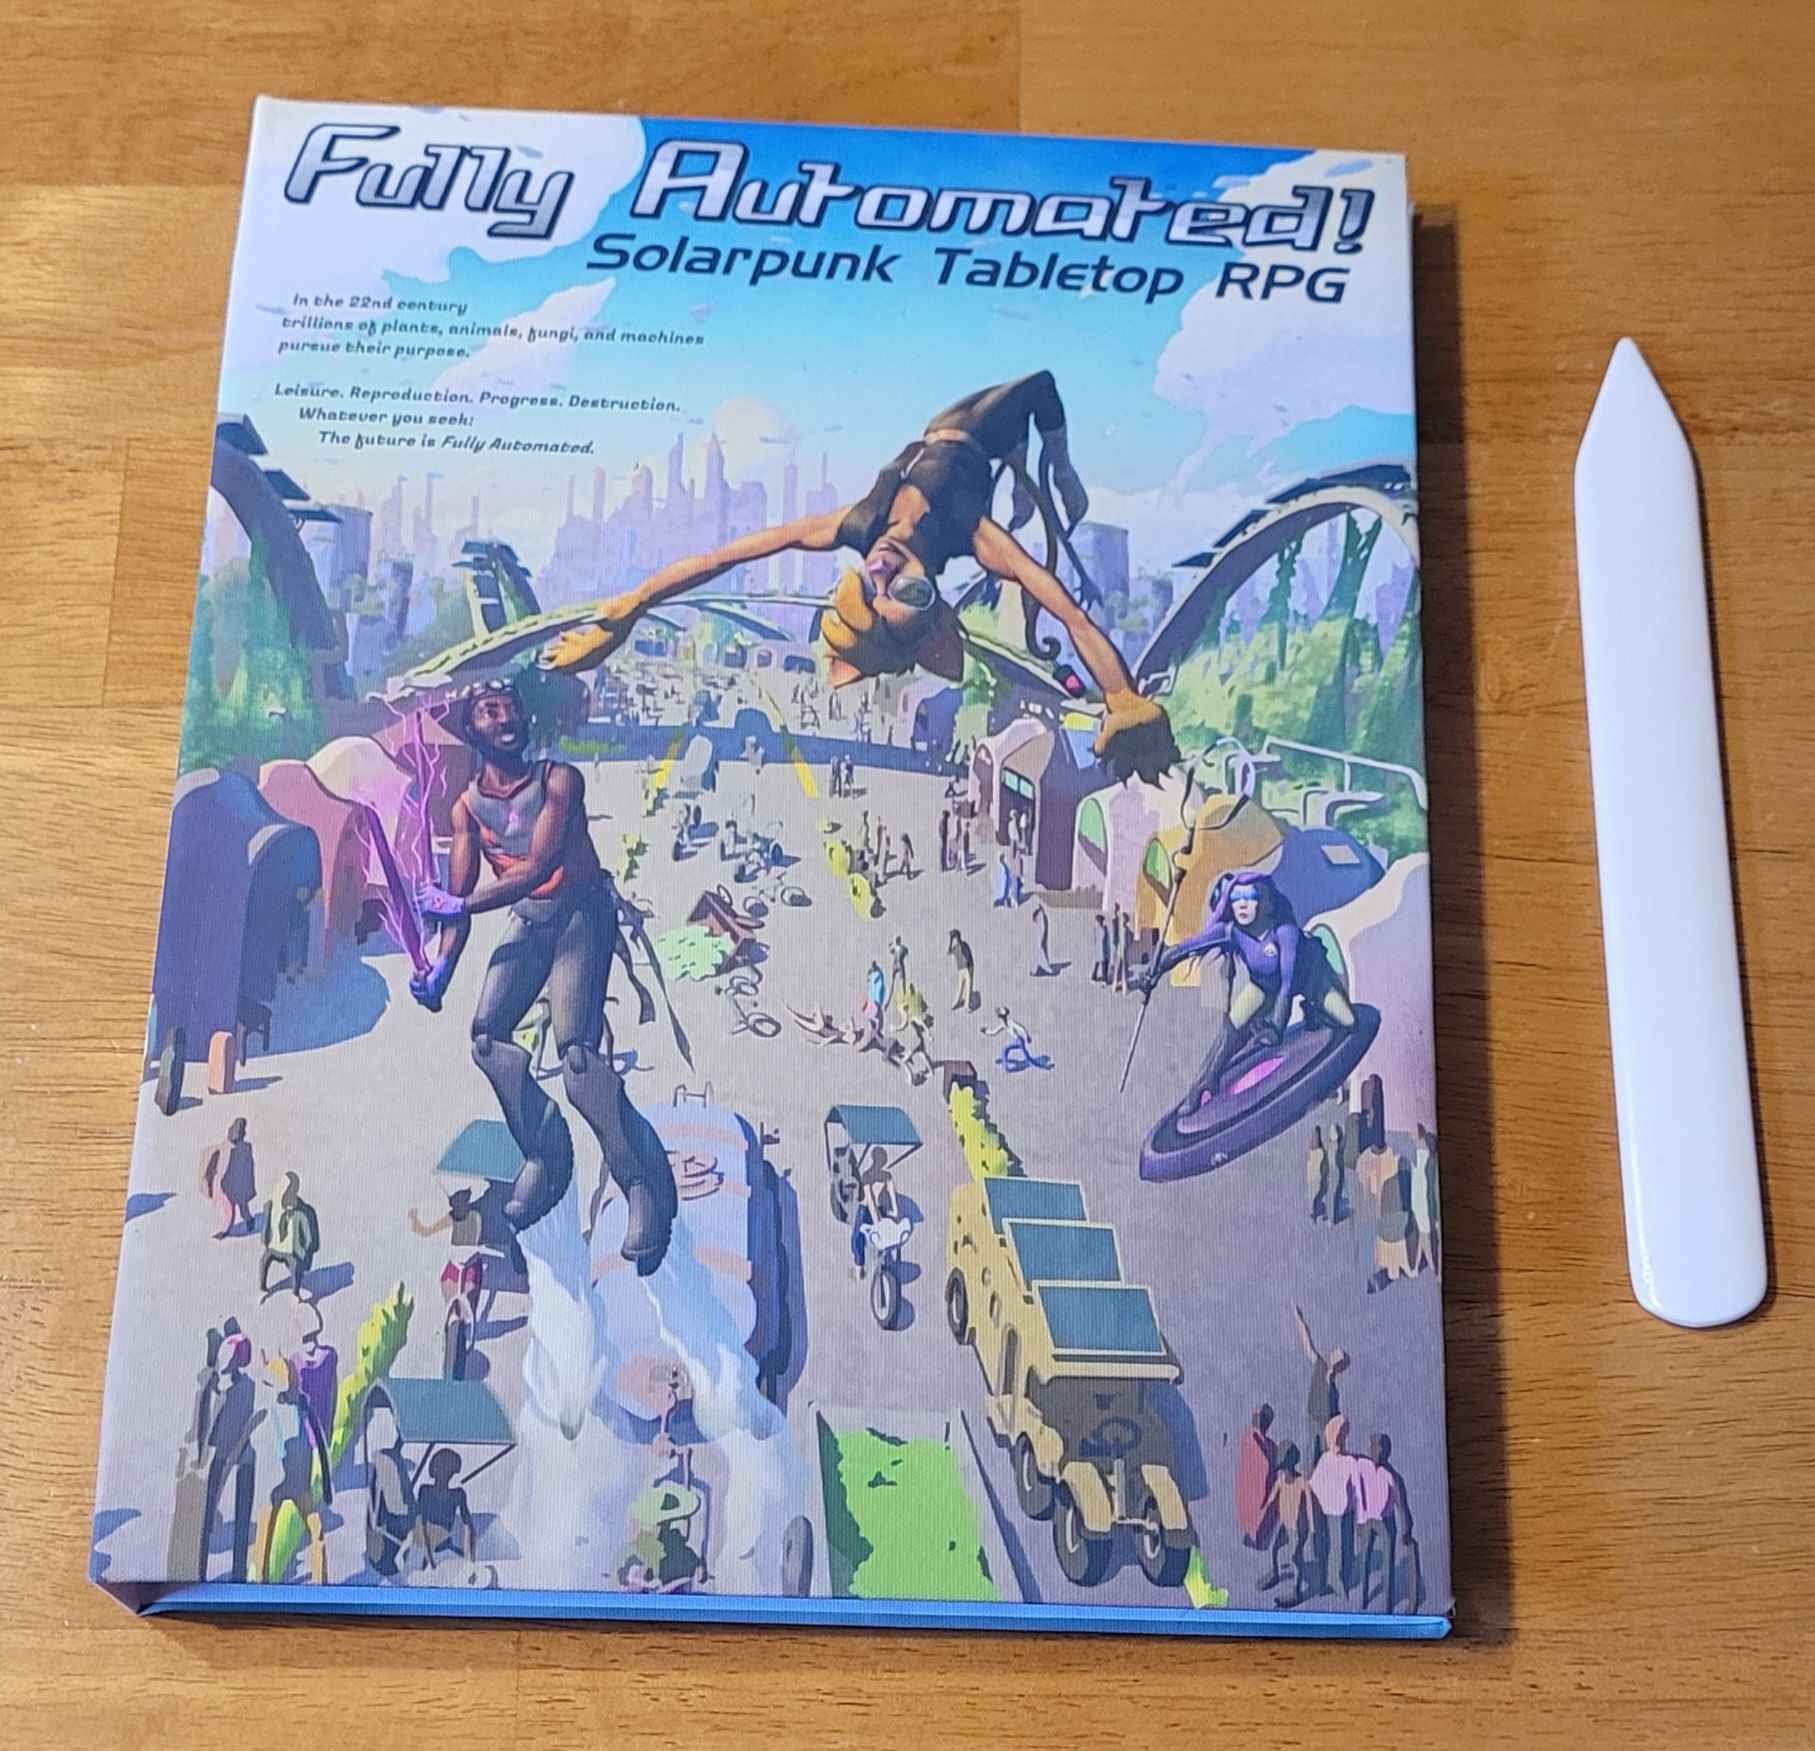
Once that was done, I banged out a quick cover layout by measuring the book, drawing a vector rectangle in those dimensions, and positioning the raster title in the middle.

We ran it with the lid open (runs as a test with just a visible dot) and made sure the rectangle followed the edges of the book.

I had to prop the cover open a little so it'd be more level (I used one of the little connector things we use to pin warped things to the work surface). Then it was just a matter of hoping for the best and rerunning the file with the lid closed.

It was kinda high stakes but I'm very pleased with how it tuned out.

#diy #bookbinding #lasercutter #etching


I recently started making solarpunk postcards again, and I had a lot of fun with a quick scene of a solarpunk cargo ship (a steel-hulled, four-masted barque) in a storm. I'd like to do more but don't yet have any strong points to make or designs I'm excited to feature.

So what would you like to see? What scene is missing from solarpunk art of humans interacting with oceans, rivers, lakes, canals? What weird idea, or old, practical design should make a comeback?

I can't promise that I'll make everything but I really do try to include as many suggestions as possible.

So far suggestions from reddit and discord have included:

  • Showing more of the mooring ropes and foundations festooned with underwater life (perhaps in another storm or low tide?)
  • Boats or ships with soft wing sails which are apparently good (in theory) when it comes to performance as they maintain their shape regardless of wind conditions.
  • edit to add: a clipper ship

I'll state up front that I'm not a nautical kinda guy. I like to pick up terminology and learn but I've never sailed anything larger than a sunfish and I see the ocean maybe once every five years. So feel free to spell out practical considerations and realism stuff because I probably won't think of it.

And thanks!


I've actually done a couple posts about softcover books on my movim blog, this one and one previous one. The Fully Automated softcovers are a little fancier, but this one I think is a good example of the benefits of being able to just make a book when you want a physical copy.

I have a few advantages in this project: my SO had already bought a bookbinding kit and book which I was able to use, and I have access to a free color printer, and, through my local makerspace, a plotter printer which can print on canvas. Everything else, the graphic design, the interposing, etc, was done using free tools like GIMP, an online pdf cropping website, and https://momijizukamori.github.io/bookbinder-js/.

It looks like one of the advantages of this hobby is suddenly being able to get physical copies of books that aren't available as anything other than PDF ebooks. I've got a handfull of favorite books from various authors which were extremely self-published, sometimes as serial fiction later edited into a PDF. One or two eventually got a limited print run, or the author made it available on a Print-On-Demand site, but at this point, I think I've found and bought all of those. That leaves a few that I'm very happy to finally be able to hold in my hands while I read them.

Vatsy and Bruno was one of those. Written in 2010 by Adam "Rutskarn" DeCamp, and published on the old version of https://www.chocolatehammer.org/ , Vatsy and Bruno is a high-strung, noire, dark-comedy-adventure story set in a radio-era city under the thumb of vague oppression. It's a fun story, and one that feels like it should be typewritten on paper (preferably cheap, grubby, fish-stained paper with some suspiciously blood-like smears).

Making this one actually took a bit more prep work on the files.

I started with the PDF DeCamp released on his website over a decade ago. This, unfortunately, wasn't really sized or laid out for bookbinding (re. the wide margins, the page size, and all the page numbers being on the right side of the page). I could get really fancy with editing this, but it's just for me, so "good enough done quick" was the order of the day.

I wanted to print this with no extra trimming, so I planned to use 8.5x11 paper folded in half. Unfortunately, the PDF was, itself, scaled for 8.5x11" paper, and when you fold that in half, the aspect ratio changes. So when I fed the PDF into (the tool I use for interposing the pages](https://momijizukamori.github.io/bookbinder-js) it stretched it vertically quite a bit. It was also showing some fairly large margins, which was unfortunate as those came from the original file. So keeping things "good enough" I threw it into an online PDF cropping tool, cropped it closer to what I'd need, and let it stretch the file a little.

I spent a good bit more time on the cover.

The original covers were also the wrong aspect ratio, but they had almost everything I needed.

I used them and a cover from one of the three sections the story was originally released in, to bash this together:

The cover, spine, text, and back cover were all made from DeCamp's own art, just re-arranged to fit this aspect ratio. From there, I followed the same process as before, but with much faster prints (no giant backgrounds) and no trimming the pages (no giant backgrounds) so that part was easy.

Fold, punch, sew, glue:

I took each signature (stack of four pages meant to fold together) and folded each page in half with the bone folder, being careful to make sure I knew which side was 'in'. Then I nested them together.

I made a guide to lay out the six holes in each signature, and used it to punch holes through the fold with the awl. Then I sewed them together following the Penrose Press Pretty Perfect Paperback Guide:

Once the book block was all tied together nice and neat, I clamped it and glued it with three coats of acid-free PVA glue.

My book clamping station certainly looks ragged enough to do the title characters proud.

While it was drying, I swung by the makerspace and printed the cover. I need to remember to oversize these by a few millimeters, because the first one is always a little small. Ah well, maybe I'll find someone with a bookbinder's guillotine someday.

I folded the cover and glued in the book block just like with the previous project.

I find it easiest to attach the cover in three steps, back, spine, front, but I'm sure real bookbinders have better systems. I start with a flat smear of glue down the inside of the back cover, right beside the bound edge and to set the book block down on it. Then I glue the spine with the book upright (this time I tried on top of the bone folder, which has a similar shape). Then I glue the front cover. I squirted some acid-free fabric glue down the spine and used a paperclip to work it further down, to where it hadn't stuck, and then held it in place by hand for a bit to get a closer fit. I like this stuff, it bonds well and it seems to set much faster than the PVA. This time I also used it to glue the bound edge of the front of the book block to the inside of the cover too, so we'll see how that works out.

The results:

Cover size aside, I'm pretty pleased with it. If ever there was a book to glue into its cover the wrong way around, this would be it, but I got that right this time. I'm glad to be able to read it properly, and to finally be able to put it on my shelf.

#DIY #bookbinding


I recently started trying to learn bookbinding (and because I never liked practicing by making something I didn't need, I'm starting with a 266-page solarpunk TTRPG rulebook I helped make).

I joined the Fully Automated discord a while back, mostly because I was looking for a place to talk worldbuilding in the genre. I read the lore/setting part of the rulebook and it actually helped me start thinking bigger than I had been around ways the world could be better. If there's a solarpunk timeline from our modern day, through conflicts and crumbles and collapses, gradually rebuilding towards something eutopian, then they're much closer to that high-tech, post-scarcity end-state than the solarpunk stuff I normally write. But there's something kind of fascinating about that world, and it makes for a great place to tell stories.

I offered them the use of the art I'd already made, and then I got involved in writing and editing the lore, including contributing a couple sections around rural areas and reuse, which, true to form, they expanded into something bigger than I had come up with on my own.

Since the game is an open source, all-volunteers thing, we didn't do a print run, just released a series of PDFs. But I have free access to a printer that can do 11x17, a plotter printer that can print on canvas, my SO's unused bookbinding kit, and enough patience to learn to bind at least a few copies, so I decided to give it a try.

The first step was rearranging the pages into signatures. These are small pamphlets of folded papers that get sewn and glued together to form the book. This turned out to be way easier to do than I expected, as there are several online tools for interposing PDFs. I found and really like this one: https://momijizukamori.github.io/bookbinder-js/

This allowed me to take the regular letter-sized (8.5"x11") PDF and rearrange it into signatures of four or five 11"x17" pages, with two pages per side. It handled reordering the pages so they work correctly once the signature is folded together and stacked with the others. We also took these interposed files and made them available on the FA! website.

Once I had the interposed version, I could print off the signatures:

I really recommend printing each signature separately so you can paperclip them together and keep careful track of which pages are inside it. It's really, really easy to completely lose the plot on the numbering - I almost couldn't figure out how to put a four-page signature back in order once or twice, if it had been mixed with other ones I'd have been really confused. But it's easy as long as you keep them in their sets and remember which side is up (because its the only sheet/side where two page numbers show in order).

The free printer I had access to couldn't print without leaving a margin so I had to trim them by hand. I started off using a papercutter on the short sides, but eventually switched to using a straightedge and scalpel on all the sides.

The next step was folding the signatures folio-style using a bone folder:

And then punching holes so I could sew them together. Some guides have you sew each signature separately, then sew those together, but the one I followed (and recommend) does them all at once.

The folded piece of paper is a template marked and punched so all the holes in all the signatures line up as closely as possible.

Next, I sewed it together using the Penrose Press guide, being careful to pull the threat as tight as I could before tying it off on each signature. I really like how secure this seems to make the binding.

Even if you tie it tight though, it'll still have some gaps. That's were clamping and gluing it helps! The guides I followed suggested just stacking books for weight at this part, but I went ahead and built a really ugly book press with a piece of scrap particleboard, scrap 2"x4", some wax paper, and a couple deck screws. I pre-drilled the holes, wrapped the boards in the wax paper, and screwed them together so the book block could be clamped between them:

That's when scope-creep hit and I switched plans from making this first copy a softcover book to making a hardcover.

I followed my SO's bookbinding book, and this guide for the spine, and added a section of cheesecloth (in place of mull, which I didn't have) and manila paper in roughly the dimensions they specified. These help hold the spine together and attach it to the cover (called the case).

Next, I roped the Fully Automated folks into making a back cover for me, and I put together a printable version with a spine and everything. I took a lot of measurements, made my best guess, then went to our local makerspace to print it on their plotter printer:

It's slightly large but I'm happy with it!

The next steps came pretty much entirely from this guide.

I cut some bookboard (stiff cardboard) to size, and did my best to line it up with the image showing through the canvas. Once I had them in place, I traced them lightly onto the back of the canvas in pencil, held it up to the light to see if it was good, and made corrections until I had good lines. Then I measured out to the edges of the sheet and trimmed it down:

Then I glued the bookboard to the canvas:

I forgot to take some pictures for the next step (sorry) so you'll have to rely on my descriptions. First I cut the corners off the cover at a 45 degree angle 1/8" out from the corner of the bookboard. I used a carpenter's square to mark the angle. Then I folded the sheets over the bookboard and glued them.

Then it was time to glue the book block into the case. This happened fast enough that I didn't dare stop to take pictures. I slipped some wax paper between the endpaper (a blank sheet I included on front and back when I used the interposing software) and the rest of the book block. Then I painted it with glue as quickly as possible, being careful to first glue the cheesecloth to the paper, then painted it over with glue as well. Then I carefully closed the cover onto the sheet. The endpaper was just about a liquid at that point, despite how lightly I stippled on the glue, so I'm glad I didn't have to try to make changes. I flipped it, and let it dry for awhile.

Then I repeated those steps on the other side and left a heavy laptop sitting on it.

Its always tense waiting while the glue dries on a project, hoping its not clamped crooked, or the glue isn't running and sticking to something it shouldn't. Especially when you're combining the end result of two other projects. Luckily this one turned out mostly okay:

I can see where the endpapers stretched (just like one guide said they would) causing them to reach further towards the fore-edge than I'd have liked. But it generally looks pretty smooth and clean so I'm not very bothered by that.

All in all, I think not bad for my first bookbinding project!


This is one I’ve had on my list for months now, and I finally decided to just go ahead and make it. Back when I was researching solar cookers, solar concentrator, and solar furnaces, I ran into a few really interesting ideas around fresnel lenses. Look them up on youtube and you can find all kinds videos of people melting glass or burning skillsaw blades in half, but the ones that kind of showed me how useful a really-concentrated point of heat could be was this 3D printer for sintering sand into glass objects and this solar rig for smelting zinc or aluminum. Both used fresnel lenses, but were limited by the size of their portable builds.

So here’s my take on something bigger and more permanent, though hopefully still flexible enough to do multiple jobs using concentrated sunlight. The building’s tower houses an observatory-style dome with an irising shutter around a very large fresnel lens. This lens is meant to gather light, but deliberately doesn’t focus it too much, just directs it to another lens, which aims the light straight down. There, on a motorized rig which allows for some adjustment up and down, is the third lens which actually brings it to a searing focal point.

With that focal point reliable and known, the people at the workshop could move several different tools underneath it as necessary, from a crucible for smelting, to a firepot for solar forging, perhaps a glassblowing oven, a 3D sinterer, or the large CNC plasma cutter-style rig shown in the scene.

A set of computers would be set up with light sensors and control over the rotation of the dome, to allow it to track the sun, and the width of the aperture in the shutters, to allow it to regulate the amount of light. The upper limit on the light would be based on how bright the day is, but if they need anything less than full sun, then the opening and closing of the shutters should help with providing consistency. If it starts around half open in full sun and a cloud moves in front of the dome, it might open all the way, then close partially as the cloud leaves. With many minute adjustments, the overall amount of light could remain very consistent down on the ground.

As for the level of focus, I suspect the kerf while cutting would almost definitely be wider than with a modern plasma cutter, but like I said before, people have cut through skillsaw blades with just a lens from a rear-projection TV. So it's possible a larger lens could concentrate even more heat, allowing it to burn through much faster, with less damage to the surrounding material. The tightness of the point would mostly come down to the quality of the lens, as far as I know.

I’ve tried to include a number of controls, caution markings, and red emergency stop buttons, but the one thing I really don’t like about the design as drawn is that it’s not obviously fail-safe. I think ideally there’d be some kind of hanging weight or other mechanism so that when power is lost (not just to the building, as that probably happens fairly often on a less-reliable grid, but to the system’s control unit) the shutters or another light-blocking mechanism slams into place.

Other notes about the scene, I’ve tried to include a diversity of ways to use the sun, the photovoltaic panels for powering the electronics and perhaps some of the tools, a set of fiberoptic solar daylighting systems, which track the sun and pipe light down to the shop floor, along with the simplest version, large windows. This emphasis on daylight should help avoid the risk of electric lights strobing in sync with moving items (such as on a lathe or milling machine) which can cause them to appear stationary and safe to grab onto, though they likely have two sources of light on each just in case. I’ve also included a water wheel, either for power generation, or for the direct motion, to be connected to certain tools or machinery via axles and belts.


Houses require maintenance. How much and how often depends on the design and its surroundings. They also require occupants - in my brief experience at least, they degrade much faster when they’re left cold and empty than when someone lives there, even if that someone doesn’t fix things. Weather, encroaching water, mold, ice, and animals can all cause compounding damage surprisingly fast.

I think of the solarpunk society I've been depicting as being post-postapoclyptic. They’ve been through the worst of the climate crisis, wars, plagues, and all kinds of shortages, and they’re trying to rebuild better. In some of my previous postcards, I’ve tried to imagine what the rural communities I grew up in would look like transformed into a modern version of how they looked a hundred years ago, with denser villages, trains, and wide stretches of forests and farmland in between. They were set up this way back when because it was practical for people who walked or relied on horse carts to get around day-to-day, and who traveled to use a boat or a steam train for a longer trip. A solarpunk society that doesn’t want to rebuild the infrastructure(s) to produce and maintain personal vehicles, fuel them, and to drive them on, might have to look pretty similar out here.

But what happens to the houses and developments spattered across the land between those villages? Every road with a house a quarter mile from its nearest neighbor, now miles from those hubs of public transit? In a society where public transit is effective, and cars are rare, I think a lot of roads will degrade pretty quickly. They already need tons of maintenance, and that’s with people using them every day, totally dependent on them, grudgingly agreeing to pay for it. It’s not uncommon to live thirty minutes or an hour from your grocery store today, but on badly broken roads, that kind of travel is going to be more difficult and costly. Some people will do it, heck, some will have held out through all the bad times and will stay no matter what else changes. But I suspect a lot of houses will have been abandoned a long time ago.

There’s tons of embodied carbon stored in those structures. In their carefully-refined materials, their transportation, and in the act of construction. Some of those materials might be very difficult to produce for a society that carefully watches its externalities and seeks to do as little harm as possible. And the longer they’re left abandoned, the more they’ll degrade. The structures will become unsafe, the materials will rot or break, or become inaccessible, and in some cases, they’ll pose environmental risks as fuel tanks rust out, chemicals escape their storage, or damaged structures catch fire (even with the powerlines cut upstream, abandoned solar panels or poorly-isolated generators backfeeding into the grid might allow for damage to an abandoned house to cause a fire). This is especially true with modern buildings, particularly the kind of McMansion featured in the scene, with their heavy reliance on petro-products like “structural” foam columns and facades, which will go up like a struck match in the next wildfire.

In some cases, old buildings could be put back into use. Perhaps they’re nearby something the rebuilding society needs. Maybe one development will make for a good farming community, and another the barracks of a logging camp. Maybe one near a river can support trade or fishing. But there will be others that are simply not very useful. They were practical enough for semi-suburban life when gas was cheap, cars were plentiful, and roads were maintained. But in a world where most people have other priorities, live in closer communities, use public transportation, and aren’t interested in rebuilding a car-centric world, these houses don’t make sense. And of course there's the ones in unsafe locations (flood plain, unstable/eroding cliff, etc) where they won’t last no matter what. To that society, deconstruction might be a very practical answer to both the long term threat posed by these structures and to their own building material needs.

Deconstruction is an alternative to home demolition. It means carefully dismantling the constructed components of a house so the materials can be salvaged and reused. Materials are typically removed in the opposite order in which they were installed, to maximize reuse.

By carefully disassembling these structures and hauling the materials back to their communities, they can build and expand for a much lower overall cost (both environmentally and in resources harvested from the world) while removing potential toxin or fire threats. And by filling in their cellarholes and replanting, they can rewild developed land, build better habitats, and restore their local ecosystems.

On top of that, even buildings picked over by looters may be full of usable stuff - furniture, dishes, cooking tools, hardware - which a society with an interconnected library economy could use to meet its needs without producing new items.

So that’s what I’ve tried to depict here, a deconstruction crew carefully disassembling old world structures so that everything, from the windows to the metal roof panels, to the cabinets to the stick framing itself, can be reused elsewhere rather than produced new.

They’ve been working from left to right in this scene, taking each house apart in reverse order to how it was built. Much as with construction, this would require different crews of specialists: inspectors, roofers, carpenters, electricians, plumbers, and others who can safely remove resources without doing unnecessary damage. Once a crew finishes their part of a building, they’d hopefully be able to move on to another one nearby.

They’re also replanting/rewilding the old backfilled foundations, something that would certainly help with breaking up the concrete (eventually). Roots are great at that.

I’m not sure if it’d be worthwhile to use concrete saws to cut at least some of the concrete foundations into construction blocks. It’d certainly help with restoring the site quicker, and it’d be a low-ish carbon source for concrete blocks, but the tradeoffs in labor, transportation, and power for the saw might not be worth it. In that case, they’d probably crack it up with a jackhammer before filling it back in.

There’s a lot of vehicles in this scene, so I should emphasize that these aren’t daily drivers. These are equipment used to haul work crews and construction materials on fairly short trips.

All the big trucks in the scene are old internal combustion engine vehicles converted to run on woodgas. I imagine they burn a lot of the wooden construction debris which were otherwise too small or damaged to be worth salvaging. Perhaps some trucks are even set up with plastic de-refineries and are able to use astroturf lawns, broken plastic siding, or “structural” foam facades as fuel on their trips. This isn’t perfect: it still produces pollution and releases CO2, but if the goal is to salvage as much material as possible, and to prevent it from burning pointlessly in the next wildfire, I could still see an aspirational society accepting that use of it.

As a bonus, woodgas vehicles are often used as generators, so they may be able to serve that role part-time on-site, powering lights and air pumps for confined spaces like basements, and even certain tools. Otherwise they’d probably use portable solar panels.

The other (smaller) vehicles are electric minitrucks and rickshaws.

I imagine that the workers are a mix of specialized crews brought in by the larger community for the scheduled deconstruction, and local volunteers who are working for trade in recovered materials. I imagine a lot of the cargo bikes, Chinese wheelbarrows, rickshaws, and minitrucks belong to them. I figure in place of real roads, the really small villages and isolated homesteads maintain a surprisingly dense web of rough trails suitable for mountain bikes or snowmobiles, which connect to all their neighbors.

Last art thoughts: I have another scene of a golf course and its surrounding McMansions turned into a solarpunk intentional community that I’d like to do, but the scope on that one is big enough it’ll be awhile before I can get to it. At this point, I’m confident I’ll make it though. McMansions, with their pointless, wasteful scale, their cheap construction, their reliance on petro-product materials, and their often vain attempt to spend their way to classiness, seem kind of like the antithesis of solarpunk design to me. Golf courses with their endless, expensive-to-maintain grass monocrop hold a similar, though less severe place in my mind.

If you read all that, thank you! And if you’re a person who owns a building in real life, and you’re thinking about doing some renovations, please consider reaching out to your local chapter of Habitat for Humanity or another group who will do deconstruction, rather than just smashing everything up and throwing it away.


This might be a bit of a reach but I’m wondering if anyone here knows enough about concrete production to help me plan the layout of my next photobash. I’d like to do a scene of a solar-thermal concrete factory – there are several supposedly in the works, like Synhelion’s new partnership with Cemex, funded by the US DoE, or the french company Solpart (whose prototype involved a rotary kiln), or Heliogen. Unfortunately I’ve had a lot of trouble finding decent photos of their setups, and even though Synhelion is apparently working on a pilot industrial-scale solar concrete plant, I haven’t found any plans to work from.

I’ve been doing some reading about existing concrete factories, and plan to keep as much as possible the same, while mostly modifying the kiln to include at least one structure similar to a solar falling particle receiver, and adding some onsite algae farms or greenhouses for capturing CO2 released by the burning of the lime, and a trainyard (either electric trains or fireless steam locomotives, given that it’s a solar plant) for moving material into and out of the plant.

I’ll say upfront I know very little about concrete production, and I’m struggling to come up with a kiln design that’ll hit the required temps for long enough, without burning the lime and messing it up.. Originally I’d pictured basically a rotating kiln feeding into a falling particle receiver, linked up so heat from the sunlight hitting the falling concrete could still travel up the tube and eventually up into the cyclones where the mix is dried. But it seems like the concrete needs a longer, slower firing time than whatever heat it gets wafting up from the aperture, and then a blast of light and heat as it goes past. The diagrams I could find seems to just be a rotary kiln with sunlight being blasted into the open lower end, but I’m not sure if that’s just the design they went with because it was a proof of concept prototype.

I also know that temperature changes are bad for lining of rotary kilns, which are normally run pretty constantly IRL, so it seems like they’d need some changes anyways to cope with the day night cycle?

In case you’re reading this and wondering why make concrete this way, the concrete industry is a huge portion of human CO2 production (around 8% total), due both to the release of CO2 from the chemical process of baking the limestone, and from the tremendous amounts of heat necessary for doing that. A more solarpunk society would hopefully use much less concrete overall, especially with changes in building design and priorities that allow for weaker materials like hempcrete and mycocrete, but for some things we’re still going to need modern concrete. Solar furnaces can hit temps well above what a rotary kiln uses, and heliostat systems aren’t far behind, and it’s a pretty direct use of heat from the sun, which would minimize conversion losses. It’s not a great fit for every current concrete plant, but it seems like it could help.


Scrappy Capy Distro has released the first issue of Harbour, an anarchist literary journal. It has 7 pieces from 6 authors, poets, and artists. You can download it for free online, or get it on paper if you happen to live in Berlin and know the anarchist scene there.

Full Disclosure: one of those authors is me! My story Fair Game is the first prose story in this edition (on page 3 on both versions of the PDF). I'm very excited that they accepted it, especially because that means I can start posting a related comic/art project I’ve been working on in the background for several months.

In the beginning of the journal the editors say this on the subject of fiction:

Traveling to some anarchist book fairs, we noticed that most of the tables were filled with theory and there was very little fiction. This edition, and future ones, is an attempt to remedy this.

Theory is often placed above fiction as more important and serious, but we believe that fiction deserves just as much space. Not all critique of the world has to offer a complete or even partial alternative to the existent, but when we fail to tell a narrative of what possible anarchist futures could look like, it can be very hard to entice others away from the pull of capitalism.

If there ever were some collapse or successful insurrection, ideologies whose ideas were most digestible or had been most widely spread would win out. Following such change, we don’t want things to return to the way they were. We want anarchist ideas to ripple out across the populace, for them to be something easy for others to play with and understand. Stories are one way to do this.

We want to make a space — a space to imagine, a space to vent, where ideas from many different places can come together, a place where we can then leave with these ideas, to pass them on.

A harbour is a place from which to venture out.

I think there's a ton of overlap between that and solarpunk in general, and the ability to show positive, attainable futures, and to demonstrate the lived experience of those better worlds, how they work, is a big part of what draws me to the genre. Hopefully I'll have a more solarpunk story for them in the future.

Speaking of which, if you have a vision of the future you want to share, they're already planning for their Fall 2024 (Issue 2). Submissions will be open from September 1st to 30th: https://en.scrappycapydistro.info/submissions


cross-posted from: https://slrpnk.net/post/847900

A few years ago, while we were cooking, my SO showed me a blog post about common spices and their substitutions. I thought it'd be cool to use that to make a chart we could hang on the wall.

It turned into a fun light research project, then a fun art project.

I started reading various blogs and realized that while many covered the same core spices, there were a lot of others that only one blog or another mentioned. So I started gathering them all up.

As I read about them on Wikipedia I'd stumble into their histories, and scope creep hit. I decided to add a column for interesting facts about each. (While gathering those, I was kind of struck at the disparity between them - some spices, have centuries of warfare, murder, and espionage wrapped around them, while others are so common or easy to grow that nobody seems to have stabbed anyone at all for it.)

I built it first as a spreadsheet in Google sheets while I was researching, pasted it into a poster-size libre office writer document for layout and font changes, exported that as a pdf so I could import it into GIMP. That let me make more detailed changes and add the flourishes that hopefully make it look like something that might've hung on the wall in your grandparents' kitchen.

This was a pretty casual project spread over seven months. It's got forty-some spices with descriptions, fun facts, and substitutions shamelessly plagiarized from cooking blogs and Wikipedia.

I've learned since that several spices are actually really unspecific, like what’s sold as oregano apparently may come from several different plants. So I'll say it's useful for cooking and accurate to the best of my ability, but I wouldn't reference it as a historical or scientific resources.

If you want to print it out, I uploaded the PDF here: https://jacobcoffinwrites.files.wordpress.com/2023/07/spice_list_printable.pdf


Another (very quick) take on the caustic soda locomotive concept based on this comment on my last postcard about what a version with swappable boilers might look like.

The idea is that instead of pumping out the caustic soda to dry it, they would instead unbolt and lift off the boiler, probably using an overhead or gantry crane, and replace it with an already-dry one. The dilute one would be inspected, and placed on a concrete containment pad where it could be connected to a solar steam generator, so the superheated steam could dry the caustic soda. This is actually pretty similar to how they apparently did it historically, except using a coal boiler and obviously without removing the boiler from the locomotive.

Ideally, this would be a bit safer as the boiling hot caustic soda would remain contained for the majority of the time, with less risk of spills during the drying process, and the extra boilers and frequent inspections could help prevent corroded parts from disabling a locomotive and stopping a train line. It might even be faster, depending on how complex the hookup process is.

In the end, it’s probably not a whole lot more practical, but I really liked the idea (suggested first by Carrier_Indomitable over on r/trains, and then with some cool visual details by @WaterWaiver@aussie.zone on the last post.


One of my goals for my postcard series is to show a rebuilding society that prioritizes reducing waste and externalities, and examining what weird technologies might appeal to them because of those goals/limitations. So I've been wanting to do a scene of a caustic soda locomotive ever since I first heard about them.

Soda locomotives were a type of fireless steam locomotive that barely made it out of the prototype phase, where the boiler is surrounded by a tank of ‘caustic soda’ (usually one of several possible chemicals), which generates heat when mixed with water. The heat produces steam in the boiler, which is used to drive the pistons, but instead of being released, its condensed and added to the soda to create more heat. This goes on until the soda gets too dilute to produce more heat, but it can be 'recharged' by drying it out again.

These never really took off because it took more coal to dry the soda at the station than to just run a conventional steam locomotive, and electric trains quickly came into their own and filled the niche of quiet, low-pollution trains for inside cities and tunnels.

But I feel like these could pair well with solar steam generators (another late-1800’s design) stationed along the tracks, to create analogue, solar-powered trains. These could run on existing unpowered tracks, without requiring any new electrical infrastructure, just the isolated drying stations.

The train crew would just exchange wet soda for dry and start again (looks like that took about 45 minutes). The cool thing is that this arrangement could be asyncronous - the station can dry out the caustic soda, then store it for when the train shows up. The train can run on cloudy days or at night, as long as they get enough sunny days to dry out big batches of soda at the stops along the way. And the solar concentrators can be huge and optimized for their location because they don’t have to move.

The focus of these postcards isn’t on technological utopias so much as on societies that are reexamining how to do things as they rebuild, anachronistically combining all kinds of tech. So trains and solar concentrators built with 1800’s technology seem like an easier starting place.

The concentrators require fairly simple materials (mirrors or polished metal) and math to make (plus some simple mechanical timing or basic motors/electronics to get them to follow the sun without a human turning a crank).

Most of the descriptions I've seen of drying the caustic soda mention pumping superheated steam through the dilute mix from another (coal) boiler, so it seems like you could use almost any design from the earliest solar steam generators to something like these modern ones depending on the society’s manufacturing capabilities. The solar concentrator/boiler I referenced for the art is a design from 1901.

(The most common modern design for solar steam generation I've seen is that sort of mirrored-trough-and-vaccum-lined-tube system. I mostly went with the big round reflector because I was worried the trough design wouldn't read as distinct from photovoltaic panels in this art style.)

The trains could run with minimal pollution using these simple technologies, and even if their range is lower, or they're not as fast, that might be a trade off this society would accept.

Ideally they would use existing tracks and passenger or freight cars, and only need new infrastructure around whatever station fueled them up on their route (or at a destination). I think this applies to the compressed air locomotives just as well as the caustic soda ones.

(If you don’t like the idea of caustic soda locomotives, but you still want this idea to work, another option with a shorter range is compressed air locomotives. Instead of drying the soda, the station would be using a solar steam engine or windmill or water wheel to run an air compressor, steadily filling a tank which would be used to top up locomotives on their route. This would still allow for isolated infrastructure to power a train along unpowered rails. IRL these mostly saw use in mines.)

The locomotive in the scene is based on a real-life fireless locomotive. They’re similar, but filled with super-hot steam by external sources. They seemed like a good reference for what a caustic soda locomotive might have looked like had the concept reached a more polished, production format. But they don’t really fit my goal for tolerating intermittency as they’d need the heat source to be going when they stopped for a refill.

view more: next ›