If you look at the very bottom of the screen shot you can see that the home, search, etc buttons are cut off.
Happy to provide more info to help. I'm on a stock pixel 3a.

Hair color changes with age. My mother in law and wife were both blond when they were kids, but their hair slowly turned browner with age. They both highlight their hair to split the difference.
We have two fairly young kids. Their hair is pretty light blond on the top layers, but their bottom layers are quite a bit darker. I suspect the biggest contributing factor beyond genetics is sunlight. Both of them spend a pretty good amount of time outdoors when the weather permits.
I try to keep my writing somewhere in the middle. Easy examples include intent, which is sometimes more important than the explanation itself, as well as outlining alternative ideas/approaches and why they weren't used.
I greatly appreciate insight into the thought process of others and try to pay it forward.
little kids
If the kids are truly little this would be an OK move from the US. However, schools in Puerto Rico teach in Spanish which would be a struggle for kids who are not fluent.
If there’s a sudden boom in prison construction in the next few years I’ll reconsider of course
You work in what now 🤨
Sarcasm aside, I am genuinely curious why you would leave this here. Is your work related to something with prisons?
Find people who care about what they're working on and they'll go well beyond the extra mile. As an extra motivator, make it clear the company won't be around if they don't succeed. I'm sure these employees have shares, but tha only really matters if the company succeeds (extra motivation!). Unfortunately, there have been a ton of green/green-adjacent automotive "startups" that have struggled to gain a foothold. See also:
(I'm sure many others)
I hope you get a decent answer. When we last visited 10 years ago a similar idea passed our minds.
I did some poking around at the time out of curiosity. From what I recall, a decent amount of manufacturing moved there in the 70s to claim made in America, take advantage of cheaper labor, and take advantage of some tax incentives. The incentives were phased out and manufacturing started leaving. Wikipedia .
I am not sure what their economy is like these days, but as with all moves a chunk of it is going to come down to the work you can/want to do and the jobs available, but with remote work living somewhere like Puerto Rico does seem appealing.
I suspect you're going to have the usual island pain points (hurricanes, expensive imports, limited economy, a large swath of the economy tied to tourism) and benefits (consistent weather year round, natural beauty which PR has a ton of, beaches, interesting culture).
Again, I really hope someone with first hand experience chimes in - even if the moved in the other direction from the island to the mainland.
Keeping a woodworking hobby from devolving into tool collecting can be a trick.
This can be true of most hobbies, lol. Amusingly, three others of yours fall into that pattern.
Electronics? If only I had a bigger power supply, higher speed/more channel scope, hot air station, logic analyzer, etc. Guitars? I have friends and coworkers who play. No one only owns one guitar, pedal, amp combo. Gardening? I have quite the setup in my basement to get seeds going, but I live in zone 6 and need to compensate some for the short growing season. Cooking can also be it's own equipment rabbit hole.
Beyond that: Cameras? Choosing which brand of body to use, sensor size, lens collection, tripods/flash/accessories. If you play a tabletop game do you really play a tabletop game or are you looking for an excuse to make and paint minis? 3D printers can be just as much about messing with the printer as actually printing things.
I think it's important to recognize the pattern so you can consciously decide if you want to fall into it or avoid it. For some people, the collecting around the hobby is even better than doing the hobby.
Nice framing! I would have maybe walked a touch closer and/or cropped to avoid the highlight on the right, but I really like the infinite mirror effect.
Ha, this is true as does amortizing things like the coffee maker that needs replacing every 5 years, white vinegar for monthly descaling, the Stanley thermos I bought 4 years ago to bring coffee to work, etc.
Let's say that it takes 15 minutes to brew the pot of coffee at 1,500 watts. That's 0.375 watt hours. At $0.20/kwh that's $0.075/pot. Yay for dumping it into a thermos once it's brewed.
All in, even if you added an extra $0.50/day brewing at home is still way cheaper.
Stay away from espresso and super "high end" artisan beans and you can have a very solid coffee hobby for not a whole lot of $$. We do a mix of drip, French press, and cold brew. The cost per cup is basically the same for each and the equipment was not very expensive.
You got me curious, so I did the math for us.
I am a drip coffee person, drink far too much coffee (40 oz) throughout the day, and work on a fairly large corporate campus so I have easy access to hot/fresh coffee that I can purchase. Even though there are multiple branded places to get coffee from on campus, they have similar pricing.
My wife and I split a pot of coffee. It takes us 3 oz of coffee beans to brew it. I can buy a 20 oz bag of the coffee beans we use for $15.29, which works out to $2.30/pot. We often stock up on the beans when they go on sale, but I don't know what we paid for them the last time around.
So.. since my wife also drinks coffee let's say that the price spread between purchased already brewed coffee vs brewed at home coffee is between $6.50-$10.60/day. Splitting the difference = $8.85. Doing that 365 days/year = $3,120 saved.
The fact that I have coworkers who drink a similar quantity of espresso based (more $$) drinks at work is insane.
Do this over a 25 year career, invest the money monthly ($260), plan for a conservative 5% rete of return and you'll have $162,577 - only half of which is principal.
Apply this pattern of thinking over a number of different spending categories and you'll be way better off financially. That said, the stats on the billionaire class are eye watering and no amount of frugality will catch any of us up to them.
If you look at the very bottom of the screen shot you can see that the home, search, etc buttons are cut off.
Happy to provide more info to help. I'm on a stock pixel 3a.
I am (slowly) working on mounting ACM panels to my Voron 2.4 to try to get my chamber temps up to reduce/eliminate warping on big ASA prints. I only needed 12 of these parts, so I chose to print them sequentially.
Want to know how slow my progress has been? Well, this photo proceeded this post and I made that post weeks ago... I'll crack open the cable chain and get this ball rolling again soon. Or maybe I'll ditch the chains and go to a USB toolhead. But that will require me to print some parts, so I guess I have to fix this. And if I'm doing that it's going to probably be 'good enough' for quite some time... 🙃
There's nothing major in the print queue, but I do want to make sure the printer is ready to go when something does turn up.
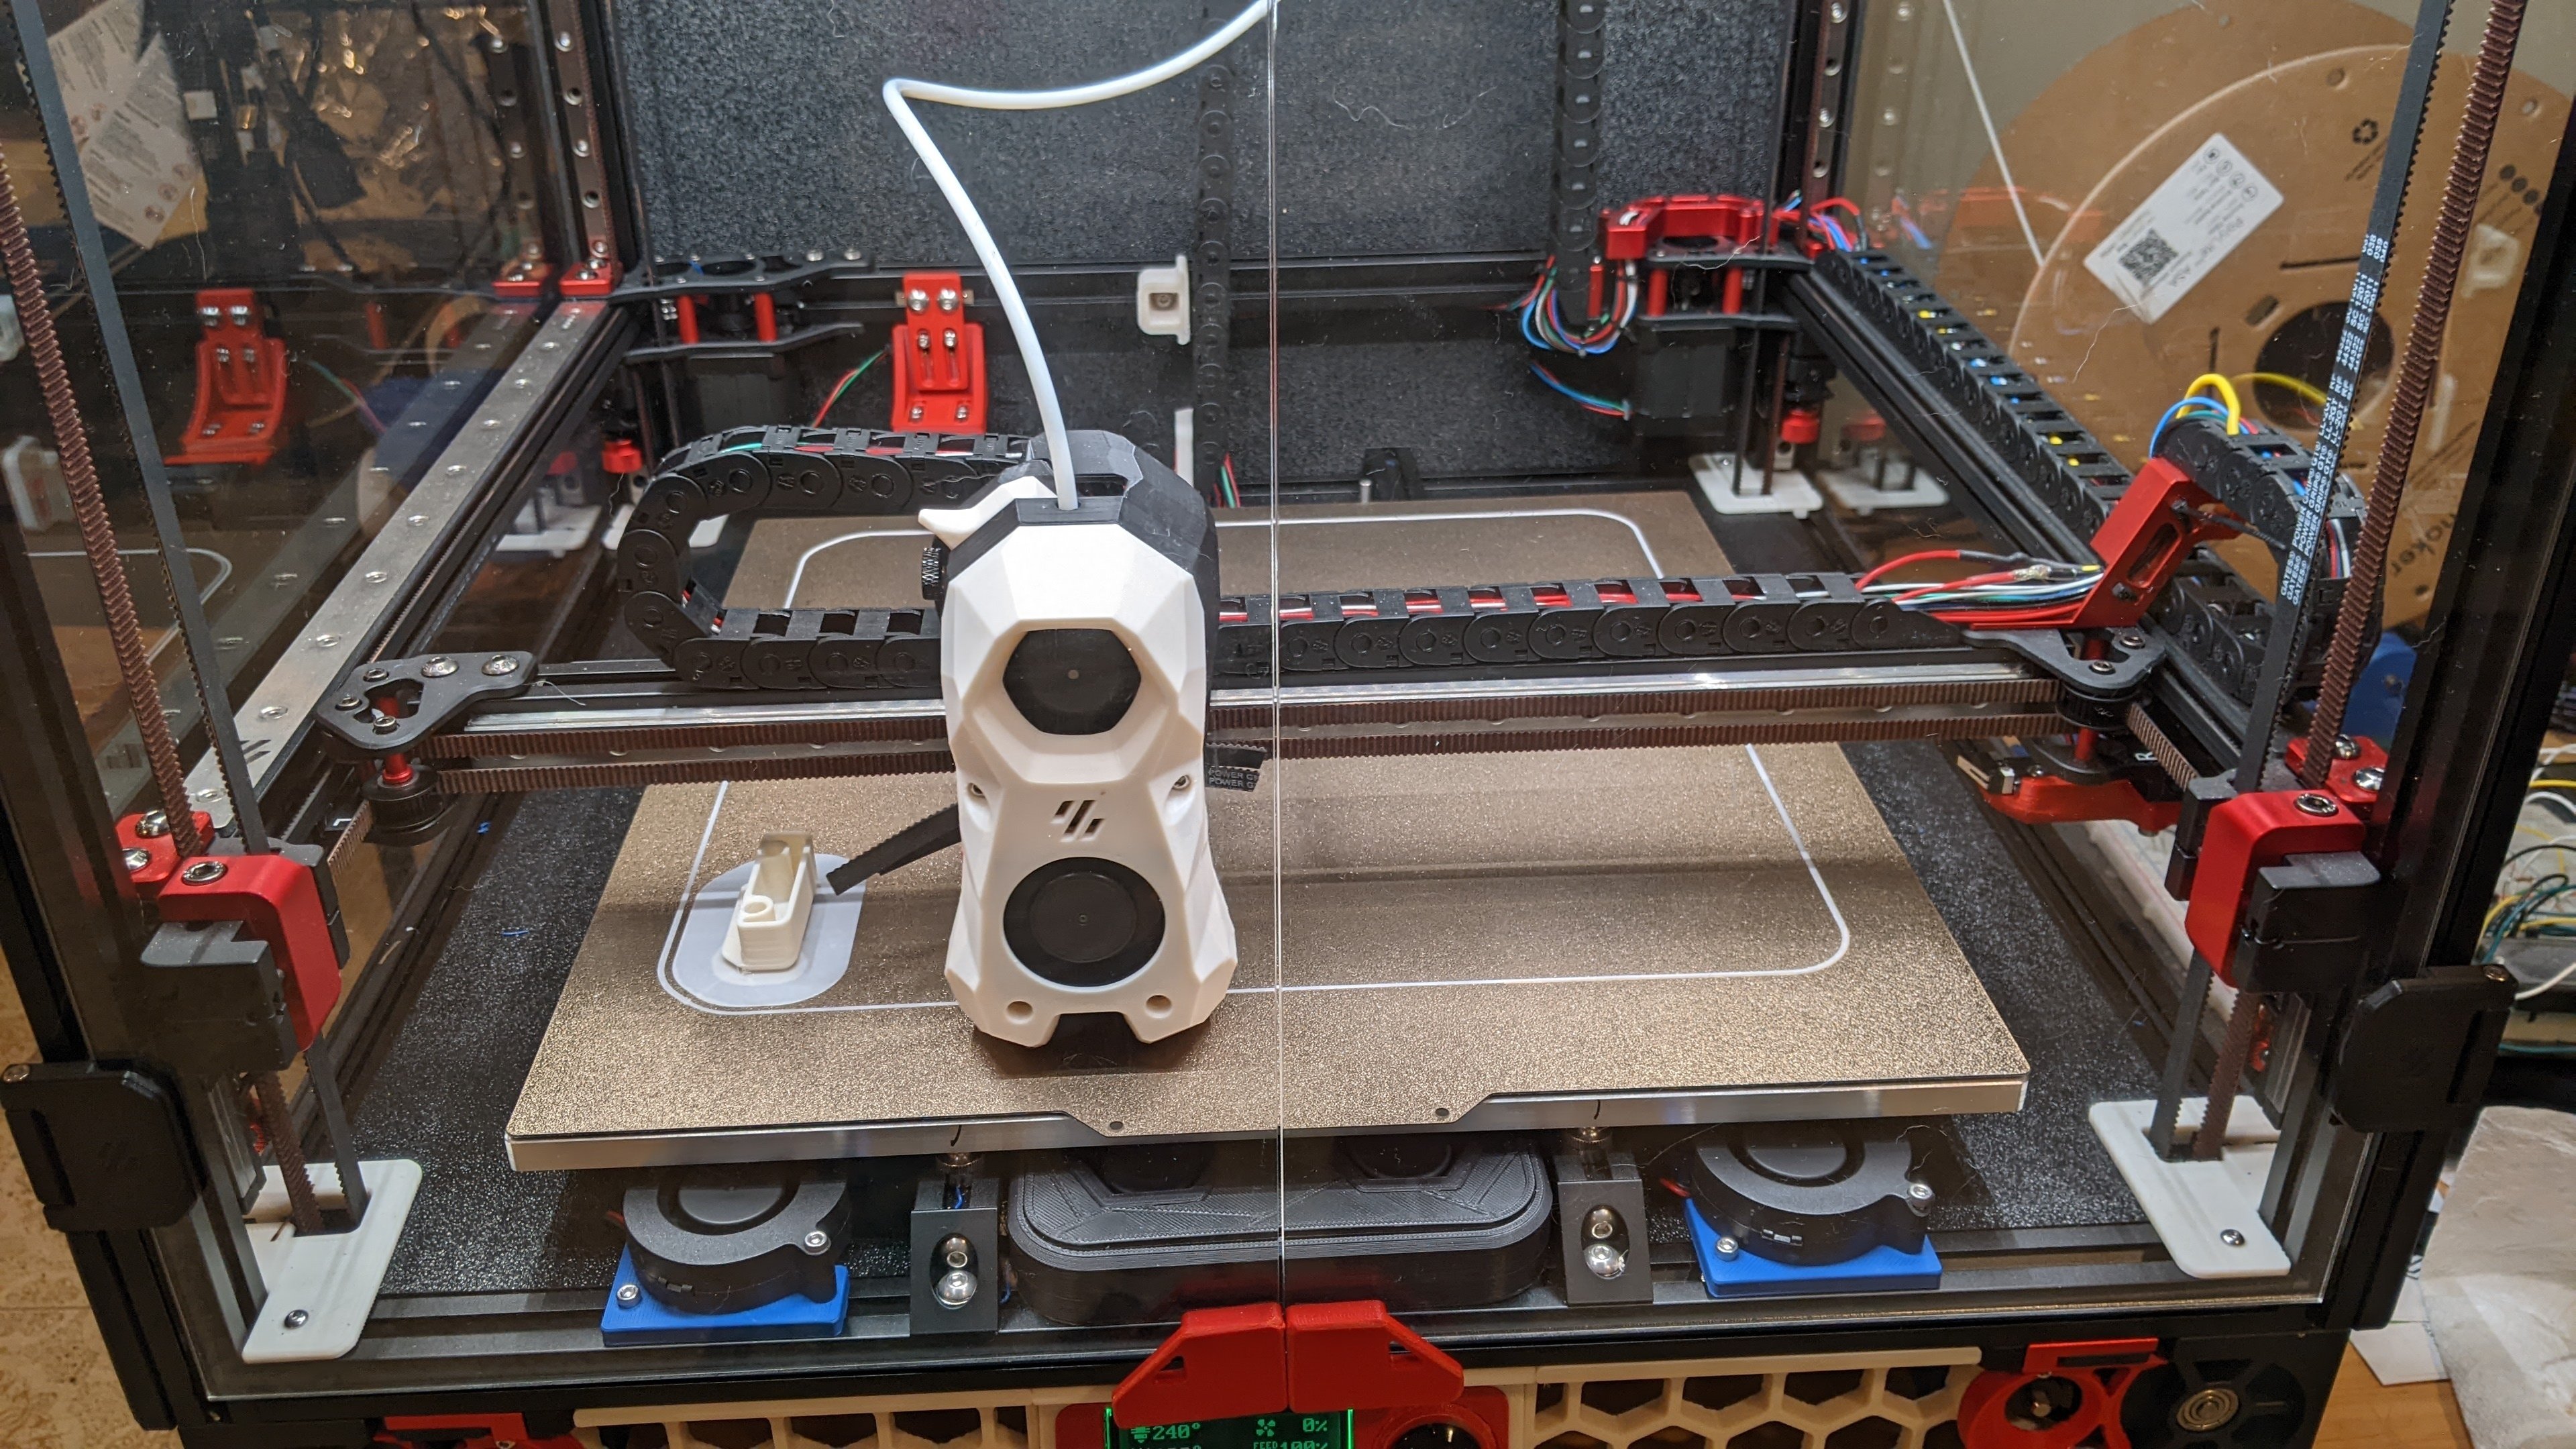
I can see the wire break in the cable chain :'(
Pros:
Cons:
Bottom line:


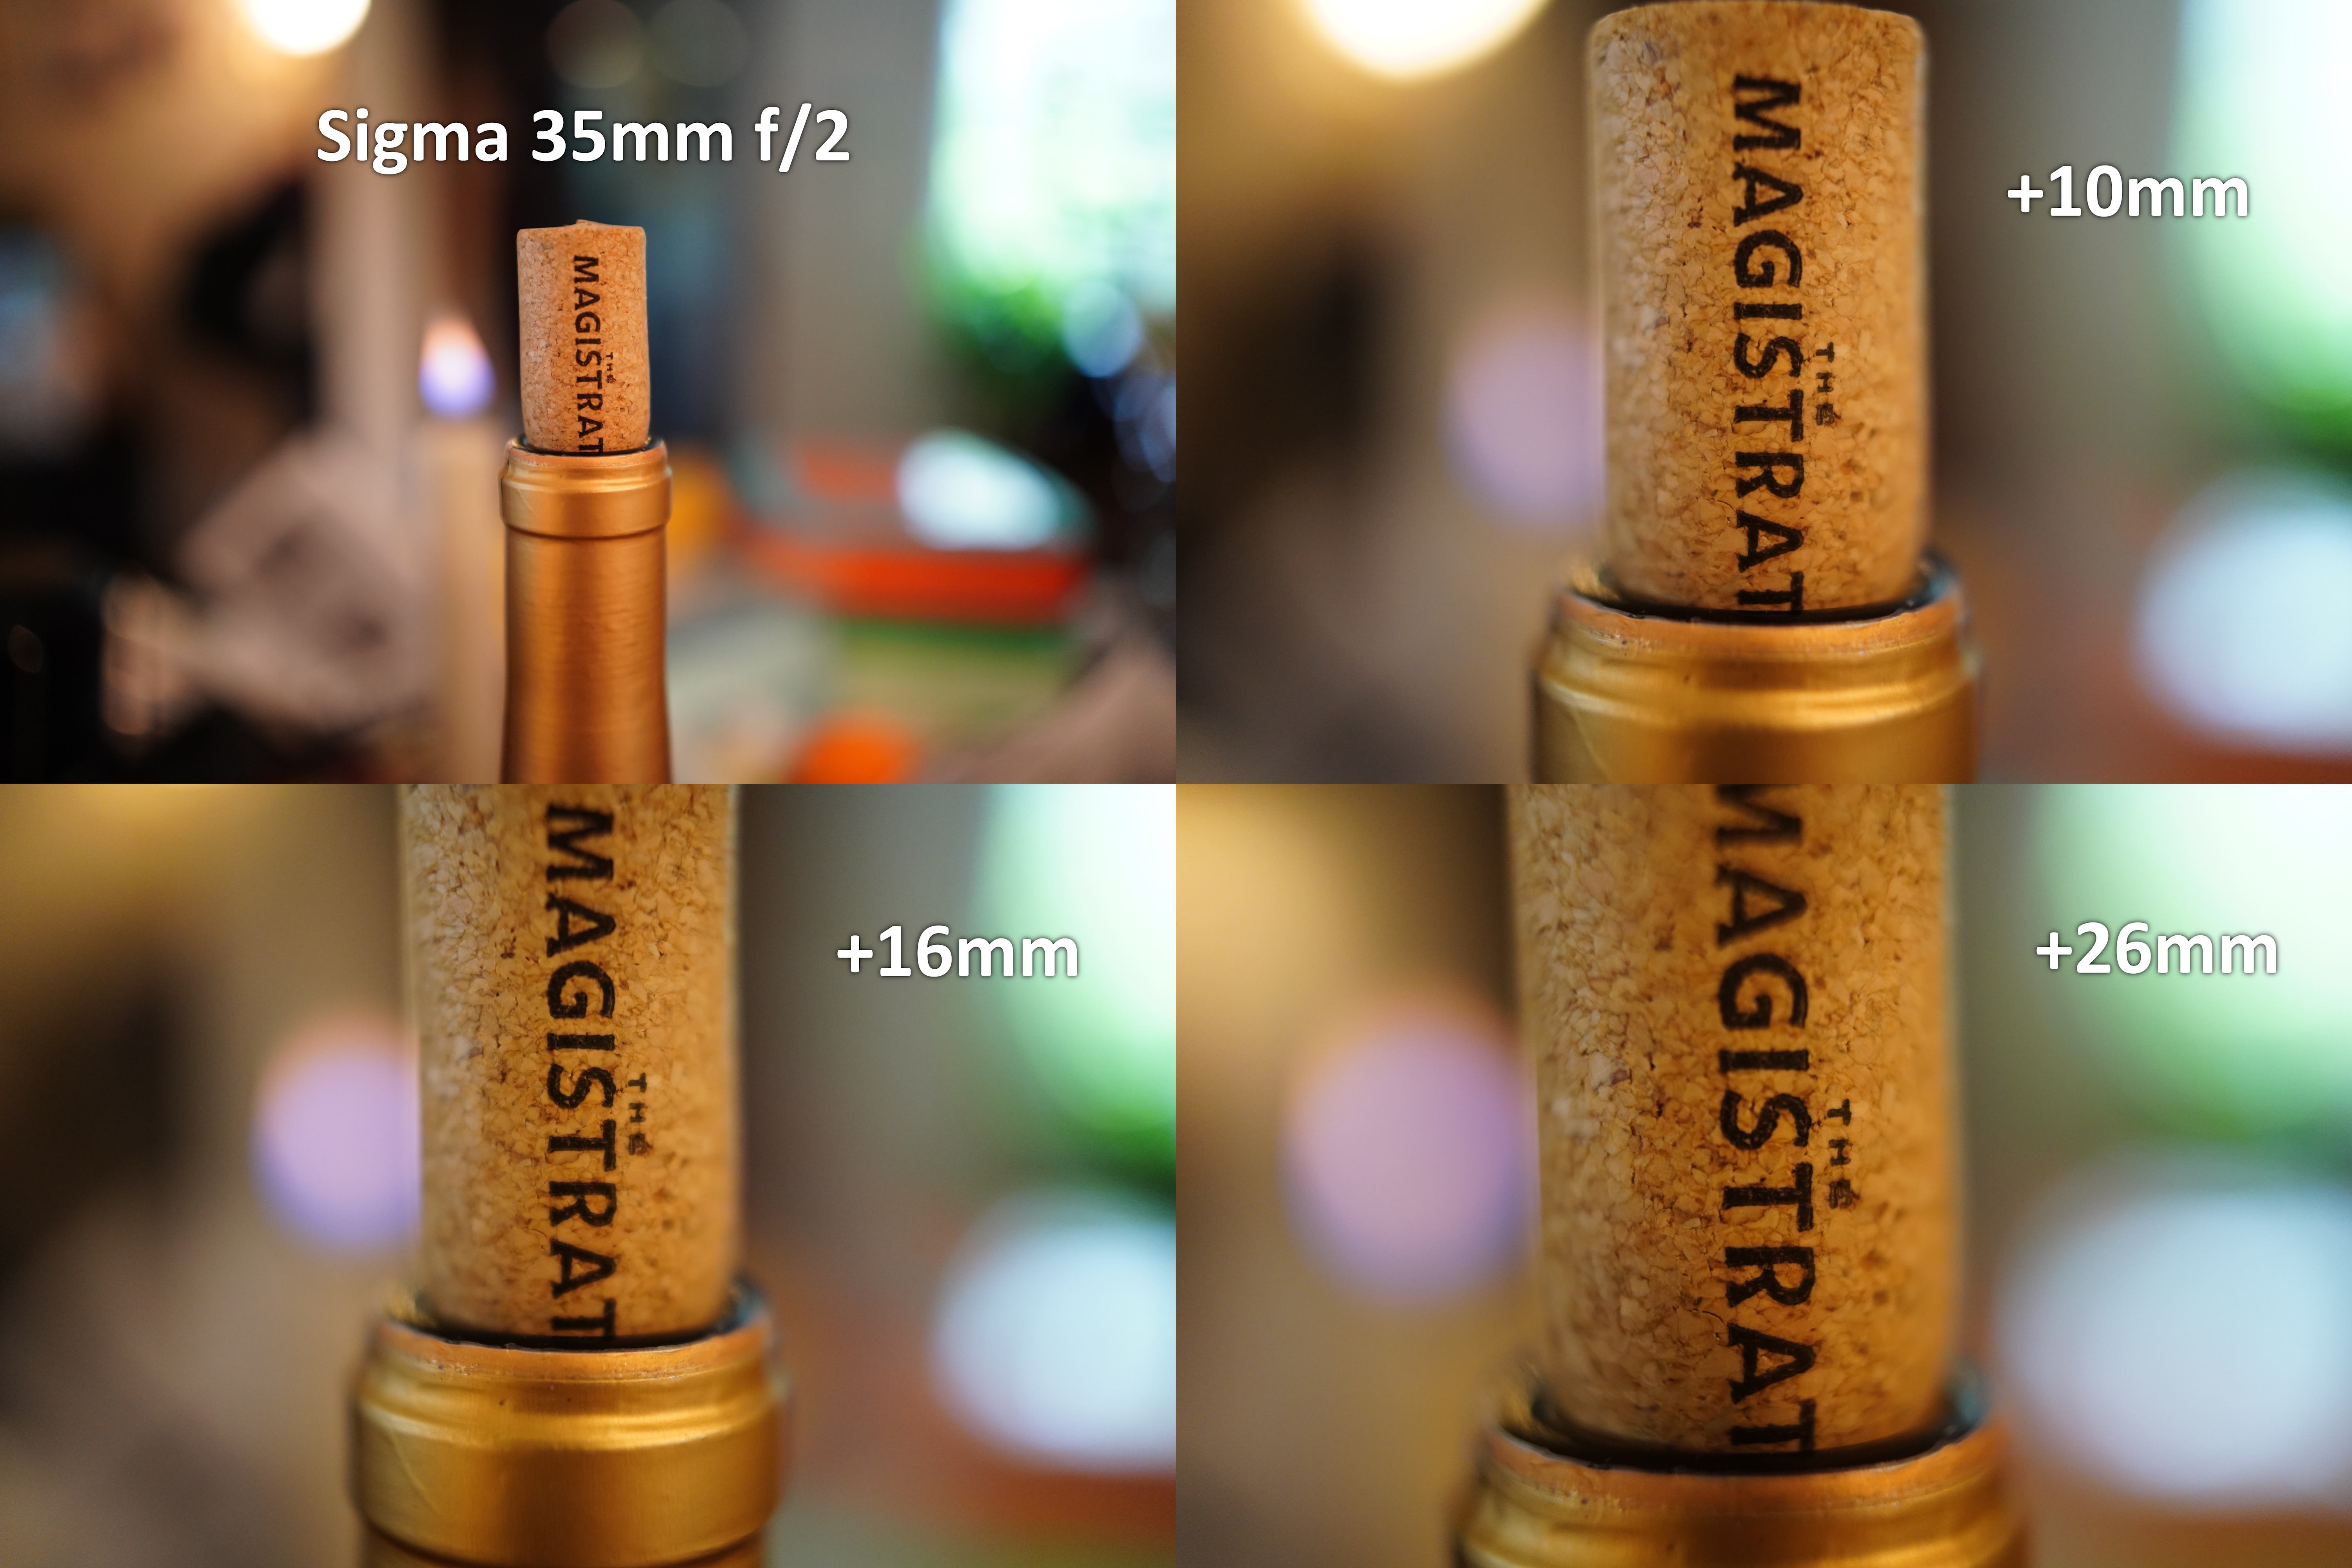
I've been interested in photographing bees recently. Rather than buy a macro lens, I spent $32 on a 10mm and 16mm Meike extension tube. Photos are with an A9II + Sigma 35mm f/2, which normally offers a 0.18x magnification. All four are taken as close as the lens will focus. I'm very happy with image quality, especially given that this lens doesn't have a super flat focal plane at its minimum focal distance.
For anyone who tries an extension tube for their first time: you won't be able to focus very far in the distance (beyond about 1 foot in my case). Be ready to get up close and personal.
No banana for scale, but let's say that it's not too big and not too small. The dimensions are 295mm tall, 270mm wide, and 240mm deep. If I had to do it again, I would be tempted to go a bit wider and touch less deep. It's probably better to be large in one of these dimensions as opposed to both of them.
Here's the top. It has a jack for charging, a connector to program the DSP, a switch to turn it on and off, and a battery gauge.

The speaker also has a built in handle that's way chunkier than it appears, but is still particle.

The big BOM pieces are a Dayton Audio LBB-5Sv2 for the BMS (battery management system), a Dayton Audio KABD-250 2 x 50W for DPS, amplification, and Bluetooth, a Peerless by Tymphany BC25SC08 tweeter, and an Italian-but-made-in-India woofer (a Coral PRF 165).
The print itself is three pieces: the bottom bit (black), the middle bit (white, blue, and white again thanks to not having enough white left to do it all in white), and the black top. Here's a CAD view that more clearly shows the three pieces:

the three pieces are held together with heat-sets and m3 bolts. There's also a tong and groove like joint to help the enclosure leak less air. I haven't noticed any evidence of air leaks while listening.

The amplifier and battery board mount to the bottom like so:

The middle was printed with some supports for the driver overhangs, but the ports and everything else were designed to print in place without supports.


This is certainly not meant to be audiophile build, but it's surprisingly decent. This isn't my first blue-tooth speaker, or even my first printed loudspeaker enclosure, but it is the first that was somewhat intentionally designed to have OK bass response while also being reasonably compact.
It measures fairly well. Frequency response, along with harmonic distortion, is pretty good. There's zero windowing or smoothing on this plot. I suspect the distortion spikes at 1 kHz, 2 kHz, etc are induced by the Bluetooth stack the board is running since they've shown up in multiple different enclosures and with multiple different drivers.

There's no nasty ringing, caused by either the drivers or the enclosure, so life is pretty good:


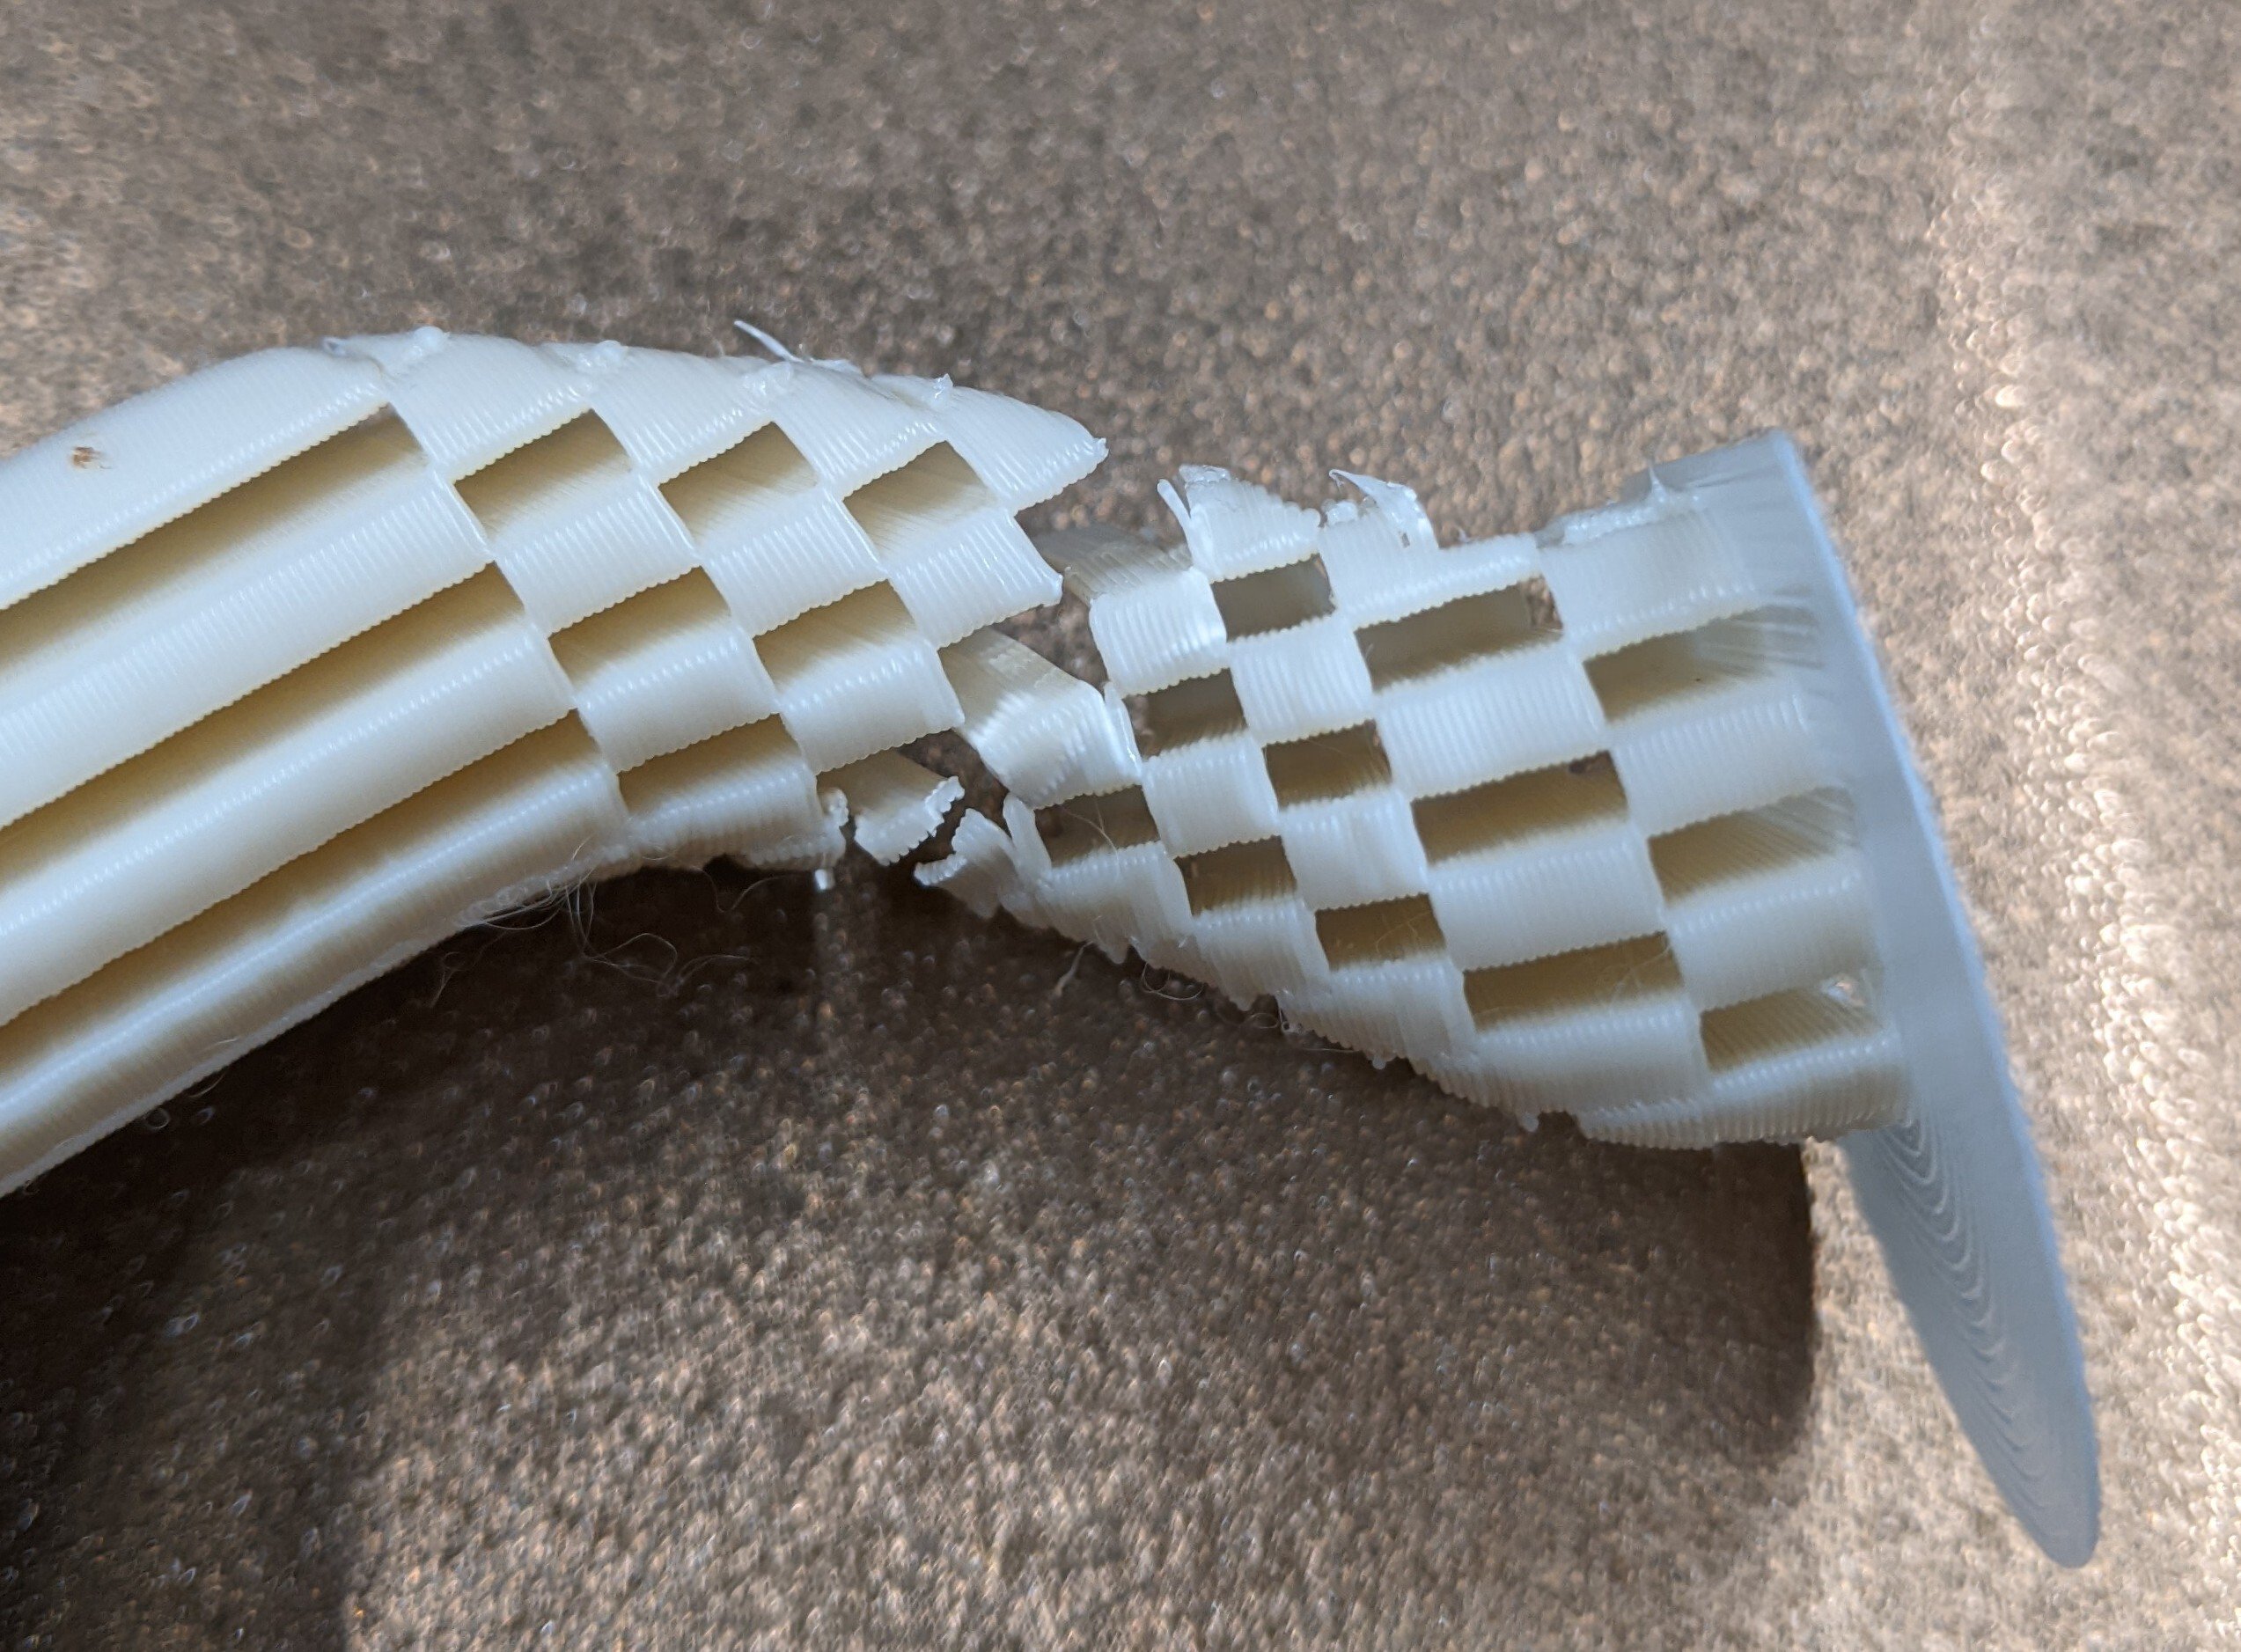
At least so far. The first go round had the nozzle crash into the tree support, resulting in a layer shift. The good news is that the print stayed very firmly stuck to the bed.
I've reset, lowered my extrusion multiplier a smidge, switched to a more traditional support pattern, and am going for it again. Wish me luck!


Very Specific Objects are a lot of fun, so here's another one.
If you find yourself purchasing a ~~cheapish Amaon RC car~~ Very Fancy DOUBLE E 1:12 Scale Large Remote Control Car Monster Trucks for Boys with Head Lights 4WD Off All Terrain RC Car Rechargeable Vehicles Xmas Gifts for Kids only for its spring perches to get broken one by one, well - I've got a solution for you.
Printables link if anyone thinks this object might apply to them.

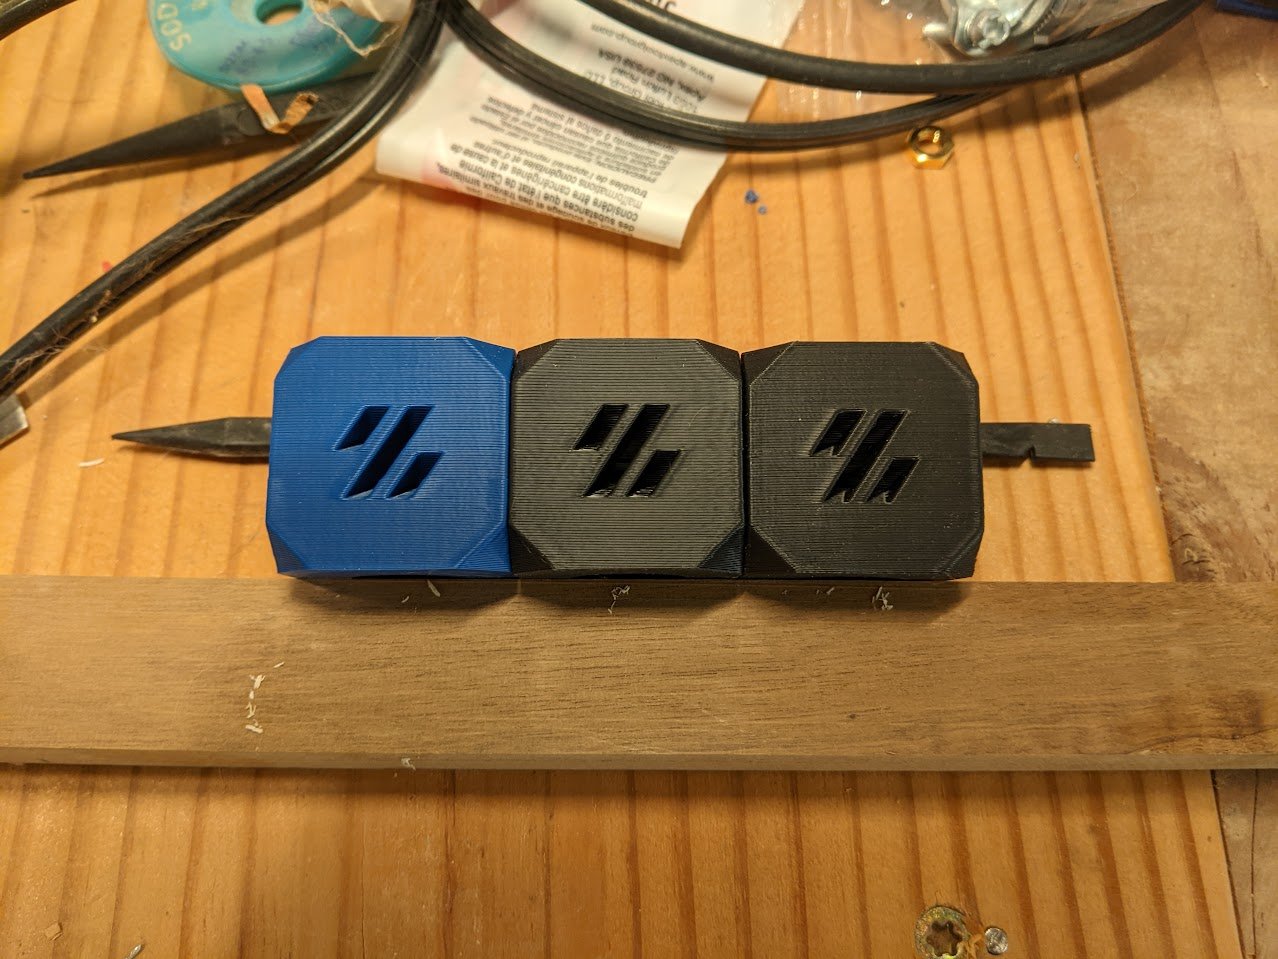
While I acknowledge the expectations Ellis tries to set, all the youtubers out there have me chasing a dragon looking for better and better layer aliment on my z-axis. I suspect (at least) one of you will come out of the woodwork and say your printer has better aligned layers than mine too 😭 I'm certainly not alone, but even in that thread you can find some people claiming that not everyone experiences the issue
So far, I've been through three iterations on my CW2:
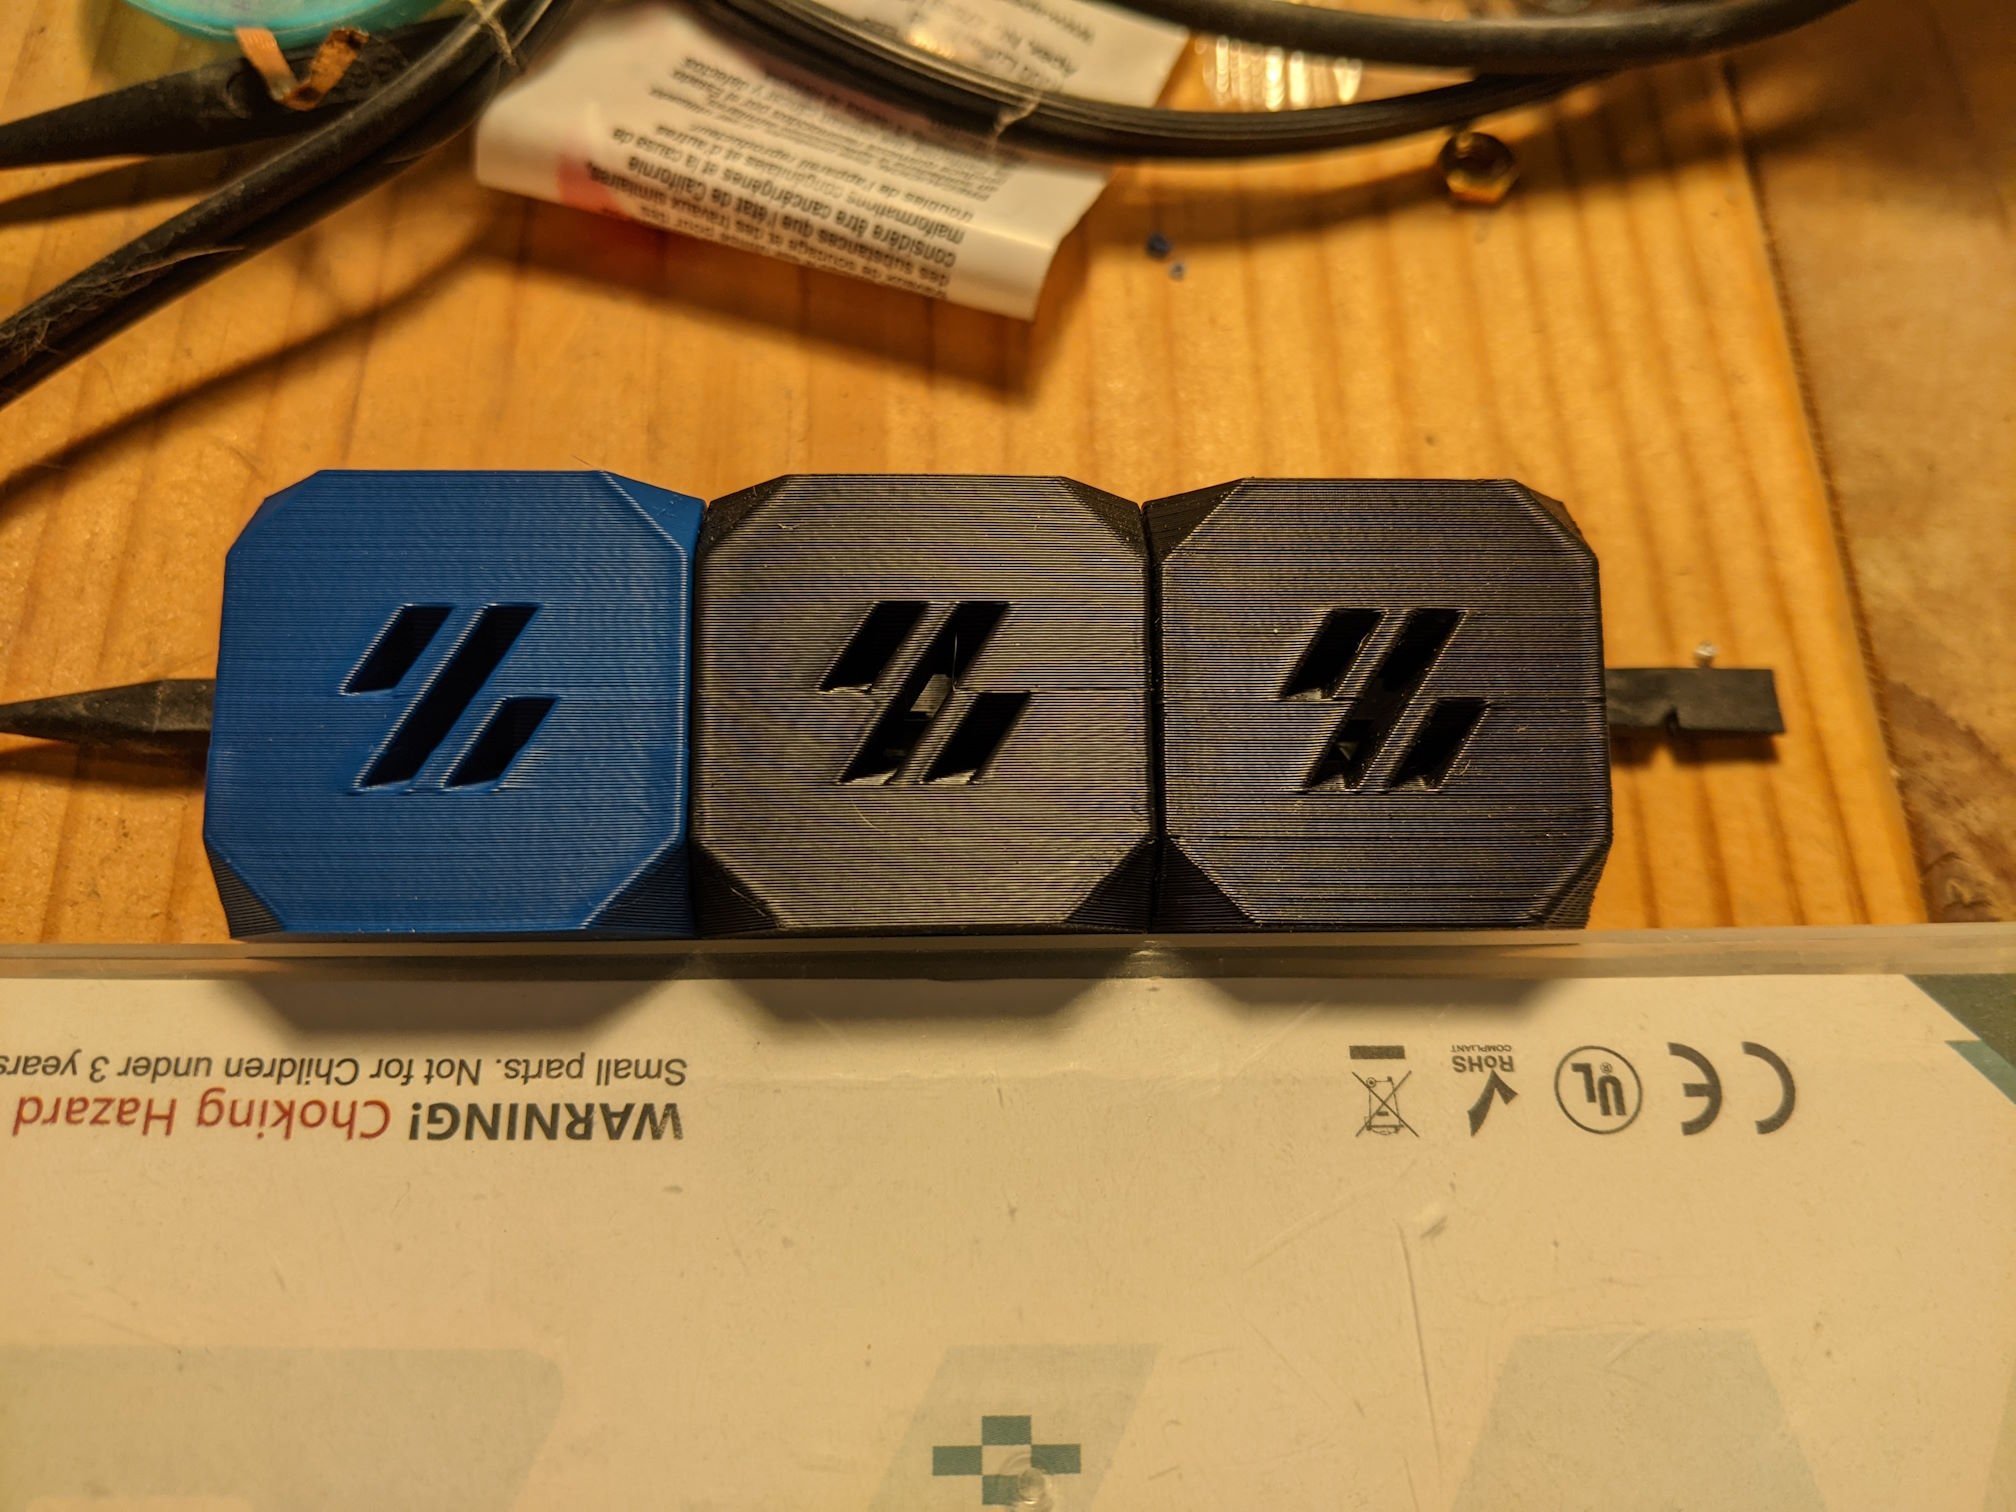
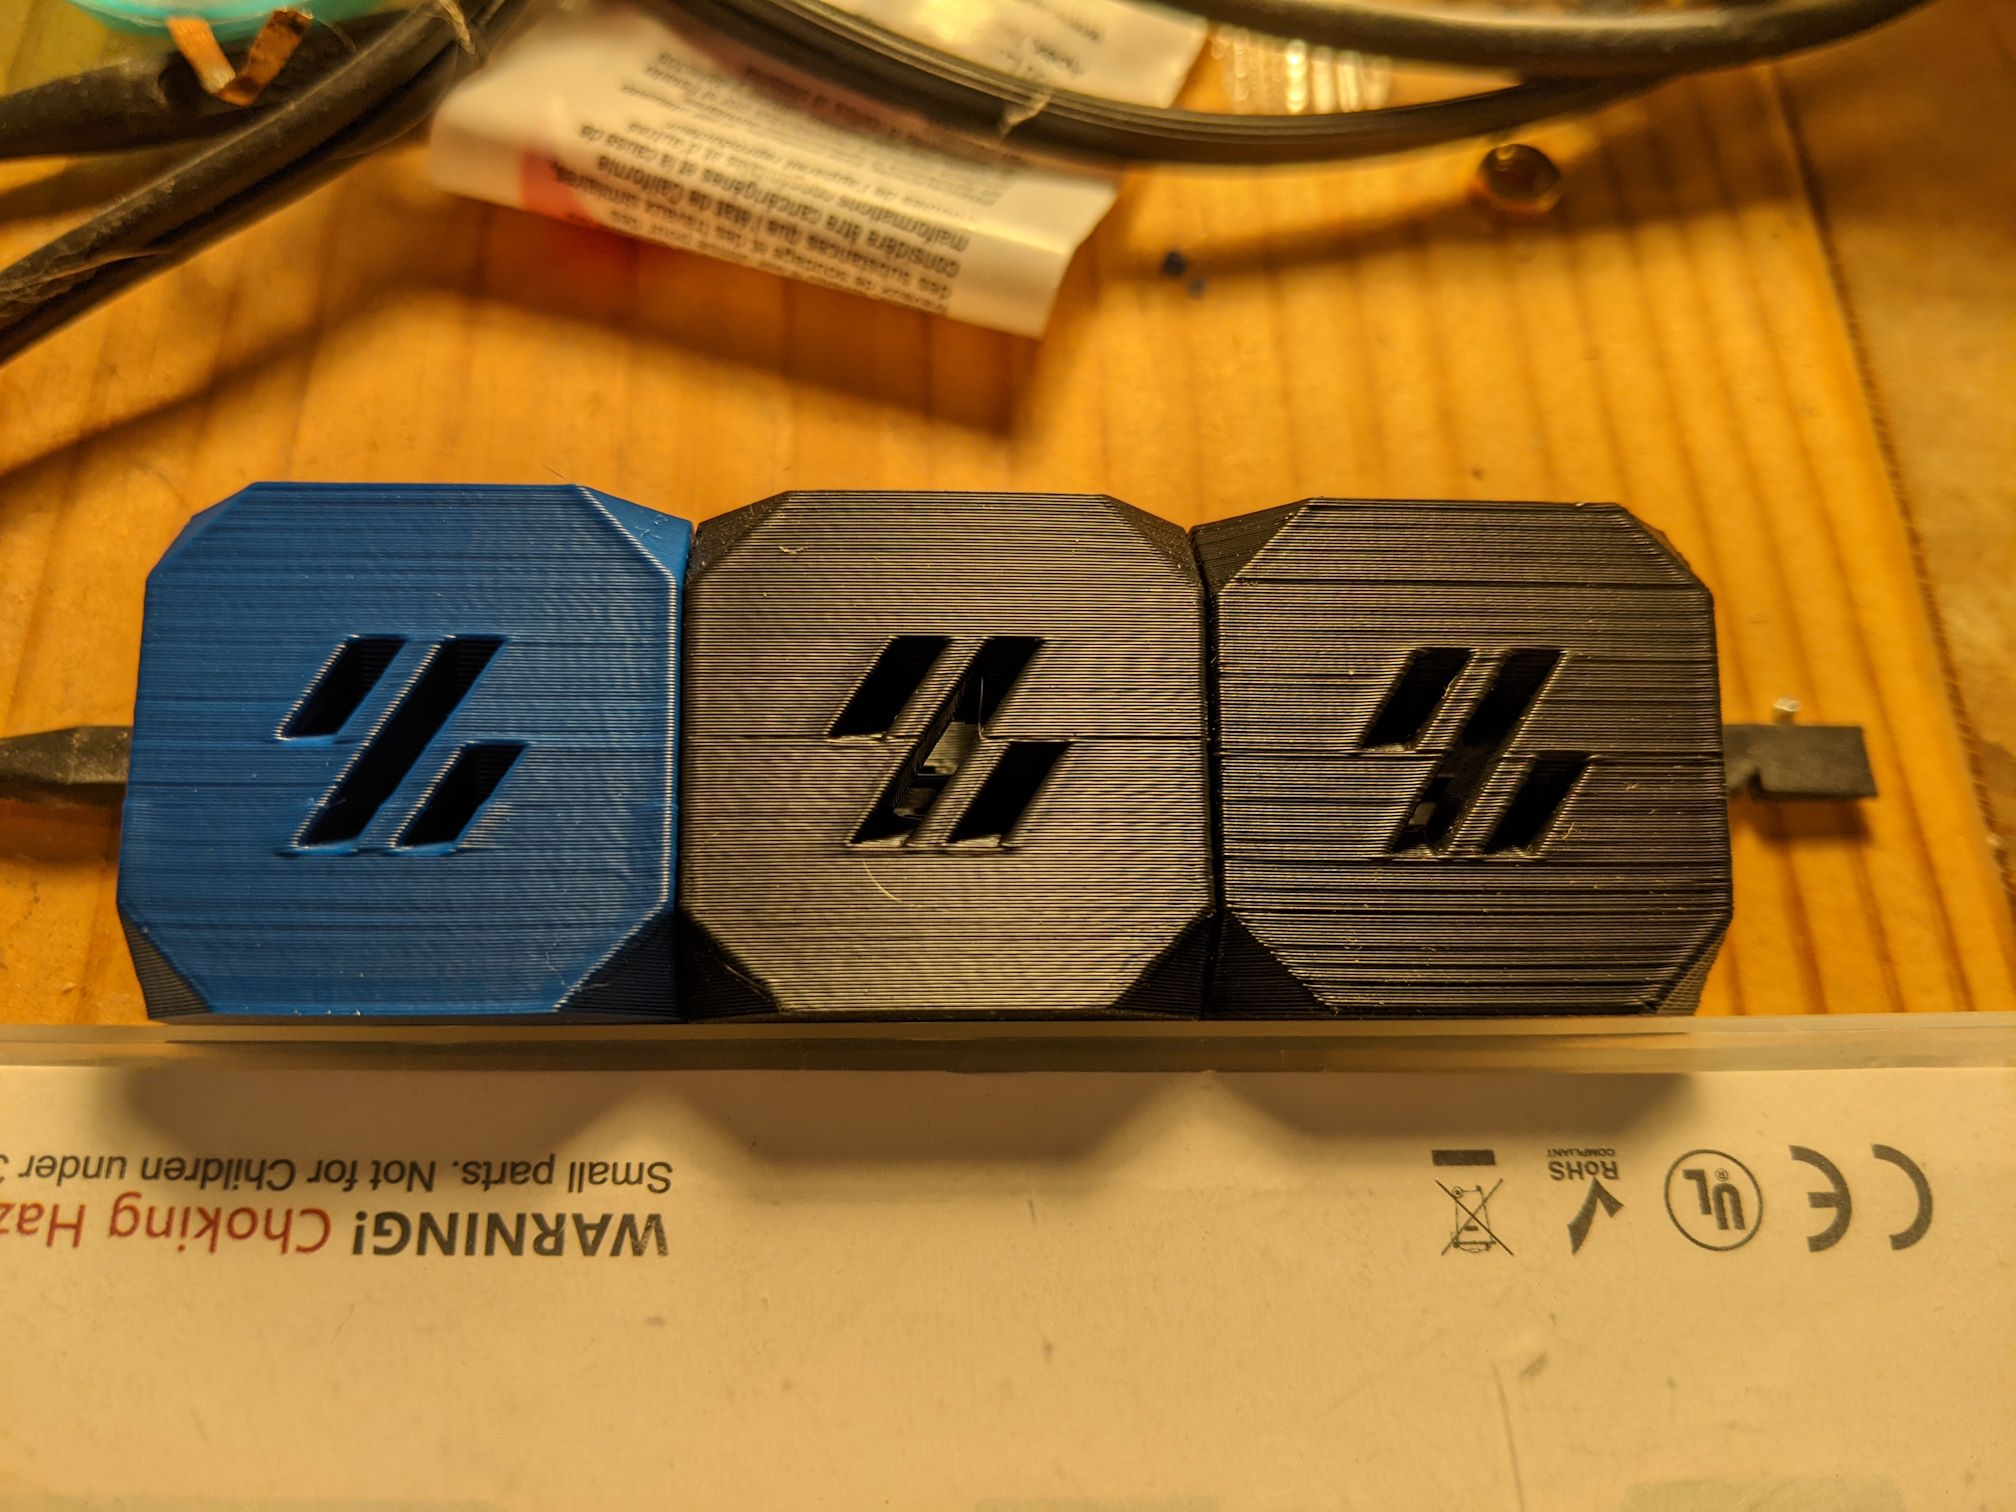
Results below with me hand holding my cellphone and moving a Pixar style desk lamp to be at a progressively steeper angle to the face of the cubes. Left = FYSTEC Pom (I also used Orcaslicer), middle = BMG IDGA, right = 'normal' BMGs. Note that the cubes are upside down.
Vanity shot with very soft and indirect light
Direct light, 90 degrees to the face of the cubes (basically perpendicular)
Direct light, ~45 degrees to the face of the cubes
Direct light, ~5 degrees to the face of the cubes (basically parallel)
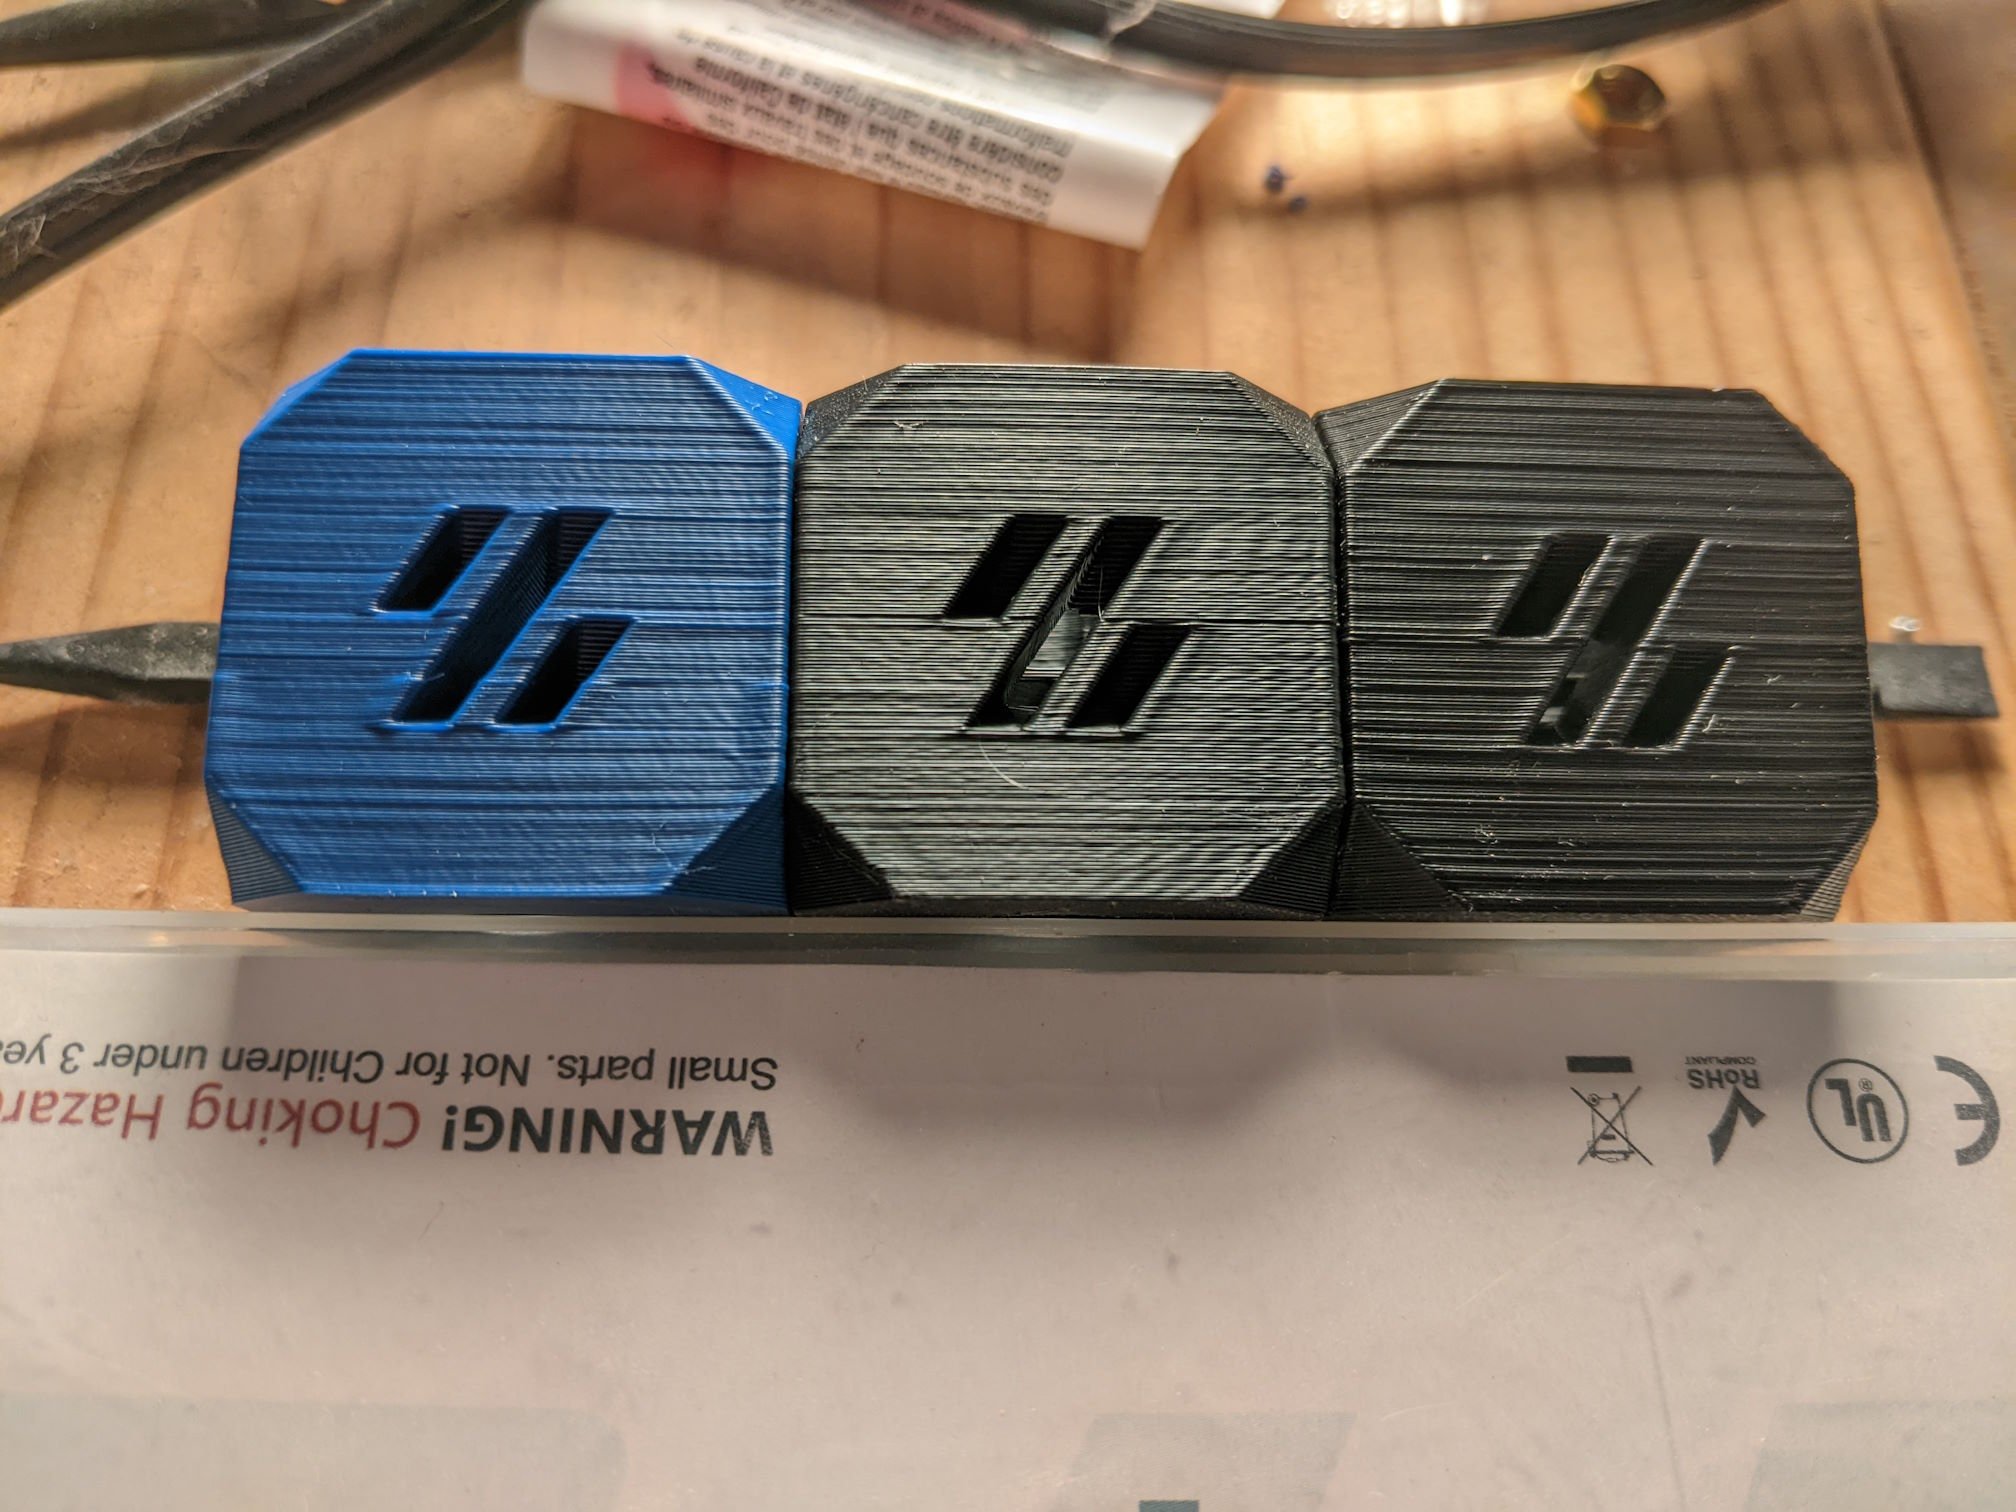
At this point, I am going to shrug, give up, and print with fuzz (or avoid harsh light).

I've been chasing inconsistent top layers for a little while when my first layer also started going... very sideways. My printer uses the nozzle to home on a micro switch, which meant that something was probably loose. Initially I was thinking the end stop or carriage, but who would have thought that the printer had shaken the hot end apart over time.
Note to anyone else who runs into this: there is no mechanical stop for those screws and tightening them too far will mash the hot bits into the cold bits. This will cause the hot bits to crimp closed just enough to no longer let filament through. If you find yourself in this situation, find (or buy) a small punch - you can use the taper on a punch to reverse the situation. Don't ask me how I discovered any of this. Why there is no thread lock from the factory, who knows. If anyone reminds me, I'll be sure to let you know how well purple loctite has held up. There's also another screw that goes into the side of the heat break to hold everything in place. That one was loose too.
2.5 hours later: all better!
Lessons learned: multiple, but if you start seeing inconsistent behavior look for a mechanical issue and don't be afraid to tear your printer down.

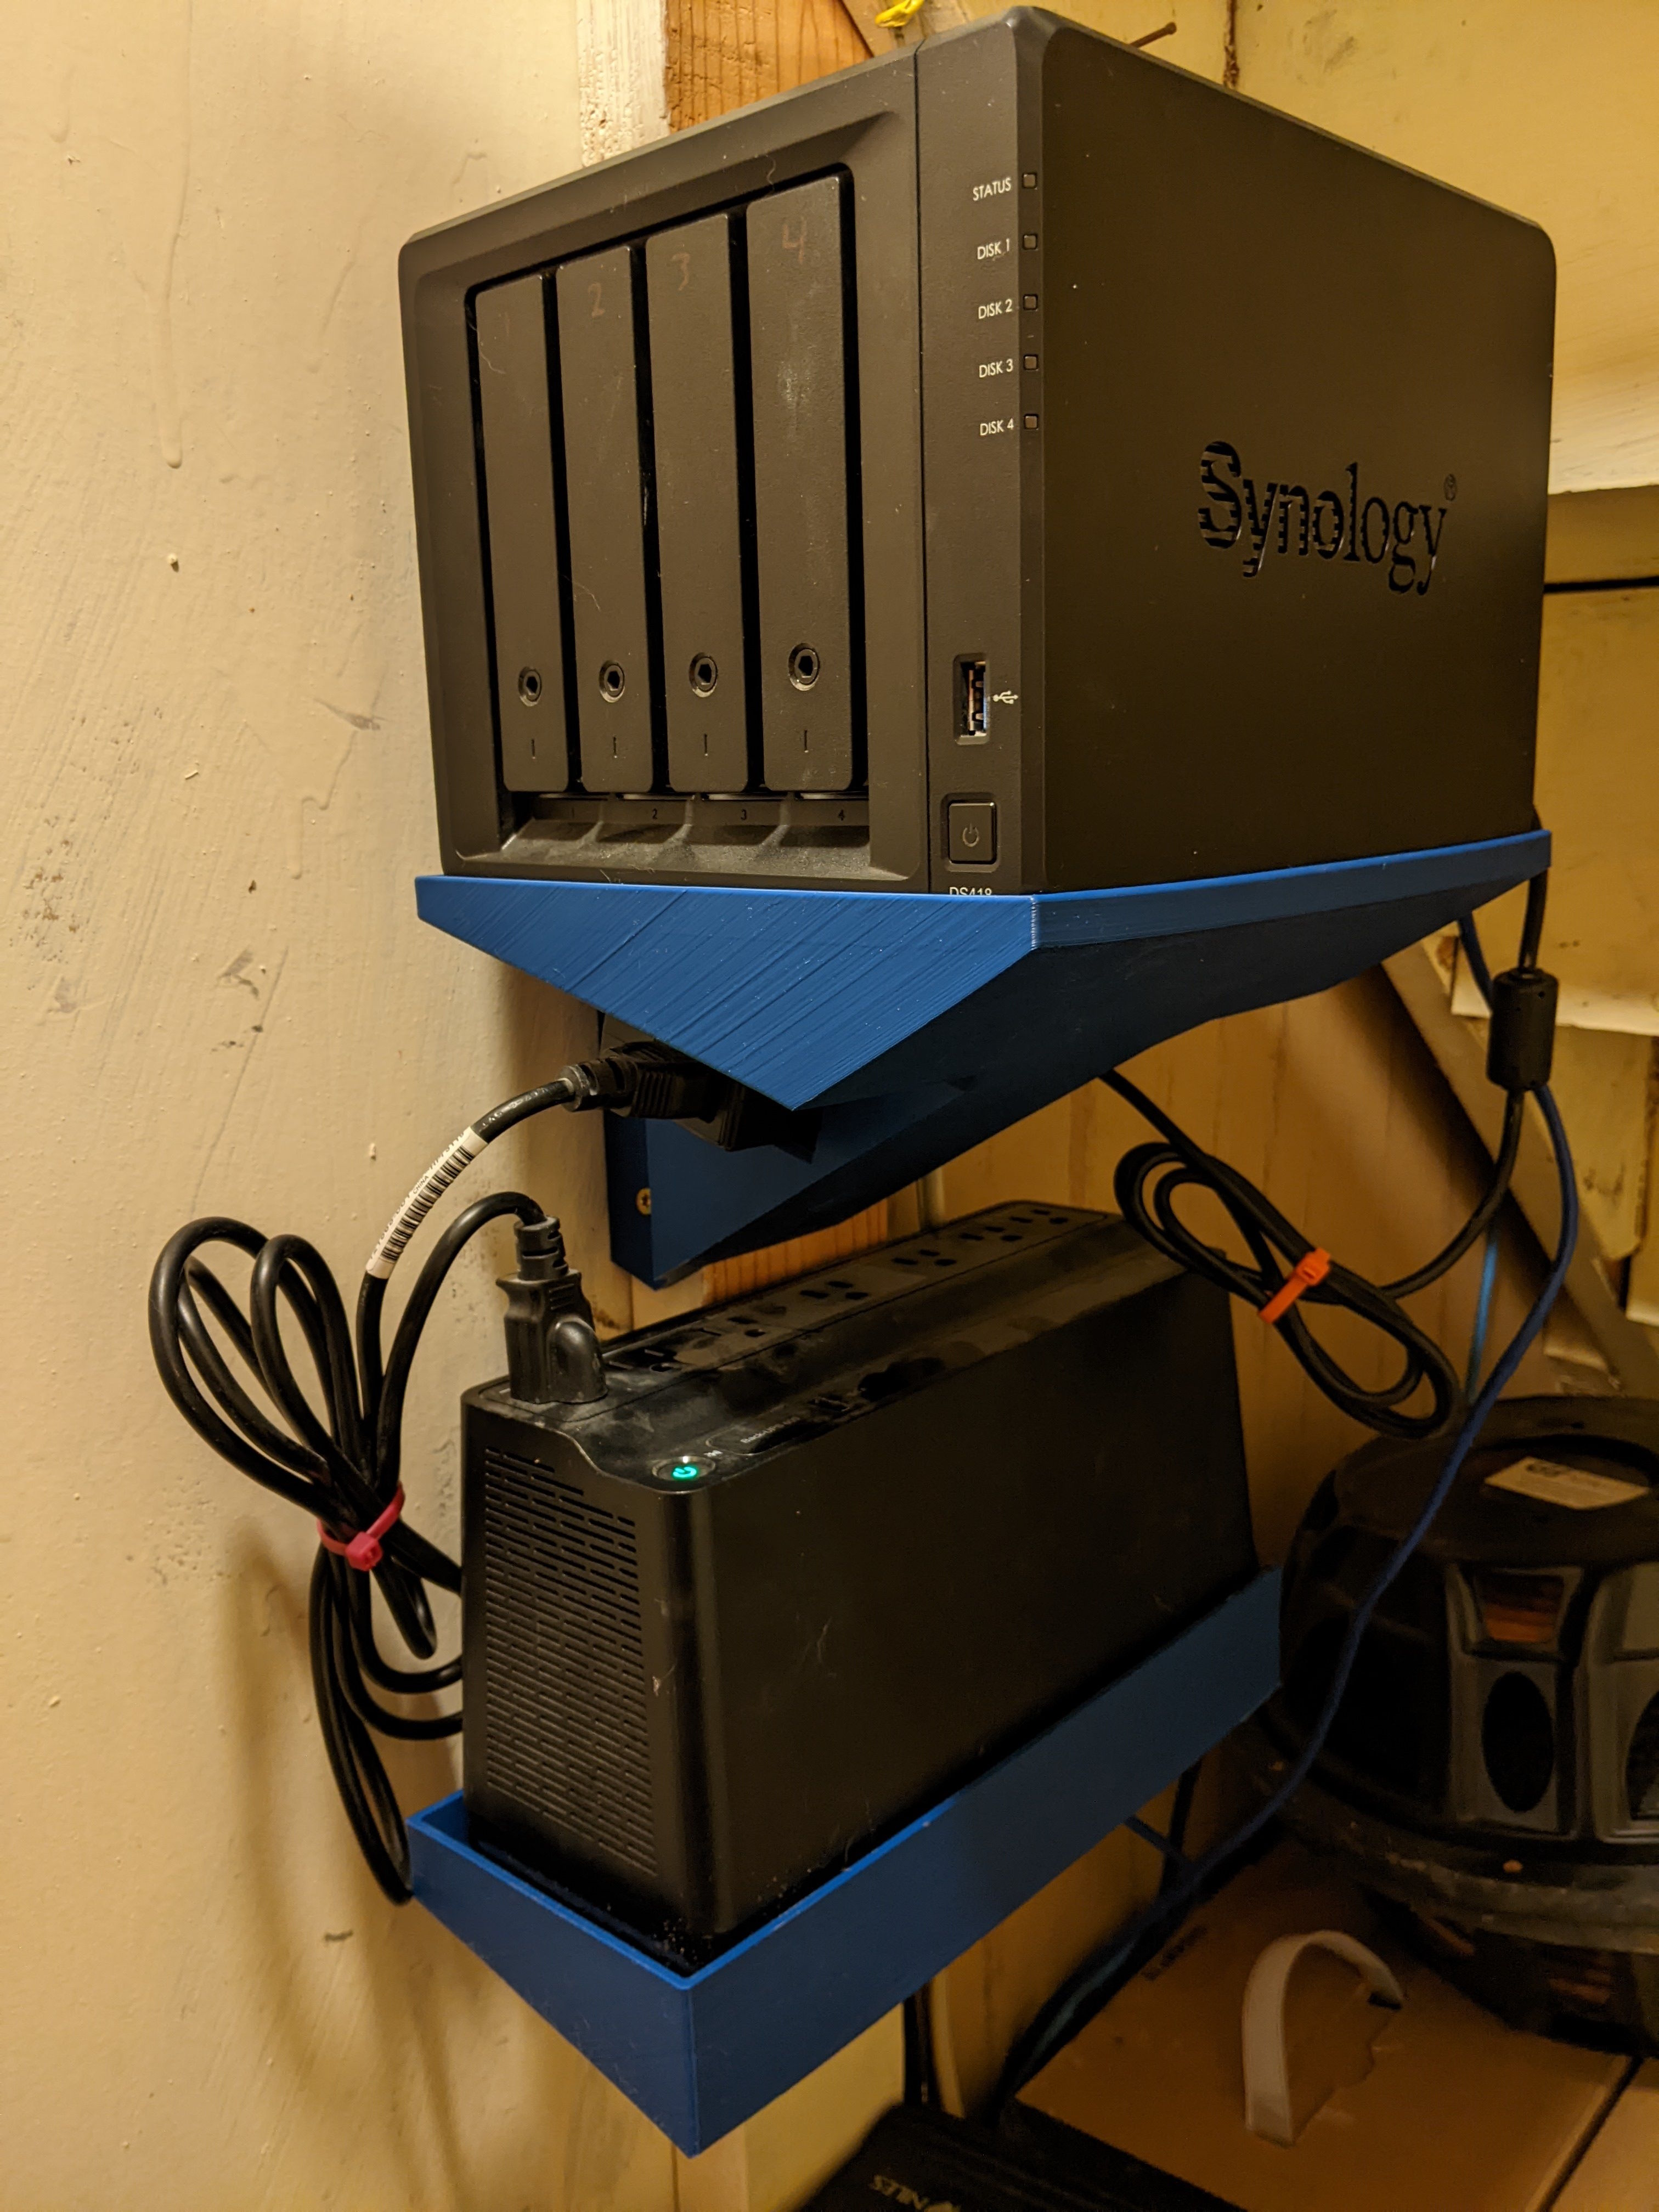
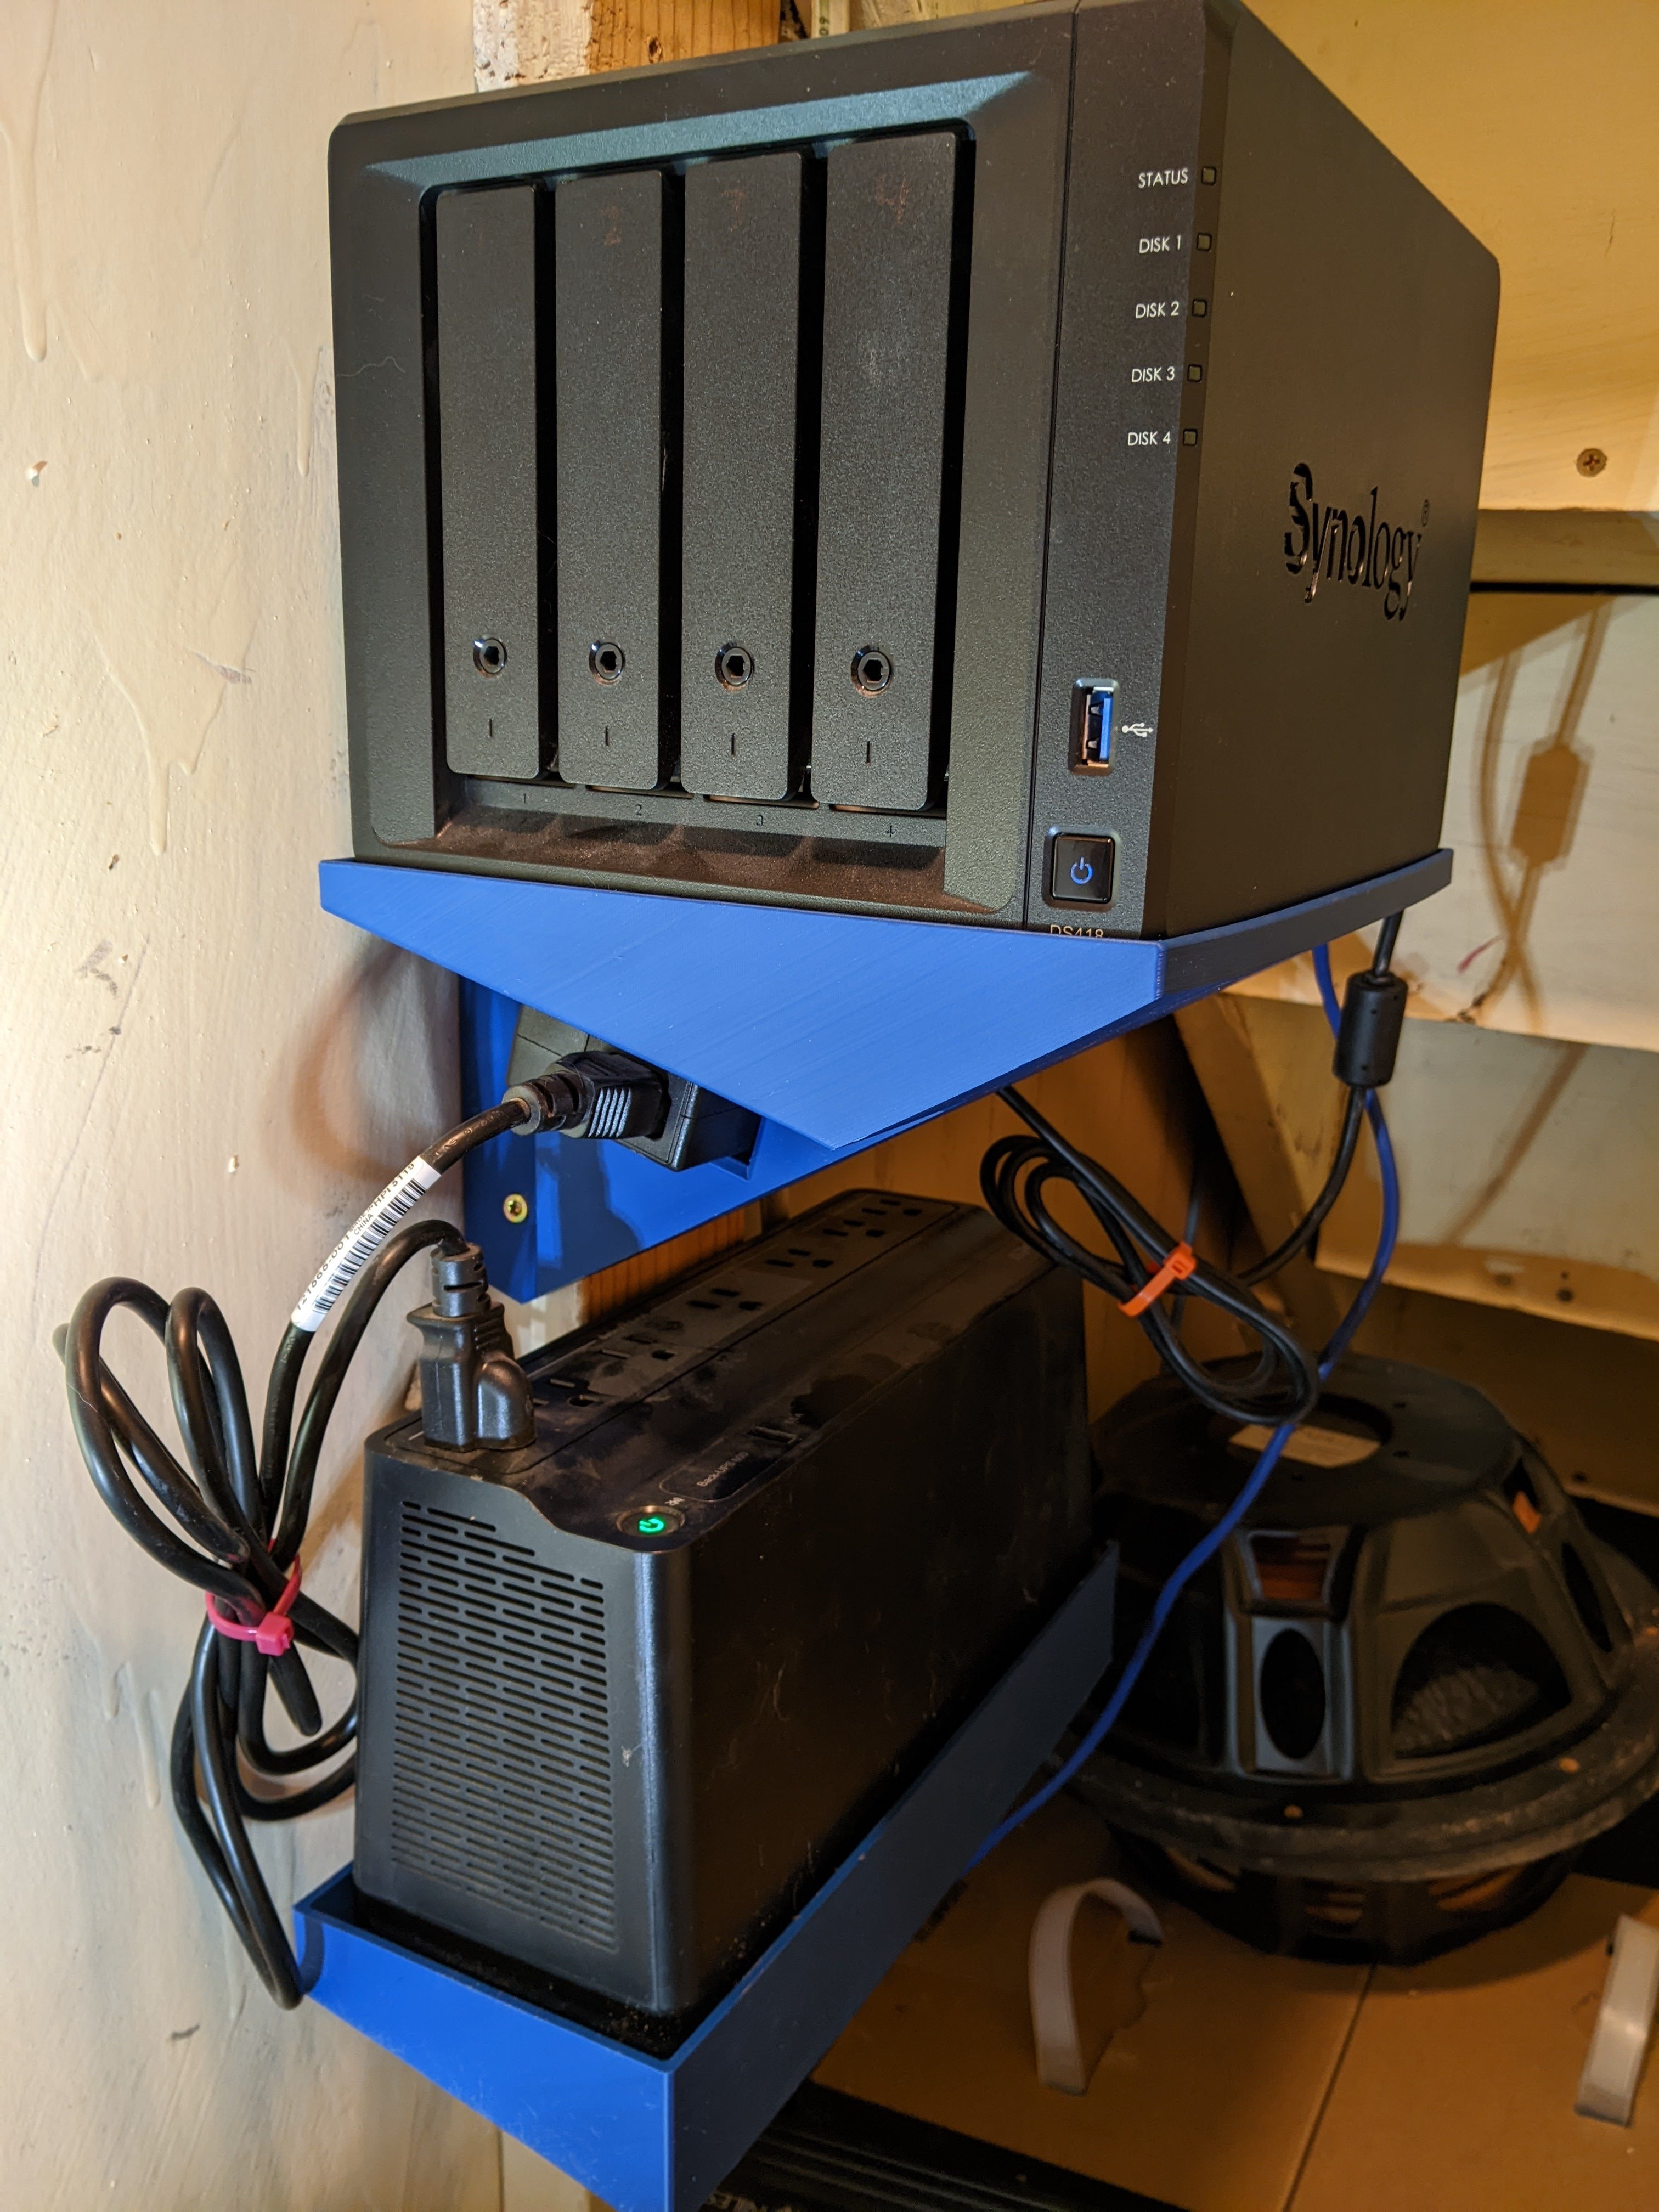
I liked a few of the VSOs that were posted earlier and wanted to share two of my more recent creations.
This mount screws into an exposed 2x4 and lets me get my Synology DS418, its power brick, and UPS (APC BE600M1) off a table and into a lower dust area of my basement.
I'll upload the STLs to printables if anyone is interested, but be warned that the parts are fairly large.
In the spirit of showing parts under unflattering lighting, here's (nearly) the same angle with a different light source.
This was a good read. Anyone who'se purchased any of his anthologies will be familiar with some of the content, but the appeal to live a fulfilling life and how hard that can be as you get older was refreshing.